Using the Main Menu15
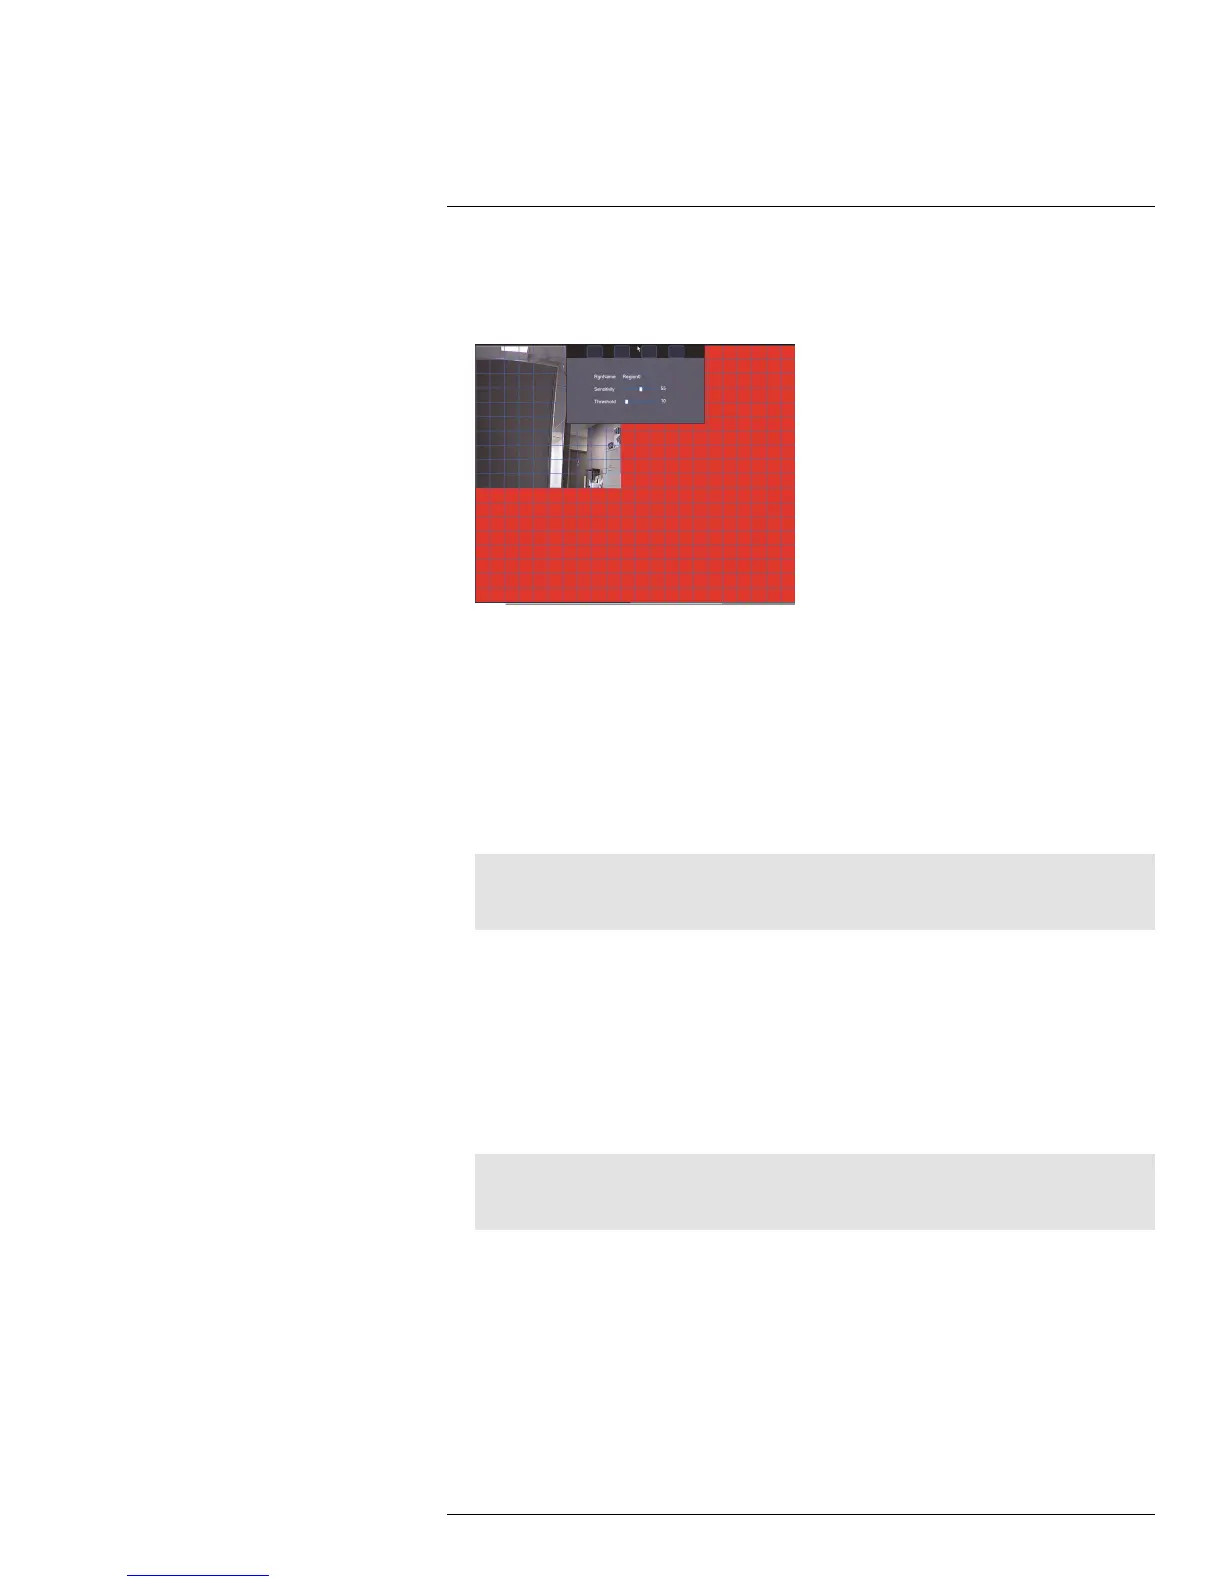
4. Click Setup next to Region to configure which areas of the image will be enabled for
motion detection. A grid will appear over the camera’s live view.
Motion Grid
• Areas enabled for motion detection are shown in color and areas that are disabled are transparent.
• Hover the mouse at the top of the screen to select which motion area you would like to configure.
You can set up to 4 motion detection areas and customize the sensitivity and threshold for motion de-
tection separately for each area between 0 (lowest) and 100 (highest).
• The Sensitivity determines how sensitive the camera is to motion. For example, if the sensitivity is
high, small amounts of motion are more likely to trigger an event. It is recommended to select a Sen-
sitivity between 30~70.
• The Threshold determines how much motion is required to trigger an event. If the amount of motion
exceeds the threshold, an event occurs. It is recommended to select a Threshold between 10~50.
• Right-click when finished.
Note
It is recommended to have a second person walk in front of the camera to test different Sensitivity
and Threshold settings to determine the best setting for your camera’s location.
5. Under Anti-dither, enter the anti-dither time. After a motion event occurs and motion
stops, if motion is detected within the anti-dither time, the system continues the motion
event and includes the new motion within the first event, rather than creating a new
motion event.
6. Under Post_REC, enter the time the system will record after a motion event occurs.
7. To configure a schedule when motion detection will be enabled on this channel, click
Setup next to Period. Configure times when motion detection will be enabled. For ex-
ample, you may want to disable motion detection during business hours and enable it
outside of business hours. Click OK when finished.
Note
This setting can override scheduled motion recording. This means that motion recording will only
take place at times that are enabled both in the Schedule menu and here.
#LX400021; r. 1.0/16017/16020; en-US
60

 Loading...