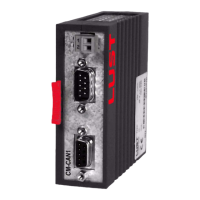
User Manual CM-CAN1
2-3
2 Mounting and connection
DE
EN
1
2
3
4
5
6
7
A
2.2 Mounting
2.2.1 Size BG1...5
(0.37 ... 15 kW)
Figure 2.1 Mounting for BG1...5
Step Action Comment
1
Make sure the power supply to the drive
unit is cut.
2
Connect the CMxxxx to the drive unit as
shown in Figure 2.1 (A). Use only the slot
at the top.
The module lock must engage
audibly.
The bottom slot is reserved for
the UM-xxxx module.
3
Mounting clearance min. 35 mm for addi-
tional/other devices Figure 2.1 (B)
Mounting is finished; for the further procedure see section 2.3 “Electrical
installation”.
H1 H2 H3
X4
X2
X3
WARNING
capacitor disscharge
time >3 minutes.
Pay attention to the
operation manual!
ATTENTION
temps de decharge
du condensteur
>3 min. observer le
mode dèmploi!
!
ANTRIEBSTECHNIK
SN.:
000.000.00000000
T
y
p
:
N
e
t
z
:
A
u
s
g
.
:
D
-
3
5
6
3
3
L
a
h
n
a
u
X1
L3
U
V
W
RB+
RB
L-
L1
L2
ACHTUNG
Kondensatorent-
ladezeit >3 Min.
Betriebsanleitung
beachten!
12
ANTRIEBSTECHNIK
SN
.:
0
00
.00
0.0
00
0
00
00
T
y
p
:
N
e
tz
:
A
u
s
g
.:
D-35633 Lahnau
klick!
X7
35mm
CM-xxxx
1
2
A
B