9
For More Information...
Troubleshooting Guide.................24, 25
STEP 8: Activate Controls
Once all controls are installed and wiring verified, turn
the control wiring feed circuit breaker ON.
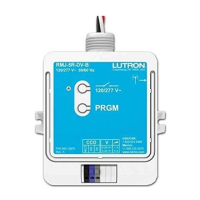
Check that the Power OK LED at the top of the
Circuit Selector is ON. If the Power OK LED is
off, turn off the control breaker, check for shorts
between wires 1 and 2, or 2 and ground.
Note:
For multiple panels once one Power OK LED is
ON, all the Power OK LED’s in all system Circuit
Selector’s should turn ON.
Push scene buttons on Accessory Controls. All GRX-
4000 Series Control Units and Accessory Controls
should act in parallel (e.g. pressing scene 1 on a
control will select scene 1 on all controls, pressing a
raise button will raise all zones).
Notes:
• NTGRX-4Q, NTGRX-4PS, NTGRX-4M
and GRX-AV-RS232’s will be inactive until
Control Set Up is completed.
• GRX-AV will be active only if set to affect Scenes
1-4 and OFF (switches 5,6,7, and 8 all UP).
• NTGRX-2B will be active only if set to affect Scene
1 and OFF (switches 5 and 6 both UP).
• Check for miswires if the controls do not act as
described.
SM
LUTRON
FADE OVERRIDE
ZONE
MASTER
ZONE 6ZONE 5ZONE 4ZONE 3ZONE 2ZONE 1
Push
GRX-4000 Series Control Unit
(6 zone unit shown)
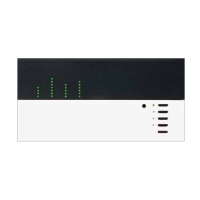
Accessory Control
(NTGRX-4S shown)
LUTRON
Push
Activate Controls
?
‘Power OK’ LED
Step by Step instructions for GRAFIK Eye Switching Panel
S
ELECT
V
ALUE
D
ISPLAYED
Load Type
Circuit
Control and Zone Assigned
Using circuit schedule
Value
3
4
5
1 Inc/Mag LV
2 Fluorescent
3 Neon/CC
S
ELECT
V
ALUE
V
IEW
V
ALUE
4 Non-dim
5 Elec. LV
– Unassigned
S
ELECT
C
IRCUIT
Link Status
Using Zone Capture
Low End Trim (optional)
High End Trim (optional)
Circuit Level
TM
®
Power OK (Pins 1,2)
Data OK (Pins 3,4)
2
1

 Loading...