2
2-5/16" (6.7cm)
2-1/8"
Preferred feed and load
wire entry—may be
expanded to 2" max.
4-1/16" (10.3cm)
1"
Slot for recessed mounting
screws (8 places)
7/8" diameter knock out (44 places)
3/8"
1-5/8"
3/8"
.312 dia.
.624 dia.
Keyholes for
surface mounting
(4 places)
1"
2-1/4"
(5.7cm)
15-1/8" (38.4cm)
1/8"
2-5/16" (5.9cm)
1" (2.5cm)
Second preferred feed and
load wire entry—may be
extended to 2" max.
3/4"
41-3/4"
(106cm)
Left side may
be punched
Class 2 (SELV) only
control wiring entry
2"
1
2-1/4"
59"
(150cm)
No entrance on right
side except Class 2
knockouts
8" (20 cm)
2-7/16"
(6.2cm)
11" (28 cm)
Class 2 (SELV) only
alternate control
wiring entry
No entrance on all
x'd out knockouts
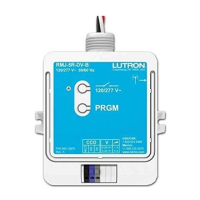
STEP 1: Mount Wallboxes
Use wallboxes with a minimum depth of 2-3/4"
(70mm) for Accessory Controls and 3-1/2" (89mm)
for GRX-4000 Series Control Units.
Multigang installations may require spacers between
wallboxes.
Mount wallboxes flush to 1/8" (3mm) below finished
wall surface.
Finished wall should not have gaps around the
wallbox of greater than 1/8" (3mm).
Mount Wallboxes and
Panels
STEP 2: Mount Panels
Top View
Front View
Bottom View
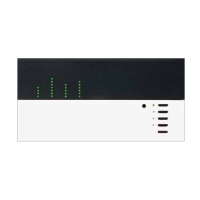
Control
GRX-CIR
GRX-4S-DW
GRX-AV‘s
GRX-4000 Series
Control Units
2 zone (2 gang)
3 zone (3 gang)
4 zone (4 gang)
6 zone (4 gang)
8 zone (4 gang)
All Others (1 gang)
Wallbox
Mounts in Ceiling with special mounting ring (provided)
Lutron # 241-399 (provided)
1900 Box (4"x4" junction box) or Lutron #241-496
Lutron # 241-519 3-1/2" (89mm) deep
(1 gang each, gangable)
or
2-3/4" (70mm), 3-1/2" (89mm) deep US Wallbox
Step by Step instructions for GRAFIK Eye Switching Panel
Left Side Right Side
WHEN SURFACE MOUNTING, THE KEYHOLE
ACCEPTS A MAXIMUM OF 1/4" MOUNTING
BOLT (1/4" IS RECOMMENDED)
WHEN FLUSH MOUNTING, MOUNT PANEL
FLUSH TO 1/8" (3MM) BELOW FINISHED WALL
SURFACE
XP Series
(Dimensions and Conduit Entry)
READ THE MAINTENANCE REFERENCE SHEET
BEFORE PAINTING THE PANEL OR COVER

 Loading...