he grill arrives nearly ready
By carefully following the
steps, you will improve the
uncrating and unpacking
steps, you will improve the
uncrating and unpacking
customer’s rst Lynx experi
steps, you will improve the
customer’s rst Lynx experi
steps, you will improve the
hipping weight on smaller
units is app. 300 pounds and
hipping weight on smaller
units is app. 300 pounds and
hipping weight on smaller
larger units may weigh over
units is app. 300 pounds and
larger units may weigh over
units is app. 300 pounds and
o not remove staples
around the top of the
o not remove staples
around the top of the
hese staples
around the top of the
hese staples
hold a wooden pallet in
hese staples
hold a wooden pallet in
place inside the carton
hold a wooden pallet in
that protects the unit from
place inside the carton
that protects the unit from
place inside the carton
that protects the unit from
damage. Removing these
that protects the unit from
pallet to fall on the top of
staples may cause the
pallet to fall on the top of
staples may cause the
pallet to fall on the top of
grill.
pallet to fall on the top of
ut the main strap holding
ut the main strap holding
the grill to the pallet.
ut the main strap holding
Remove the staples at the
Remove the staples at the
bottom
Remove the staples at the
Remove the staples at the
of the carton.
Remove the staples at the
the grill from the pallet and
place into desired location.
the grill from the pallet and
place into desired location.
the grill from the pallet and
Use two or more people to
move or install this unit. Fail
Use two or more people to
move or install this unit. Fail
Use two or more people to
ure to follow this instruction
can result in back or other
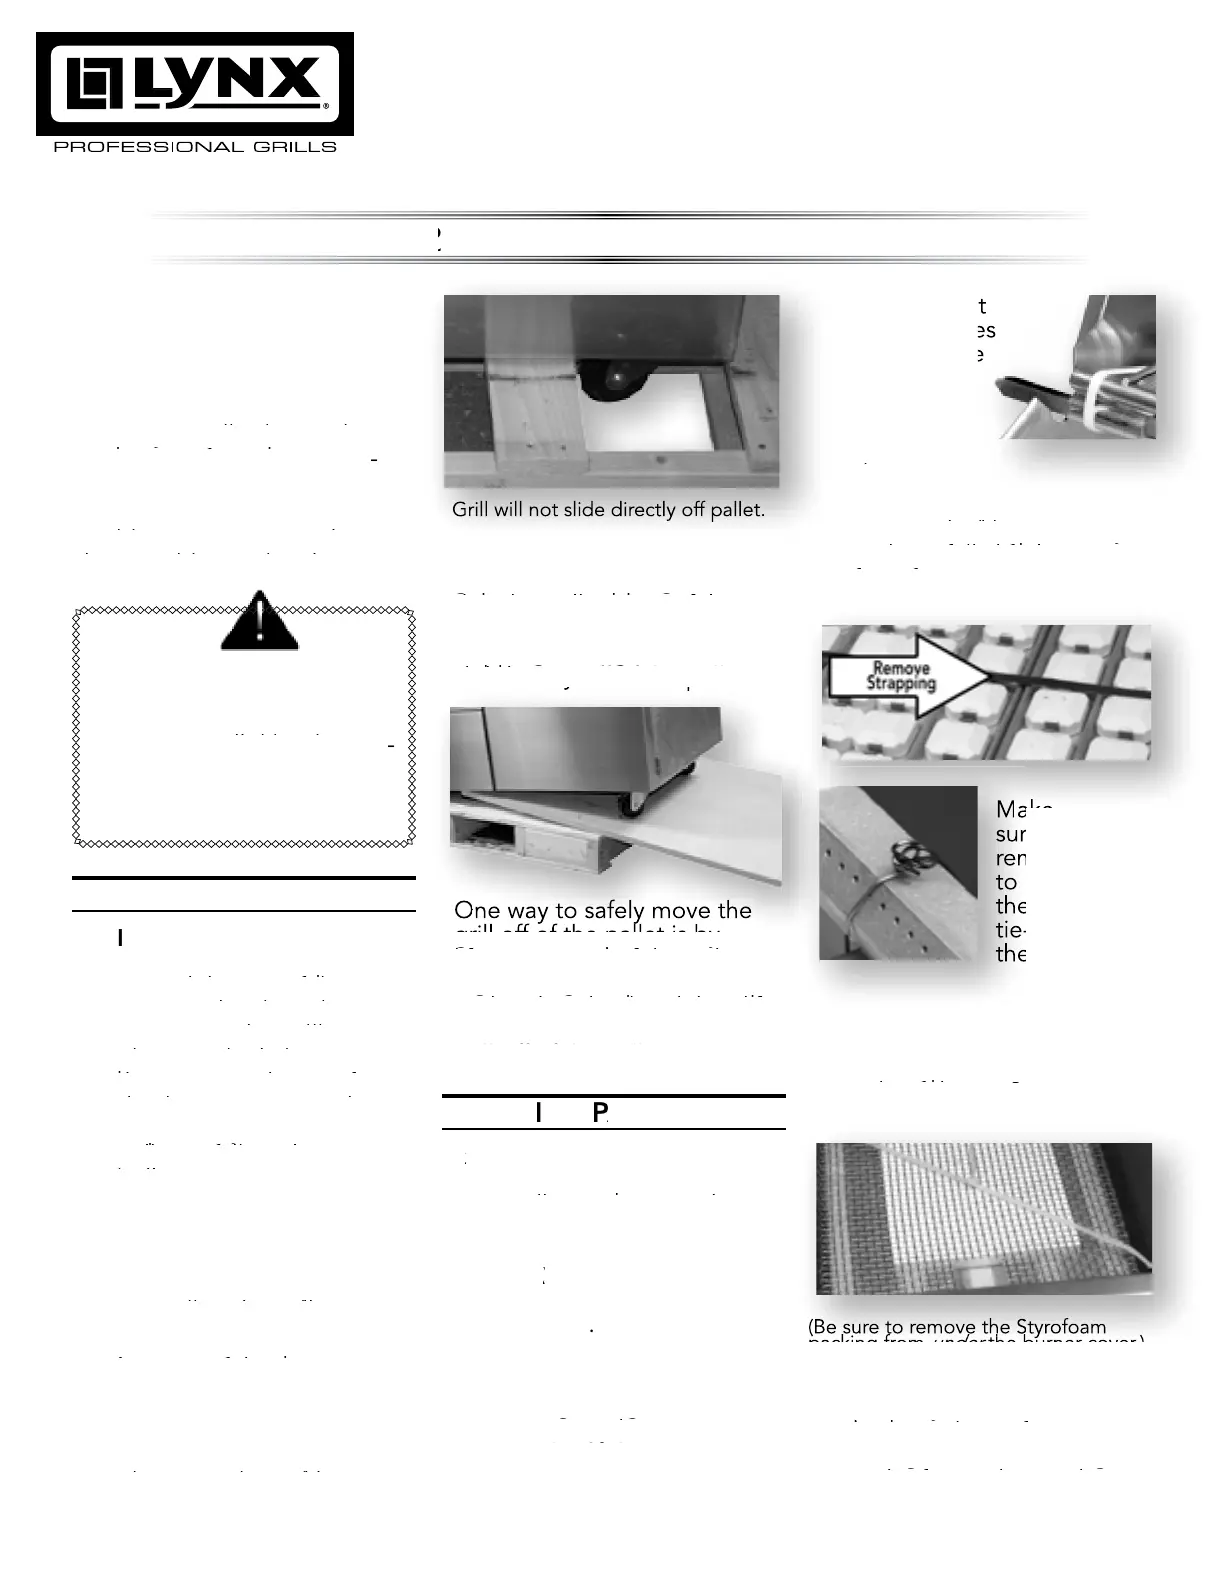
he wheels sit down in the
gaps of the shipping crate so
that the grill can sit safely and
gaps of the shipping crate so
that the grill can sit safely and
gaps of the shipping crate so
solidly on the crate during
slid directly off of the pallet.
shipping.
slid directly off of the pallet.
shipping.
he grill cannot be
slid directly off of the pallet.
he grill cannot be
grill off of the pallet is by
lifting one end of the grill
grill off of the pallet is by
lifting one end of the grill
grill off of the pallet is by
high enough to place a ramp
under the wheel and then lift
high enough to place a ramp
under the wheel and then lift
high enough to place a ramp
the other end while rolling the
the other end while rolling the
grill off of the pallet.
the other end while rolling the
cables and straps to ensure
your grill arrives at your home
cables and straps to ensure
your grill arrives at your home
cables and straps to ensure
in the same condition that
packing, the grill racks, and
packing, the grill racks, and
emove any loose items
packing, the grill racks, and
emove any loose items
from the rebox.
emove any loose items
Grill will not slide directly off pallet.
slid directly off of the pallet.
ne way to safely move the
grill off of the pallet is by
ne way to safely move the
grill off of the pallet is by
ne way to safely move the
spit (if
equipped).
spit (if
secures the briquette trays
ut the strapping that
secures the briquette trays
ut the strapping that
and carefully lift them out,
secures the briquette trays
and carefully lift them out,
secures the briquette trays
and carefully lift them out,
front rst.
and carefully lift them out,
burner partition on the left
burner partition on the left
side of the
burner partition on the left
burner partition on the left
S
burner partition on the left
under
the burner cover.)
under
nsure that all burners are
properly seated on the
burner valve orice and
properly seated on the
sitting level with the legs
in the frame slots and no
sitting level with the legs
in the frame slots and no
sitting level with the legs
(Be sure to remove the
packing fr
(Be sure to remove the
(Be sure to remove the
under
(Be sure to remove the
(Be sure to remove the
the burner cover.)
(Be sure to remove the
tyrofoam
the burner cover.)
tyrofoam
under
the burner cover.)
under
(Be sure to remove the
under
(Be sure to remove the
the burner cover.)
(Be sure to remove the
under
(Be sure to remove the