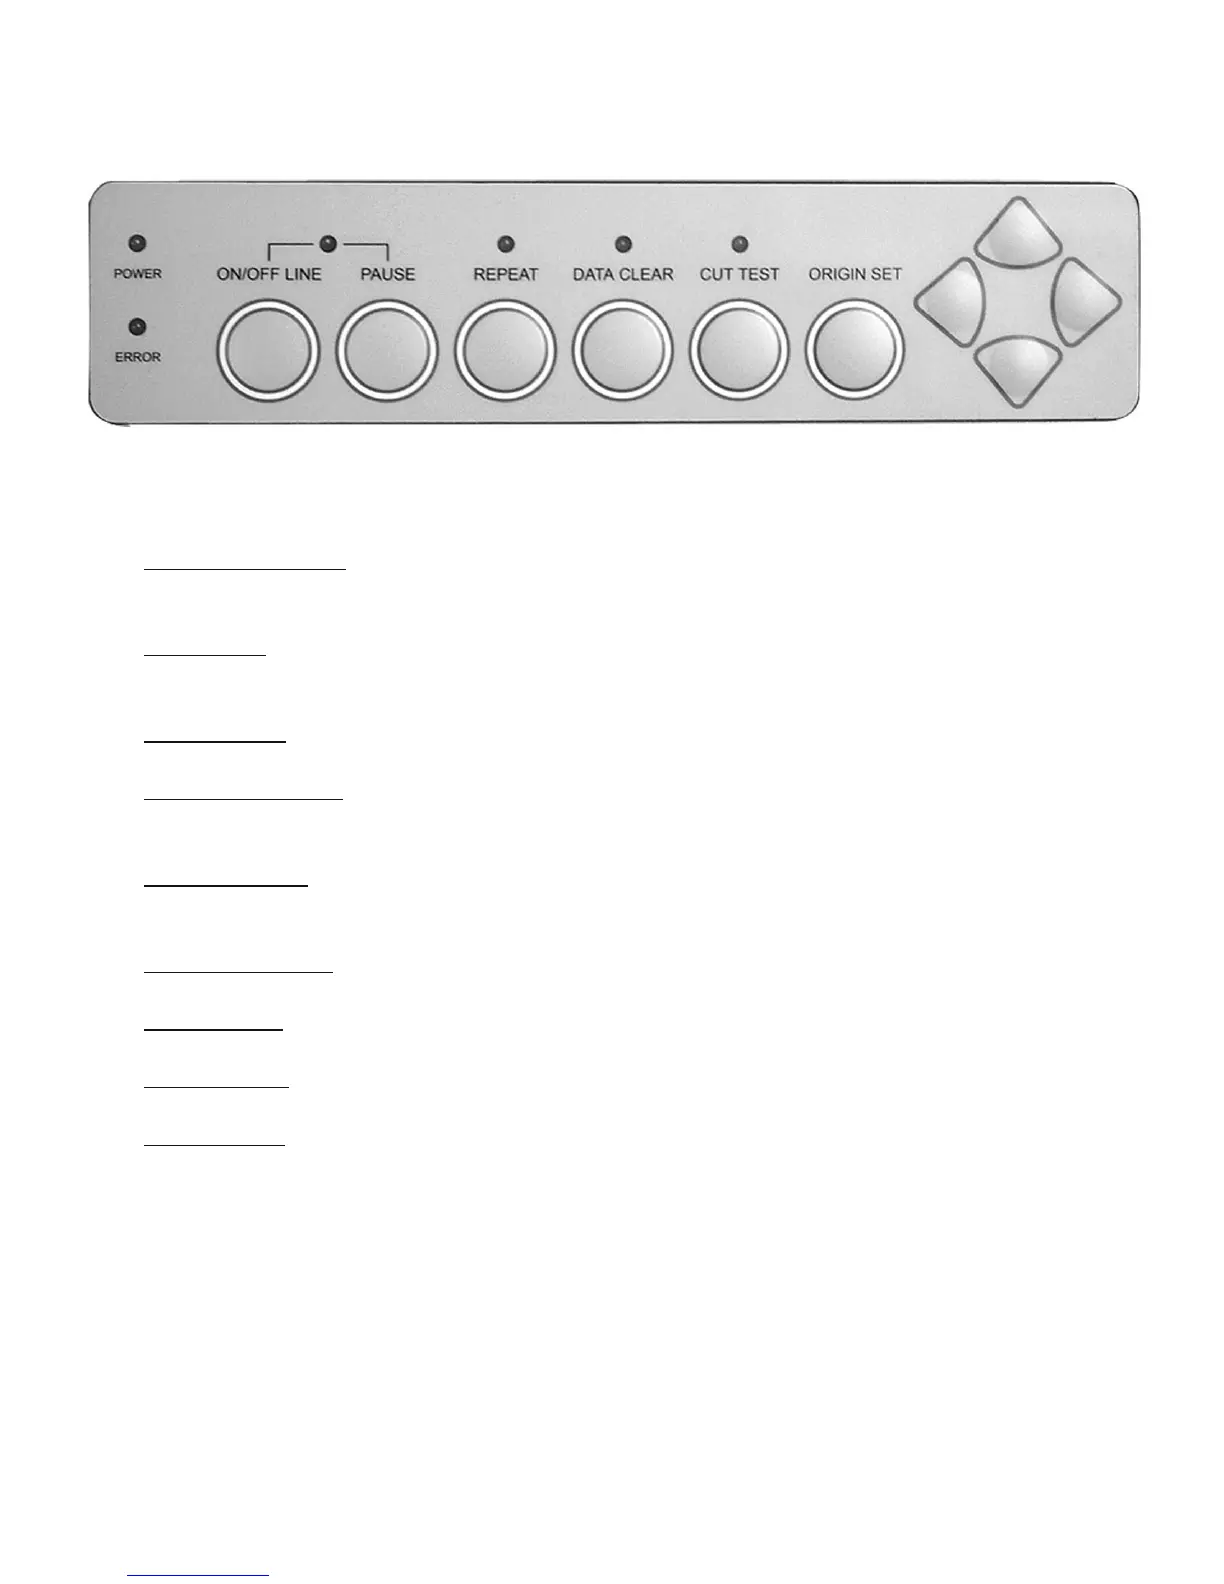
4.3 Control Panel
Figure 4-12
1. ON/OFF LINE Key – Used for communication between the cutting plotter and the host computer.
When ON LINE condition, the LED above is on. Press the ON/OFF LINE LED again to turn off.
2. PAUSE Key – Pressing this key once can temporarily terminate the motion of the cutter, and the ON/
OFF LINE LED fl ashes. Press ON/OFF LINE Key can release the paused state and resume cutting.
3. REPEAT Key- Press this button to repeat the last cutting and the REPEAT LED turns on.
4. DATA CLEAR Key - Press this key to clear the data in the buffer memory. At this moment the DATA
CLEAR LED turns on.
5. CUT TEST Key - To test the set value before starting your cutting job. While doing the cut test, the
CUT TEST LED is on.
6. ORIGIN SET Key – This key sets a new origin point for cutting to the current tool position.
7. ARROW Key – Used to move the media or the cutting carriage.
8. POWER LED – Turn on the power, the POWER LED on.
9. ERROR LED – When this LED is on or fl ashing indicates various problems or errors. To fi nd the cause
of the problems, see Chapter 5 “Troubleshooting”.
Note: Steps 3 through 7 require the cutter to be OFFLINE.
4. Basic Operation 4-6
 Loading...