GETTING STARTED21
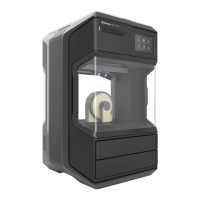
SETTING UP THE MAKERBOT REPLICATOR Z18
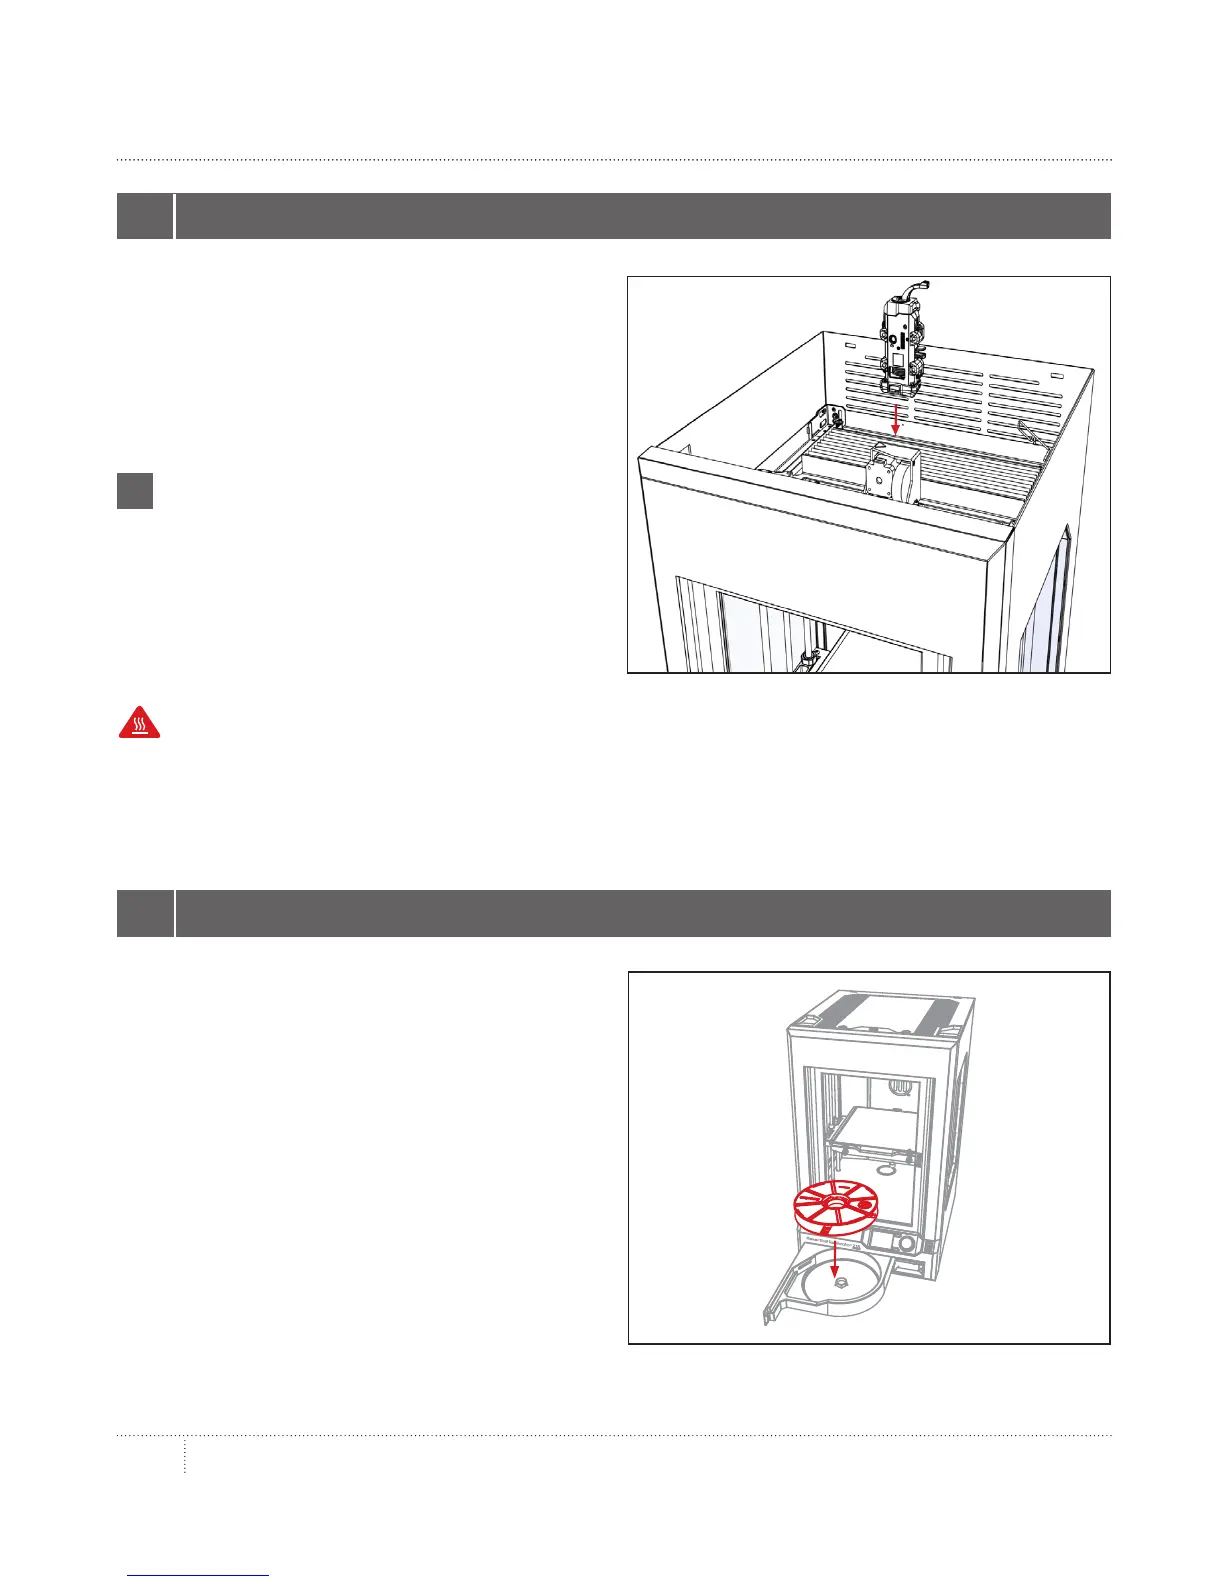
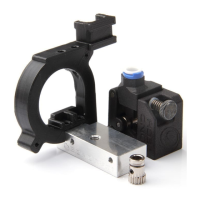
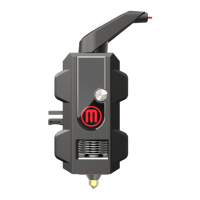
Locate and unwrap the Smart Extruder and
press it against the back of the extruder
carriage, with the connector pins facing the
front of the MakerBot Replicator Z18. Magnets
will lock the Smart Extruder into place.
1 INSTALL SMART EXTRUDER
Note: If you need to install the Smart Extruder
again at any time, go to the control panel and
select Utilities > System Tools > Attach
Smart Extruder.
i
Caution: Never remove the Smart Extruder from your MakerBot Replicator Z18 during or
immediately aer printing. Always allow the Smart Extruder to cool to 50° C completely before
removing it from the MakerBot Replicator Z18.
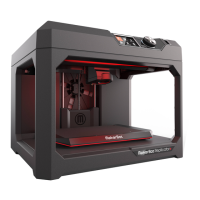
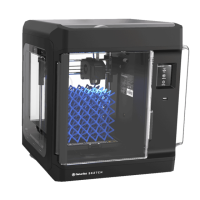
2a. Locate the Large MakerBot PLA Filament
spool and remove it from its plastic bag.
2b. Push the right side of the filament drawer
to open it.
2c. Place the spool in the drawer with the
MakerBot logo facing up.
2 LOAD FILAMENT SPOOL