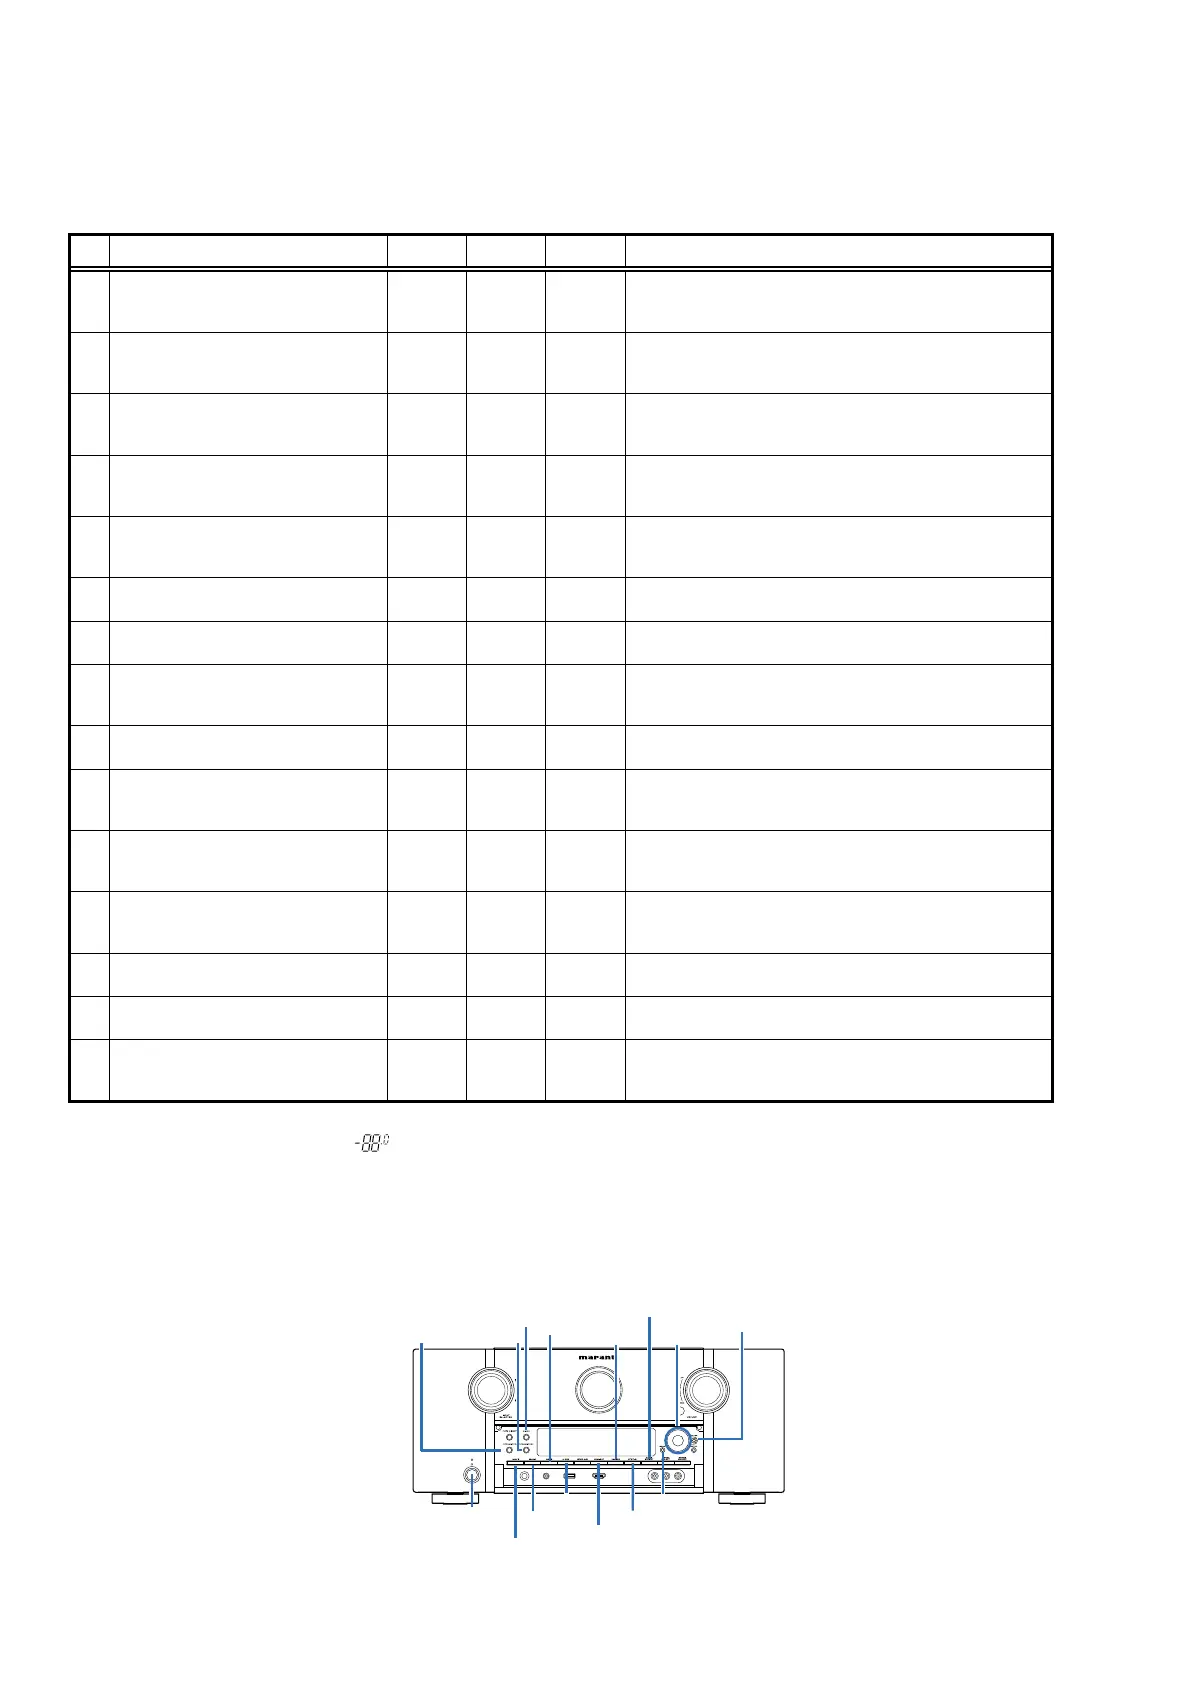
Special Mode Conguration Buttons
b
No. 1 -12, 15 : Hold down buttons"
A
", "
B
" and "
C
" at the same time and press the power button to turn on the power.
b
No. 13, 14 : Hold down buttons "
A
" and "
B
" for at least 3 seconds while the power is on.
b
No. 16 : Press the "
A
" and "
B
"
buttons simultaneously while inserting the AC plug to turn the power on.
No. Mode Button A Button B Button C Contents
1
Version Display
(u-COM / DSP Error Display)
DIMMER STATUS -
Displays the version of rmware such as the main rmware or DSP,
etc. Errors that have occurred are displayed.
(See 21 page)
2
User Initialization Mode
(Settings for the Installer Setup are not
initialized.)
GAME A-DSX -
Initializes backup data.
(Settings for the Installer Setup are not initialized.)
3
Factory Initialization Mode
(Initialization includes settings for the
Installer Setup.)
MOVIE MUSIC -
Initializes backup data.
(Initialization includes settings for the Installer Setup.)
4
PANEL / REMOTE LOCK Selection Mode BACK ENTER -
Start this unit in the PANEL/REMOTE LOCK selection mode so that
PANEL LOCK and Remote Lock can be selected as ON or OFF.
(See 25 page)
5
Check the Video/Audio pass
Mode
ZONE
SELECT
BACK -
This is a special mode for service conrmation used during repair
work to simplify the conrmation work for the Audio channel/
video channel. (See 28 page)
6
Protection History Display Mode ↑ ↑ -
Displays the protection occurrence history.
(See 75 page)
7
232C Standby Clear Mode : ↑ ↑ -
Switches from 232C standby mode to normal standby mode.
(See 76 page)
8
Operation Info Mode ↑ ↑ -
Displays the total operating time of the set, number of times the
power was switched on, and number of occurrences of each pro-
tection.(See 77 page)
9
TUNER STEP mode
(N model only)
↑ ↑ -
Enables reception STEP of the ANALOG TUNER to be changed.
(See 78 page) For N, U(without HD Radio) Region.
11
Installer Setup Mode
CURSOR
0
BACK -
Access the Remote Maintenance mode via the internet. Installer
Setup is displayed on Setup menu / Network.
b
Refer to AVR_RemoteMaintenance_.pdf of SDI.
12
Protection Pass Mode M-DAX
DYNAMIC
EQ
DYNAMIC
VOL
Enables the power to be turned on when protection detection is in
the stopped state.
(See 78 page)
13
CX870 / CY920 Initialization mode BACK ENTER -
Enter this mode only after replacing Flash for CX870 / CY920 and
rewriting the rmware.
(See 79 page)
14
CX870 / CY920 Reboot mode M-DAX
DYNAMIC
EQ
- Reboot the CX870 / CY920. (See79 page)
15
USB Update Mode HDMI OUT STATUS
Switches this unit to USB Update mode.
(See 83 page)
16
Forced USB All Device Write Mode HDMI OUT STATUS -
Mode used when this unit cannot be recovered.
Forcibly switches this unit to USB update mode.
(See 86 page)
NOTE:
When the volume indicator displays " ", the set has entered a special mode for developers.
In this case, RS-232C communication cannot be used.
To cancel this special mode, press and hold the "
CURSOR
f
"and "
STATUS
" buttons for 3 seconds and longer. When the volume indica-
tor returns to the normal display, RS-232C communication can be used.
ENTER
ZONE2
SELECT
GAME
CursorDIMMER
MOVIE
BACK
A-DSX
STATUS
MUSIC
X
HDMI
OUT
DYNAMIC EQDYNAMIC VOL
M-DAX
SPECIAL MODE
20