Installation manual - Ecotype - 13
3.2 Installing the tensioning plates - Hand-operated version for body > 8 m and electrical
version
3.2.1 Installation of the rear tensioning plates with the "NORMAL CABLE" option
When installing the rear tensioning plate, pay special attention not to impede the movement of other moveable parts (e.g..
swing doors).
The most appropriate location of the plate is as close as possible to the rear edge, but, at the same time, at such a distance
as not to hinder the movement of hinges and similar.
Incorrect placement could cause damage to the covering itself or to the body.
If in doubt, it is advisable to try out the movement of the rear moving parts to avoid unpleasant
surprises.
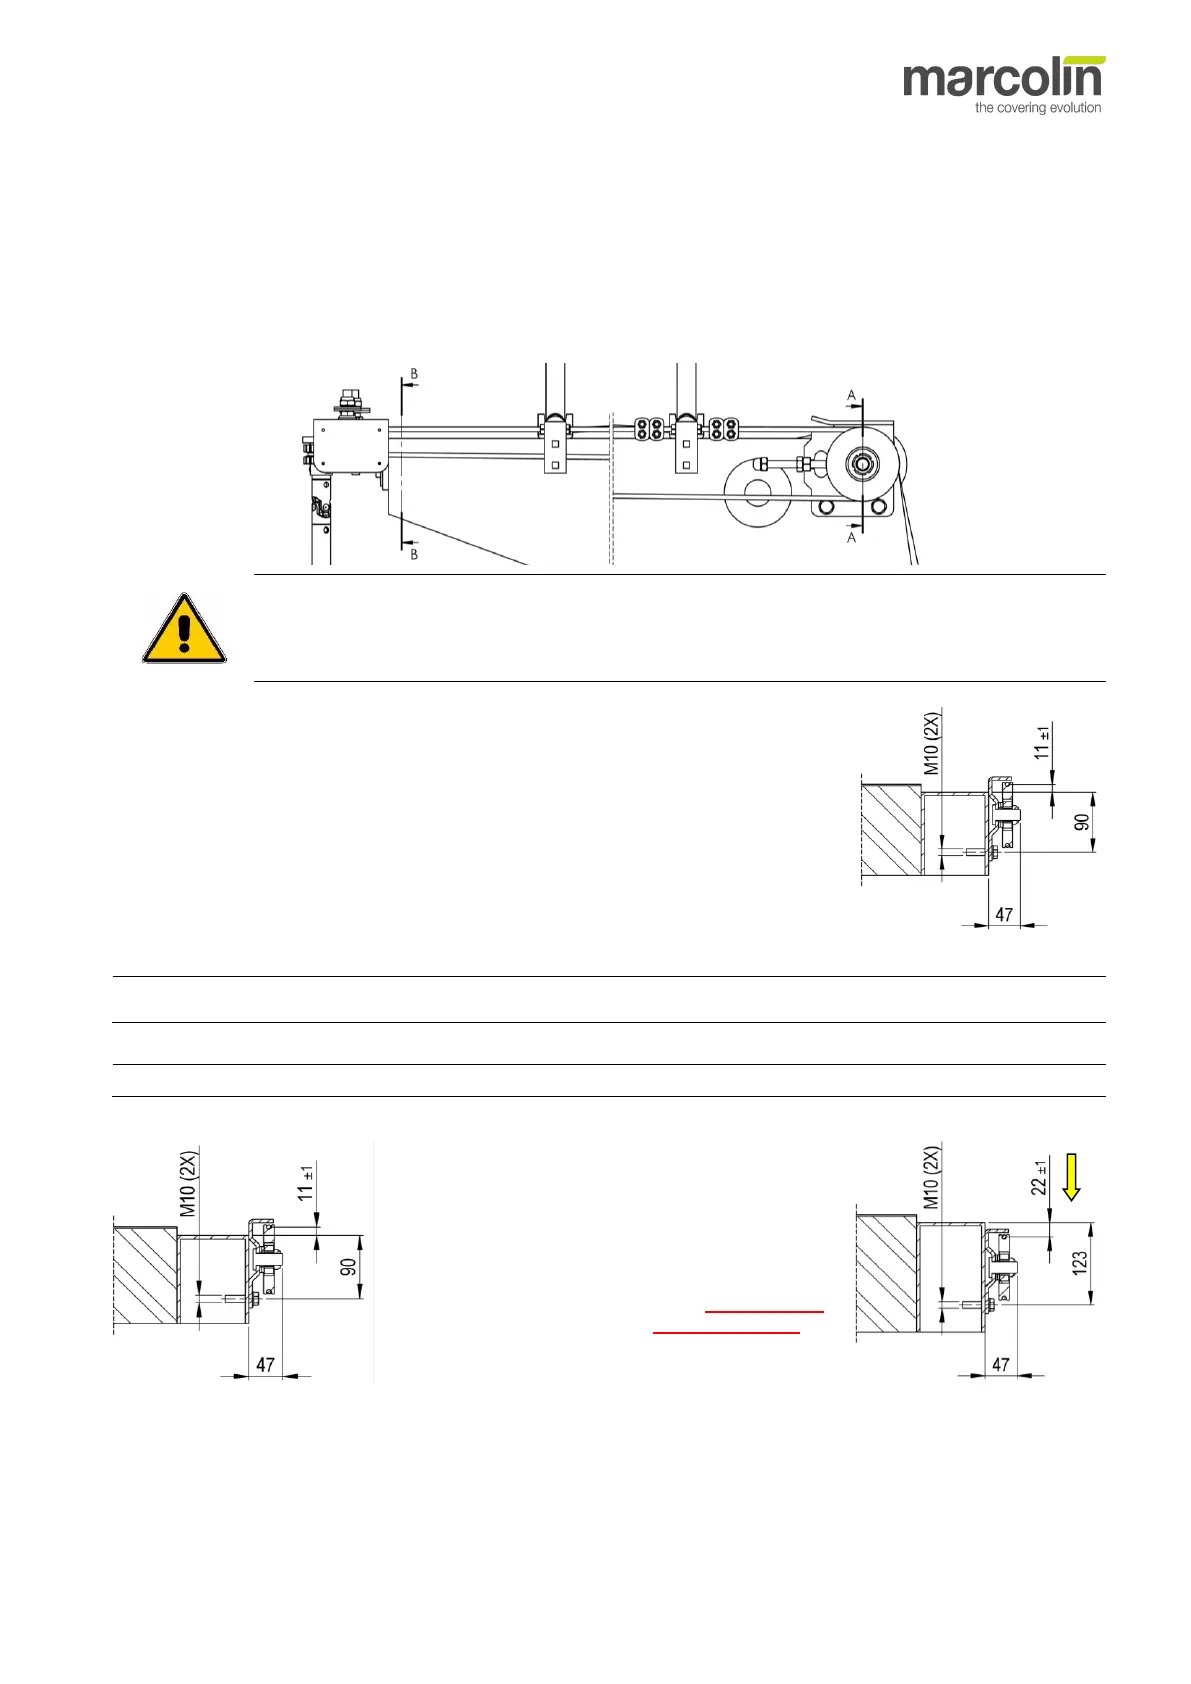
1. For the correct operation of the covering, ensure that the axis of the lower plate fixing
holes is located at a distance of 90 mm from the upper edge of the body.
2. Proceed with two M10 threaded holes on the side wall, in correspondence with the
holes on the plate.
3. Secure the plate using the bevelled head screws M10x40 provided with the kit,
ensuring that the tensioning screw is facing the front of the vehicle.
During its lifetime, the structure will be subject to vibrations and stresses. It is therefore recommended to use a
medium or high strength thread locking fluid.
4. Mount the plate on the opposite side using the same procedure.
The correct installation of the rear plates is essential because it affects the placement of all other components.
3.2.2 Installation of the rear tensioning plates with the "LOWERED CABLE" option
When mounting the cover with the LOWERED
CABLE option, you need to add 33 mm to the
distance (90 mm) required by the normal cable
option.
The installation distance for the lowered cable
option is 123 mm ➔