2.2 Factory settings
•
Temperature : Day 18°C
ECO 15°C
Night 08°C
Frost 05°C
•
Clock program : Program block 1
Day 12345
Switch time 08:00 >> 17:00
Switch to Day
•
Exception day : off
•
overtime timer : Maximum setting time 03:00hrs
Switch to Day
•
Selection temperature sensor : Sensor Thermostat
•
Calibrate temperature sensor : 0.0°C
•
Summer / winter time : Automatic
•
Pin code : 1 0 0 0
3.0 Installation and initial starting
3.1 General
•
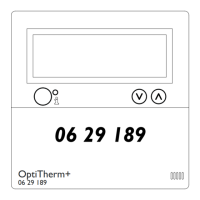
After unpacking check the OptiTherm+ and if also ordered, the external sensor(s) delivered
with it for damage.
•
At the same time check the correctness of the type/model
(Thermostat: OptiTherm+ 06 29 189, external sensor: Digital sensor conc. 2 Wires 06 29
194).
Contact the supplier if the thermostat is damaged or it is not the correct type/model.
3.2 Positioning
In order to determine an appropriate place to mount the OptiTherm+ you must consider the
points below:
– Place the OptiTherm+ in the room to be heated, because it is supplied with an internal room
sensor. This is not applicable when an external sensor (optional deliverable) connected to the air
heater(s).
– Mount the OptiTherm+ in a draft free location
– Do not mount the OptiTherm+ on a cold wall/partition.
– Do not mount the OptiTherm+ directly in the airow of the air heater(s).
– It is advised to place the OptiTherm+ at a distance of ±1.5m from the oor.
3.3 Cabling
For the cabling a protected bus cable must always be applied.
Also see table [2] for the maximum length and the proper diameter.
Attention!
The cable protection is earthed on the air heater.
5
EN
 Loading...