Tool knife
Wire strippers
Protective glasses
Marker pen
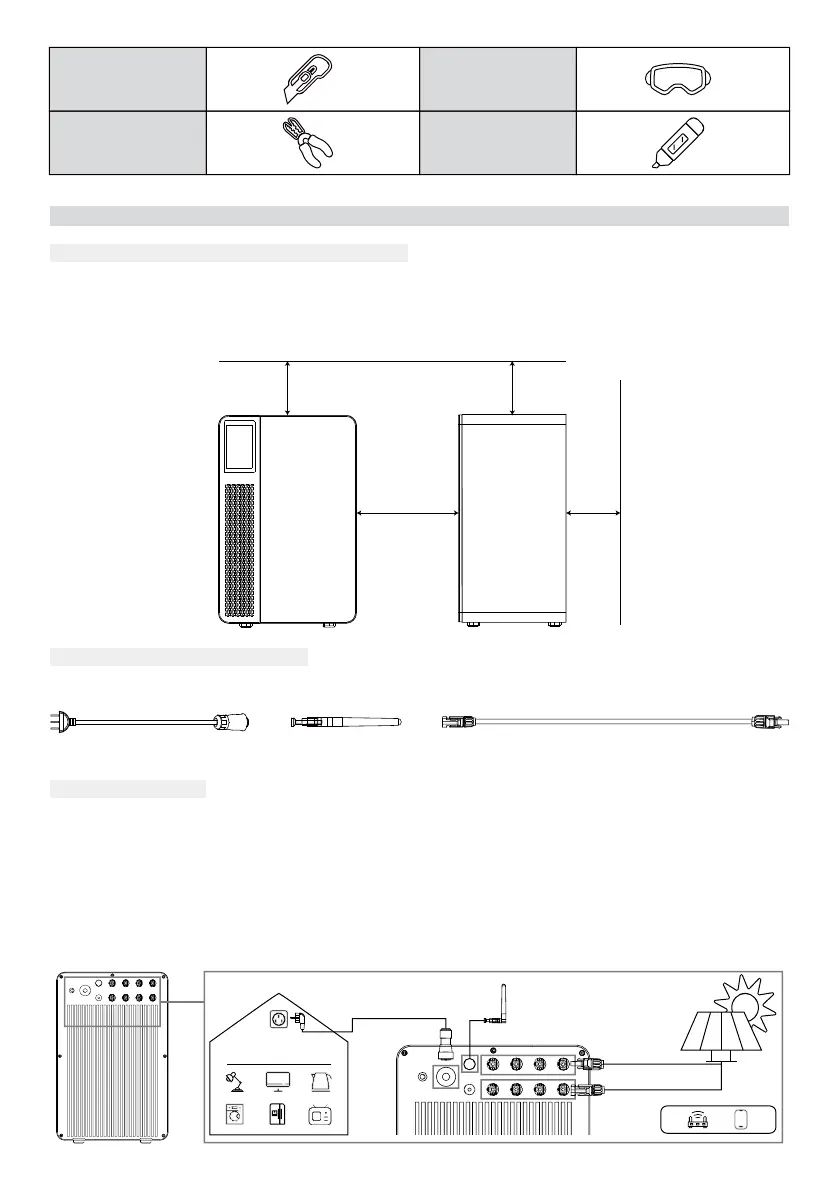
3.4 Equipment Installation
≥150mm ≥150mm
≥150mm150-300mm
There needs to be at least 150mm of space between the top and rear of the machine to ensure that
there are no other devices around and no obstructions to meet the requirements of heat dissipation
and safety isolation.
Cables included:
1. Plug the male and female connectors into the photovoltaic MC4 terminals.
2. Insert the AC terminal of the balcony photovoltaic integrated machine into the matching AC line
and tighten the thread. Insert the plug of the AC line into the socket and connect it to the local
power grid.
3. Connect the antenna to the position shown in the figure and tighten the threads.
Step 1: Floor Installation Dimensions
Step 2: Prepare the cables
Step 3: Wiring
AC power outlet
Photovoltaic
panels
1
2
AC Connection Cable Antenna PV MC4 line (Provided by the PV
panel manufacturer)
Antenna
3
12