EN-23
REMOVAL OF OVEN DOOR
Attention!
Hazard of damages and injuries!!
The oven door is provided with glass panels that may be broken if not properly
handled. The broken glass may cause cuts and injuries.
Don't drop the oven door and the glass panels.
If a glass is damaged, do not use the oven and contact the Support Center.
If a glass panel is broken, keep children away and carefully remove all pieces of
glass.
Attention: the oven door may close automatically when trying to remove the
internal glasses before removing the door from the appliance.
Do not use the equipment without internal glasses.
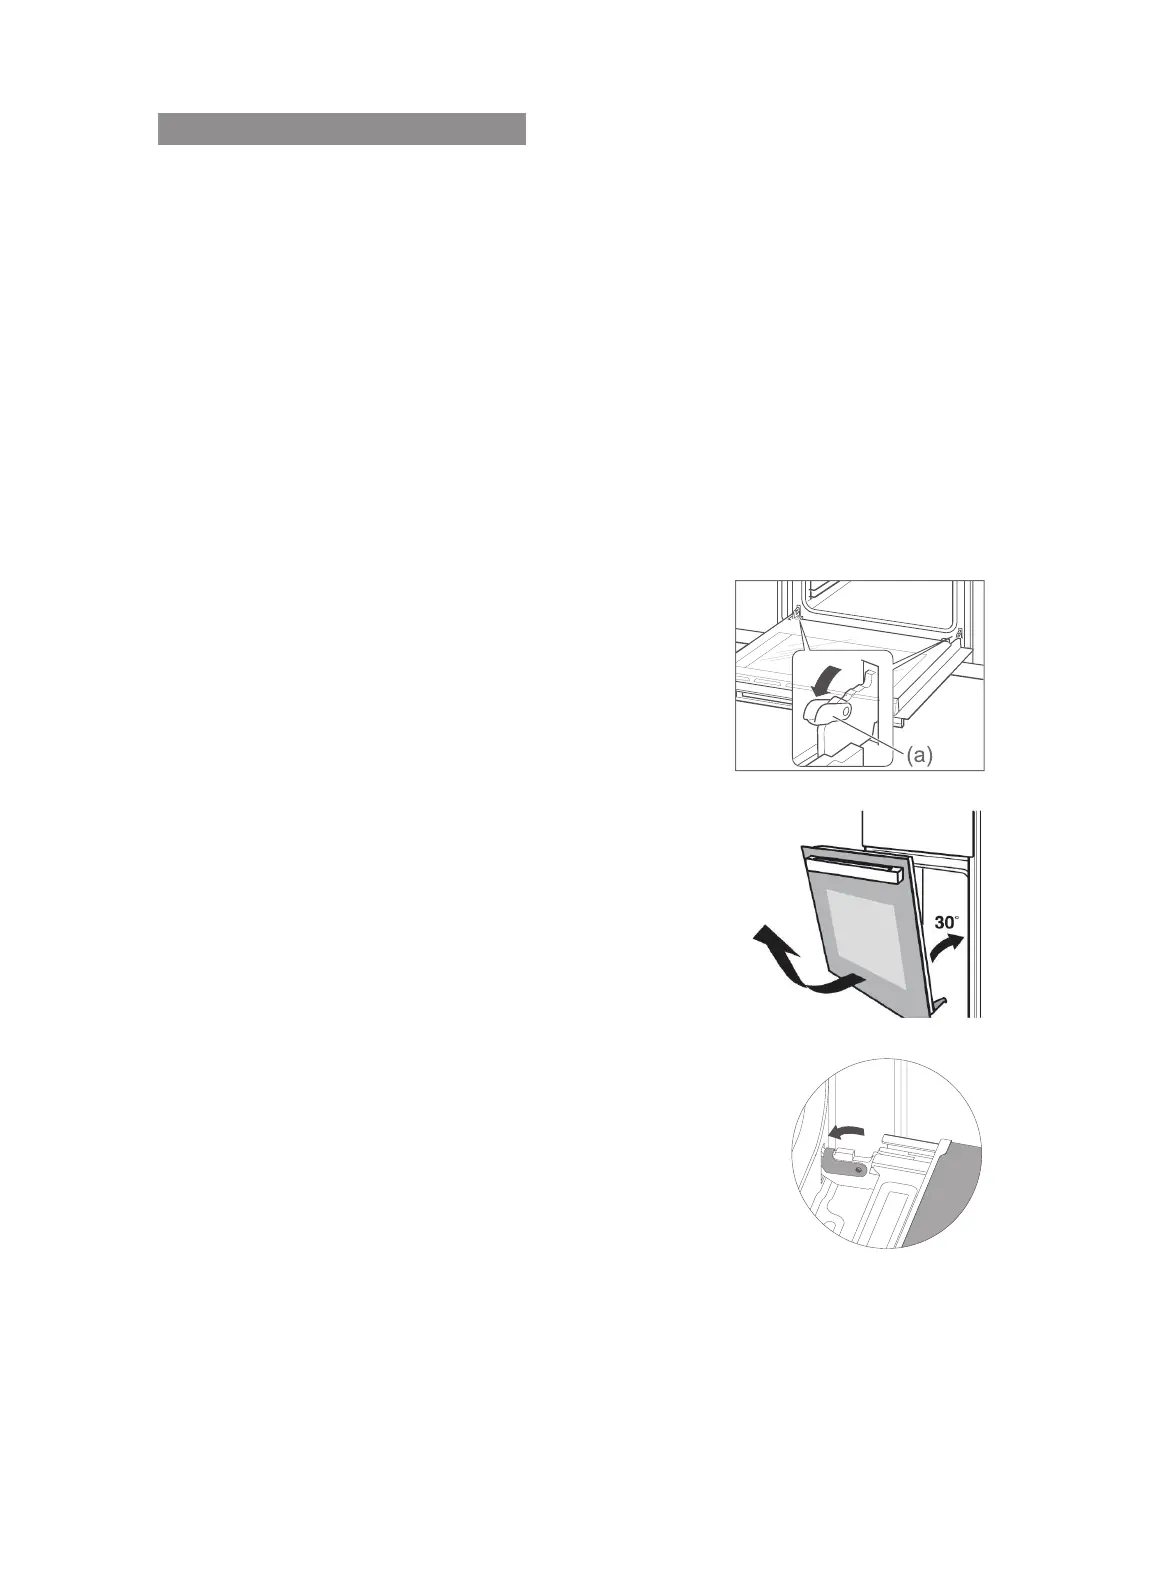
INSTALLATION AND REMOVAL OF THE OVEN DOOR FROM THE APPLIANCE
To clean easily and safely the oven door, it must be removed form the product frame:
1. Wide open the oven door.
2. Open the two locking levers to the left and right
outwards (a) as shown on the side (Fig.1).
3. Slowly close the oven door until it stops.
4. With your hands, grab the door on the sides lift it
slightly upwards and remove it (Fig.2).
5. Clean the oven door and the various glass panels (see
next section for disassembly of the internal glass).
6. Once cleaned, reassemble the oven door on the
appliance by performing the reverse procedure, then
first make sure that the hinges are inserted in the
right position on the right and left. You must be able
to insert them easily and without resistance. If you
feel any resistance, check that the hinges are inserted
correctly in the respective seats.
7. After closing the locking levers to the right and left by
pushing them inwards as shown in Fig.3, if the oven
door is mounted correctly you can close it without any
problem; in addition to closing it correctly if the oven
door is mounted correctly it must leave the ventilation
slots between the door glass and control panel free.
Fig.1
Fig. 2
Fig.3