EN-17
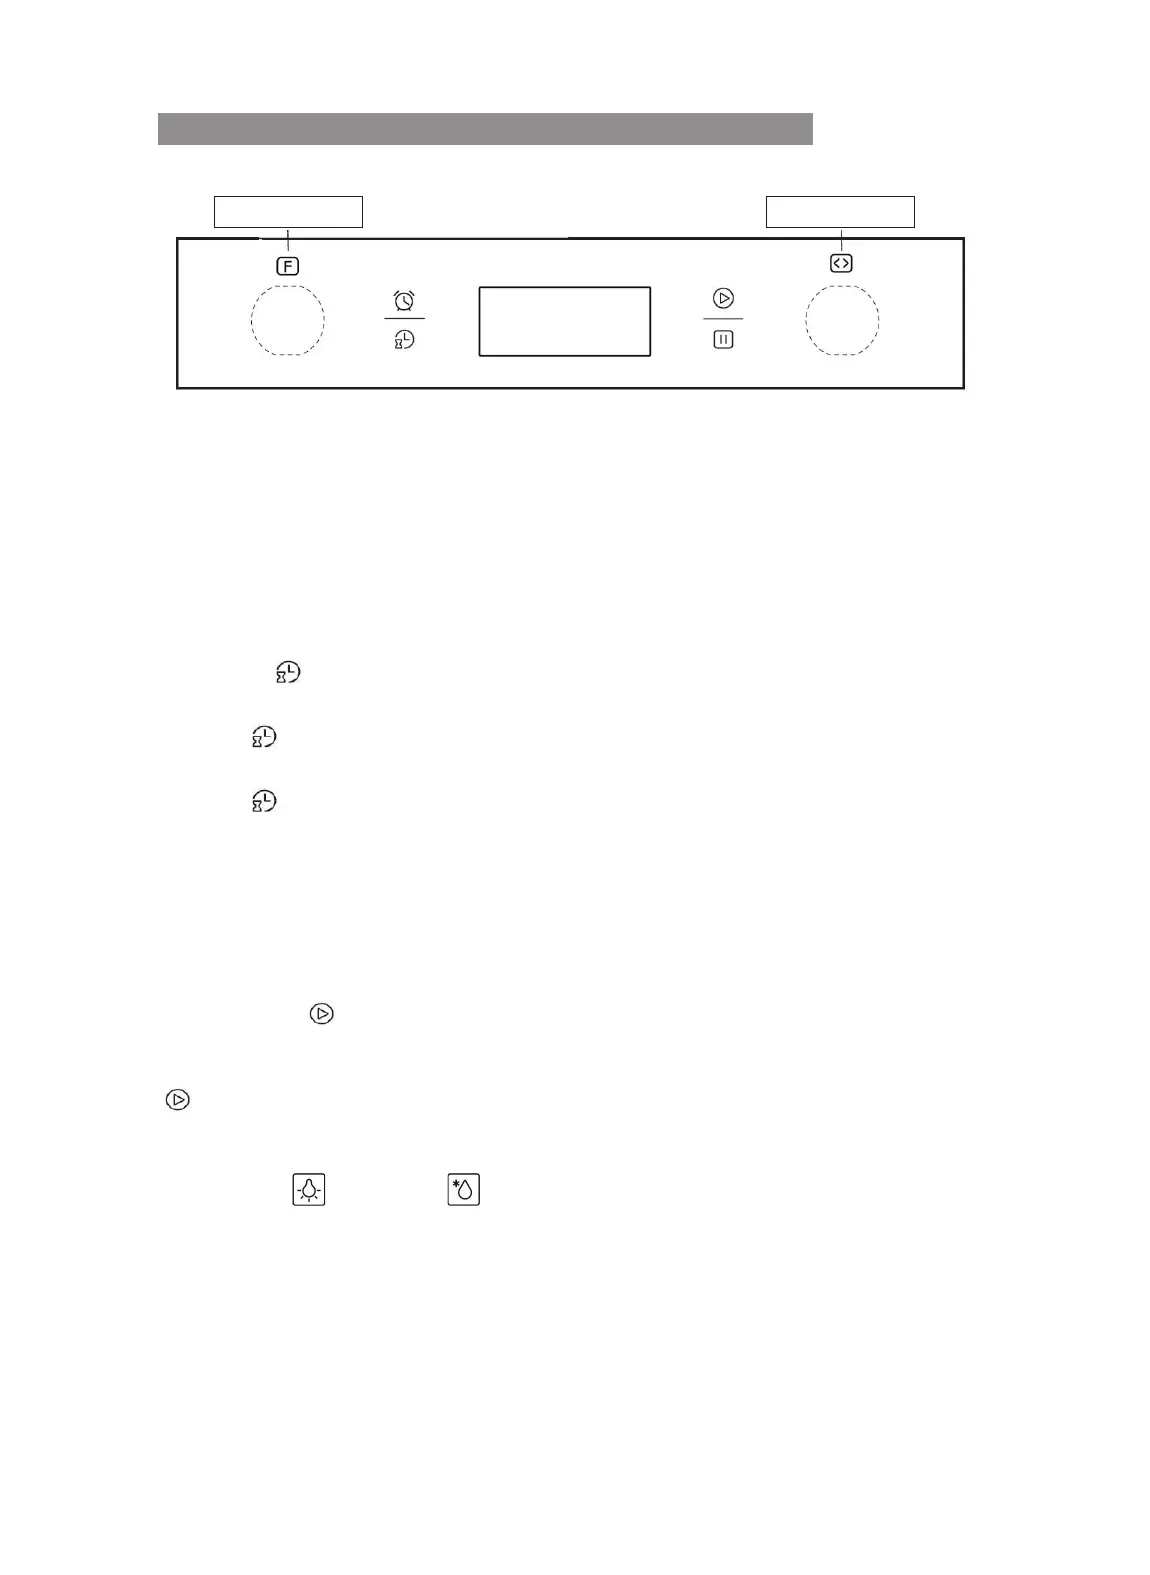
CONTROL PANEL FOR EASY CONTROL MODELS
Models: MKO 906-PR M XS; MKO 1006-PR M P XS
K1 Knob K2 Knob
Warning: the picture is only for reference and could not match exactly the model you
purchased.
To turn the Push Pull knobs, press and pull them on, then do not close them again while
the oven is running.
Clock Settings
After connecting the oven to mains power, the Display will show "0:00" with steady
light. Then, apply the following steps to setup the clock:
1 - Pressing
key, the hour digits will start blinking.
2 - Turn the right knob "K2" to setup hours (value between 0 and 23).
3 - Press
key to confirm selection. Then, the minute digits will start blinking.
4 - Turn the right knob "K2" to setup minutes (value between 0 and 59).
5 - Press
key to confirm selection and complete settings.
N.B. If the clock is not set, the display will show "0:00".
Setting Cooking Function and Temperature
1 - Turning the left "K1" knob selects the desired cooking function.
2 - Turning the right "K2" knob selects the desired cooking temperature (*).
3 - Press Enter
to confirm oven activation.
You can also turn on the oven soon after selecting the cooking function, by pressing
key. In this case, the oven will set a default cooking temperature according to the
selected function.
(*) The Lamp
and Defrost functions do not allow the setting of cooking
temperature, as no heating element is running.
Turning the "K2" knob in the remaining functions will allow changing temperature in 5°C
steps. The temperature value will blink, until the center of the oven cavity reaches the
set temperature. Once the temperature is reached, the oven will beep briefly and the
temperature value will show steady on the display.