MPPT Solar ChargeMaster 25 – User and Installation Manual
4.8 COMMISSIONING AFTER INSTALLATION
4.8.1 Commissioning step-by-step
CAUTION!
Check the polarity of all wiring before
commissioning: positive connected to positive
(red cables), negative connected to negative
(black cables).
1 If all wiring is OK, place the DC-fuse between the Solar
ChargeMaster and the load.
2 Then place the DC-fuse between the Solar
ChargeMaster and the battery.
WARNING
When placing this fuse, a spark can occur,
caused by the capacitors used in the Solar
ChargeMaster. This is particularly dangerous in
places with insufficient ventilation, due to the
gassing of the batteries an explosion can occur.
Avoid having flammable materials close by.
3 The Solar ChargeMaster will initiate the charging
process if the voltage from the PV array is 5VDC higher
than the battery voltage; see chapter 3.
Note: If the Solar ChargeMaster does not switch on, press
the POWER switch for 1 second.
4.8.2 Battery type setting
The Solar ChargeMaster is suitable for charging the
following battery types: Flooded lead acid, AGM, Spiral,
Gel, Traction batteries and Mastervolt Li-Ion batteries (MLI).
WARNING
The MLI charging voltages on this charger fit
the Mastervolt Li-ion (MLI) batteries but do not
necessarily fit other Li-ion batteries! See also
section 4.9. Always follow the instructions
provided by the battery manufacturer!
CAUTION!
Invalid settings of the Solar ChargeMaster can
cause serious damage to your batteries and/or
the connected load! Adjustments of settings
may be undertaken by authorised personnel
only.
Note: If your Solar ChargeMaster is not new, you must
consider that former users may have changed the
settings.
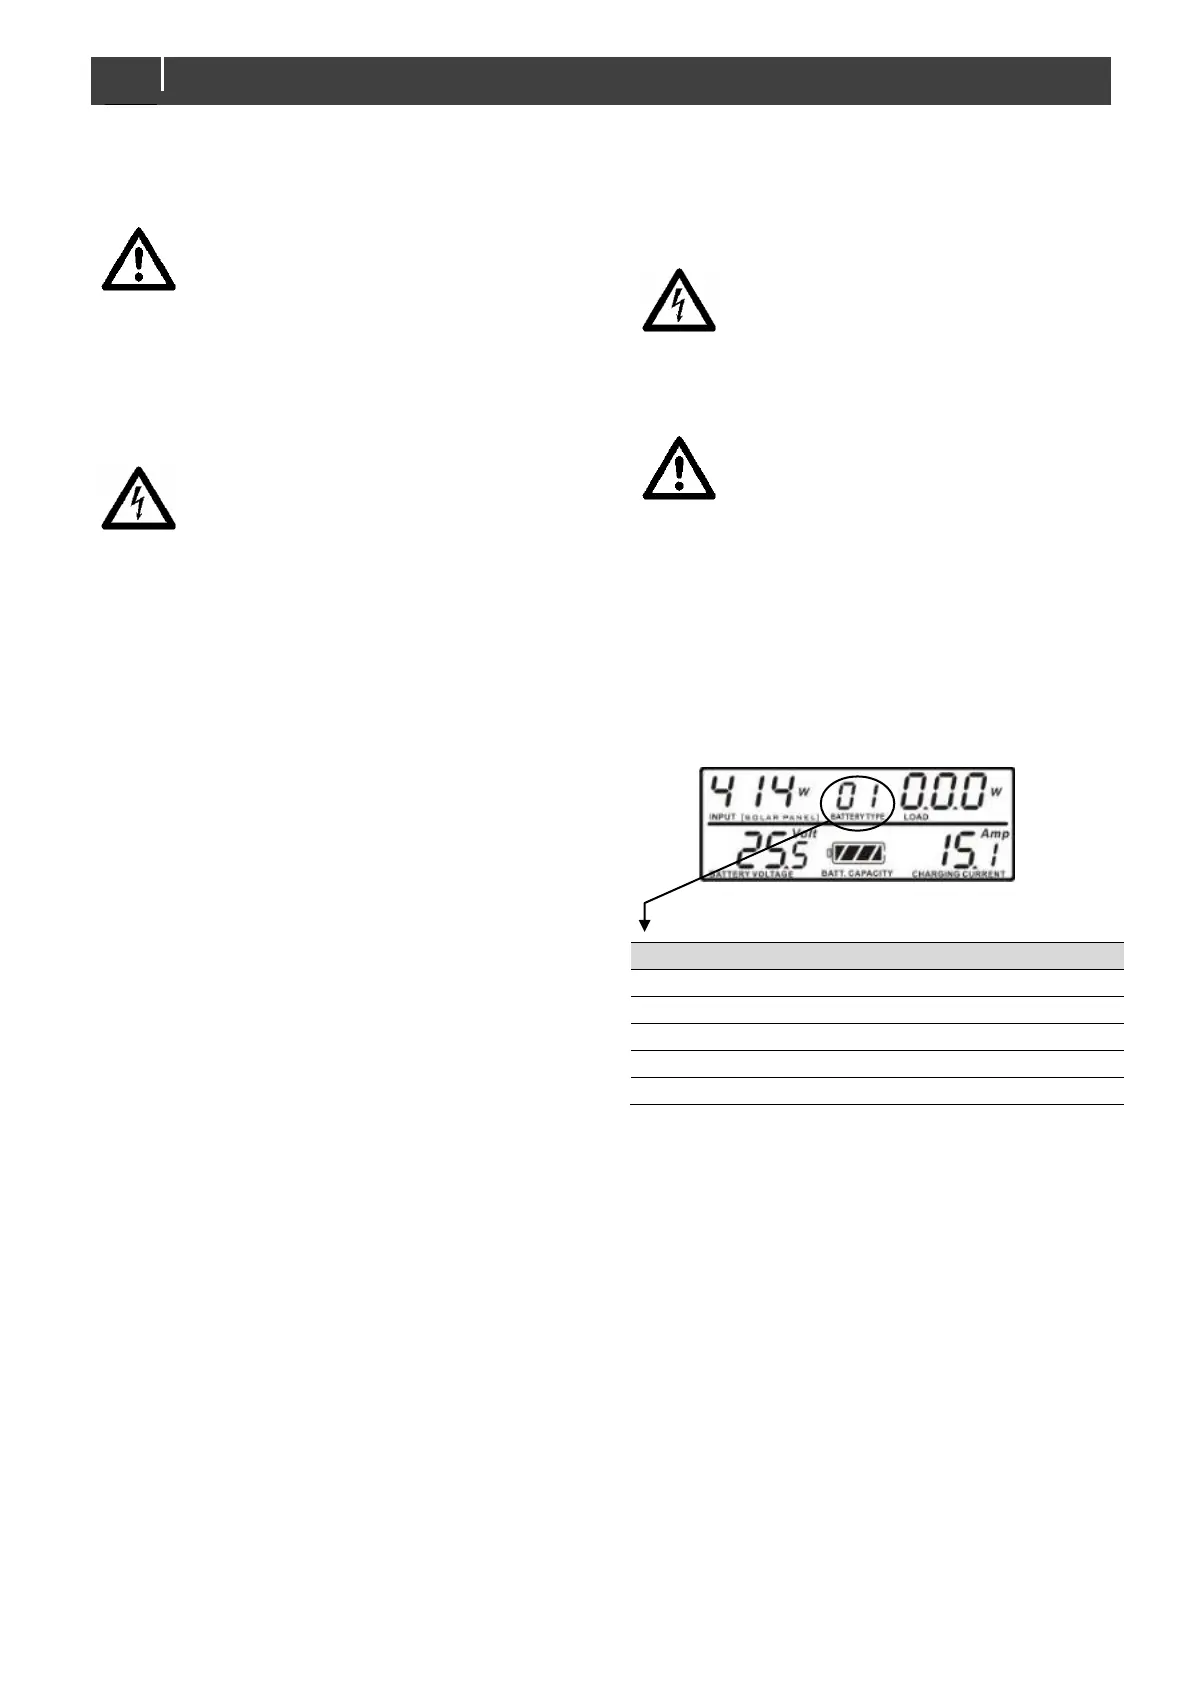
The actual setting for Battery type is shown on the display
during normal operation mode. See Figure 13.
Mastervolt MLI (see section 4.9)
Figure 13: Battery type setting
To change the Battery type setting:
• Hold the POWER button (Figure 1) pressed until the
Battery type indication starts blinking;
• Press the POWER button shortly to scroll through the
Battery type settings as described above;
• Hold the POWER button pressed until the Battery type
indication stops blinking to confirm the desired setting.
When the POWER button is not touched for 10 seconds,
the Solar ChargeMaster will return to the normal operation
mode without changing a setting.
 Loading...