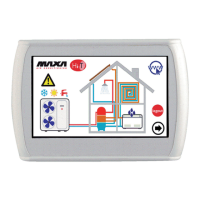
Hi‐TCentralizedcontroller
25
4. Entertheservicepasswordandpressonthemark’sconfirmation;
5. Enterinsidethe“Addressesconfiguration”;
6. Enterinsidethe“Addressesassigns”;
7. Changetheaddresswiththearrows:theaddressescanbeassignedfromthenumber10;
8. Pushontheconfirmationiconnexttotheword“Start:”;
9. Afterafewsecondsyouwillsee"Set";
10. Removepowersupplyfromthefirstfancoilandpoweronthesecond;
11. Performthesamesteps7through9foreachfancoilunitsconnectedtothesamekeyboard.
12. It is important to assign to the
fancoilunits that will be boundto thesamezonea series of consecutive addresses(e.g.
whetherthereare3fancoilunitswithinthesamehallandifyouwanttoassociatethemwithasinglethermalzonethatwe
callHALL,youmustgivethethemselvesaseries
ofaddressesfrom10to12,etc..).
4.5.2 SCANNETWORK
Onceeach fan coilhasbeen addressed ,itis essential to perform a networkscan to check whetherall the fan coils arecorrectly
recognized.Todothis:
1. restorepowersupplytoallthefancoil;
2. enter to the service menu following the same procedure described in the
previous section (points 2‐4) and enter "Scan
network";
3. pressthetickconfirmationclosertotheword"Start"andletthesystemscansthenetwork;
4. after scanning the system should find all of the chiller (max. 7 in cascade) and all fan coil units connected to
the same
network.Ifthenumberoffancoilsfounddoesnotmatchthoseinstalled,thewiringwasnotperformedproperly.
Ifoneormorefancoilproperlyaddressedandidentified,getdisconnectedfromthenetwork(forexample,duetoafailureofthe
fancoilpowersupply),thekeyboardproceed
withtheupdatingofthenumberoftheactuallyworkingfancoilsinthesystemwitha
delayof2minutesfromtheoccurrenceoftheevent,accompanyingtheupdatewithaanerrormessage.Whenthefancoilsarere‐
connected,thekeyboardrecognizesthemautomatically,savingthesettings
previouslyset.
4.5.3 AREASFANCOILASSIGNMENTANDCUSTOMIZINGTHEAREA’SNAME
Tomatchthefancoiltothedesiredareasyoumustperformthefollowingsteps:
1. enter the "Configuration" and from here going in "Service menu " following the same procedure described in Paragraph
4.5.1(steps2‐4)andselectthe“Areaconfiguration”;
2. presson“Zone1
”;
3. pressonthesecondlinewhereitappearsthecurrentname"Zone1"andchangethezonenameusingthekeyboardthat
appears(youcanenterupto9characters);
4. toconfirmthenewname,press"Enter",otherwisepresson"Esc";
5. pressthevalue
thatappearsatthewords"From"(thevalueishighlightedinred);
6. usethearrowstoselecttheaddressofthefirstfancoilunitsintheareathatyouareconfiguring;
7. pressthetickconfirmation;
8. pressthevaluethatappearsincorrespondenceof"To"
(thevalueishighlightedinred);
9. usethearrowstoselecttheaddressofthelastfancoilunitsintheareathatyouareconfiguring;
10. presstheconfirmationtick;
11. repeatsteps2through10,usingtheproceduretootherareasthatyouwanttoconfigure.
4.6 ASSOCIATESUNITOPERATION
4.6.1 ON/OFF
Onceexecutedthezoneconfigurationandtheassociationofthefancoil,youcanproceedtothe"firststart"oftheconnectedunits.
YoucanturnonoroffwithasingletapthewholesystemheadedbyasinglekeyboardHi‐T;otherwiseyoucanindividuallyturnon
thechiller
andmanageindividualzones.
Foroperatetheentiresystem:
1. fromthemainpageofthesystem,goto"Statussetup;
2. inthemenuthatappearsarelisted:SYSTEM,CHILLER,ZONE‐nth.
3. Push on "System" and with a single operation you can turn on or
off all fan coil units of all the areas connected to the
keyboardHi‐Tandallthechillersthatarepartofthesamesystem: