MBIT Technologies
*
www.mbit.com.au 13
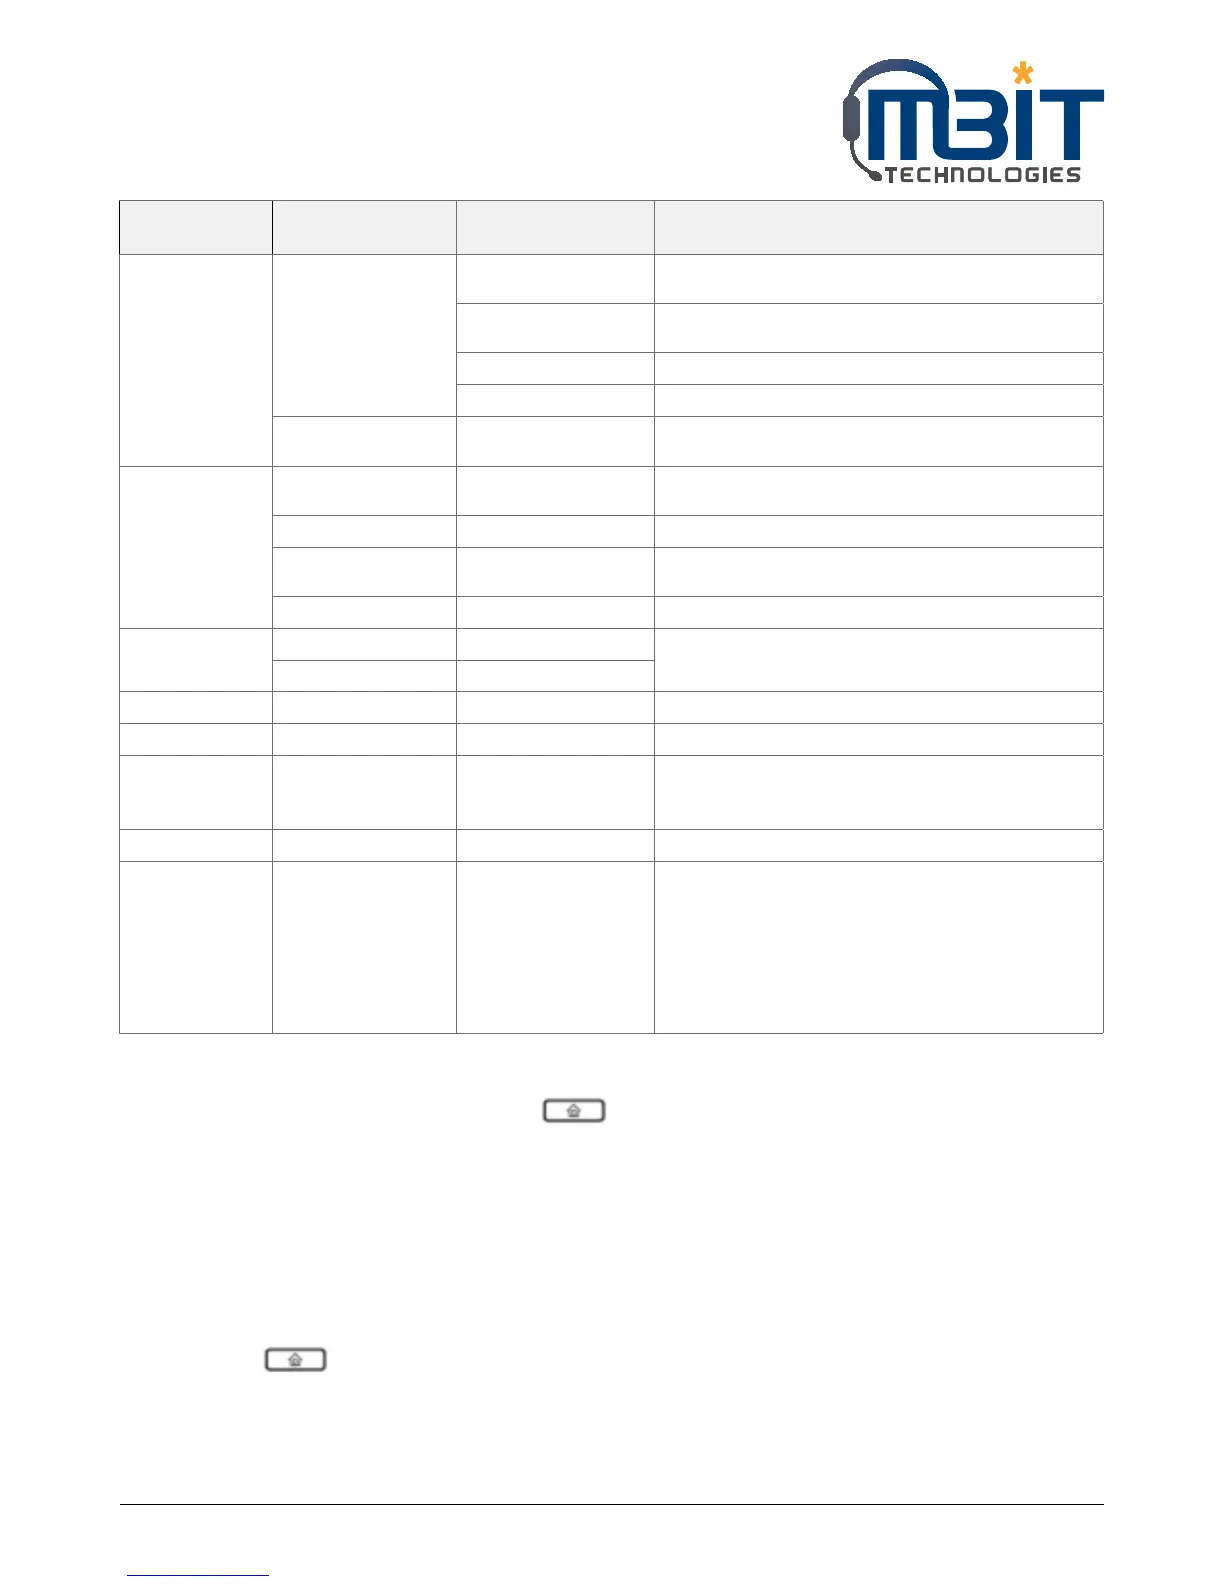
Main menu
(LCD display)
Menu Items
(LCD display)
Submenu Items
(LCD display)
Explanation
14.1.3 Current Netmask To view the Current Netmask, or to change the Current
Netmask.
14.1.4 Current Gateway To view the Current Gateway, or to change the Current
Gateway.
14.1.5 DNS1 To view the DNS1, or to change the DNS1.
14.1.6 DNS2 To view the DNS2, or to change the DNS2.
14.2 Wireless
Connection
AP To display the name of all APs.
15 Product INFO 15.1 Product Name To view the current information of Product Name,
Software Version, Hardware Version and MAC Address.
15.2 Software Version
15.3 Hardware
Version
15.4 MAC Address
16 Status 16.1 Account1 Status To view the current information about the status of
account1/2/3/4/5.
16.2 Account2 Status
17 Reboot To reboot bb100.
18 Factory Default To set bb100 factory default.
19 Set Password To reset password.
The password of LCD is same as the one of Webpage.
Default is null.
20 LCD Contrast To view and change the contrast of LCD.
21Login/Logout Press it to logout LCD.
bb100 will memory the password if user has input the
password when access to 9Accounts and bb100 will not
request the password if user access to it again.
Press 20 Login/Logout to erase memory, and then user
should input password when user access to 9Accounts
again.
4.2 How to configuration from Menu
1) When the phone is on-hook, press the button to enter Main menu.
2) Use the Numeric Keypad to input the digit or character
3) Press the en softkey button to change the input method between digit, capital letter and small letter.
4) Use the up and down softkey button to scroll up and scroll down. Configuration the item or sub-item
according to the prompt.
5) Press the ok softkey button to confirm.
6) Press the save softkey button to save changes.
7) Press button or delChr softkey button to delete one digit or a character.
8) Press the cancel softkey button to cancel changes and back to the up level.
9) The password which need when access to Accounts item is the same as the one of admin mode when
login Web, default is null.