GMK Sphere Calipered Kinematic Alignment Surgical Technique
10
OPTION
To achieve further stabilization, insert two pins into the
fixation holes.
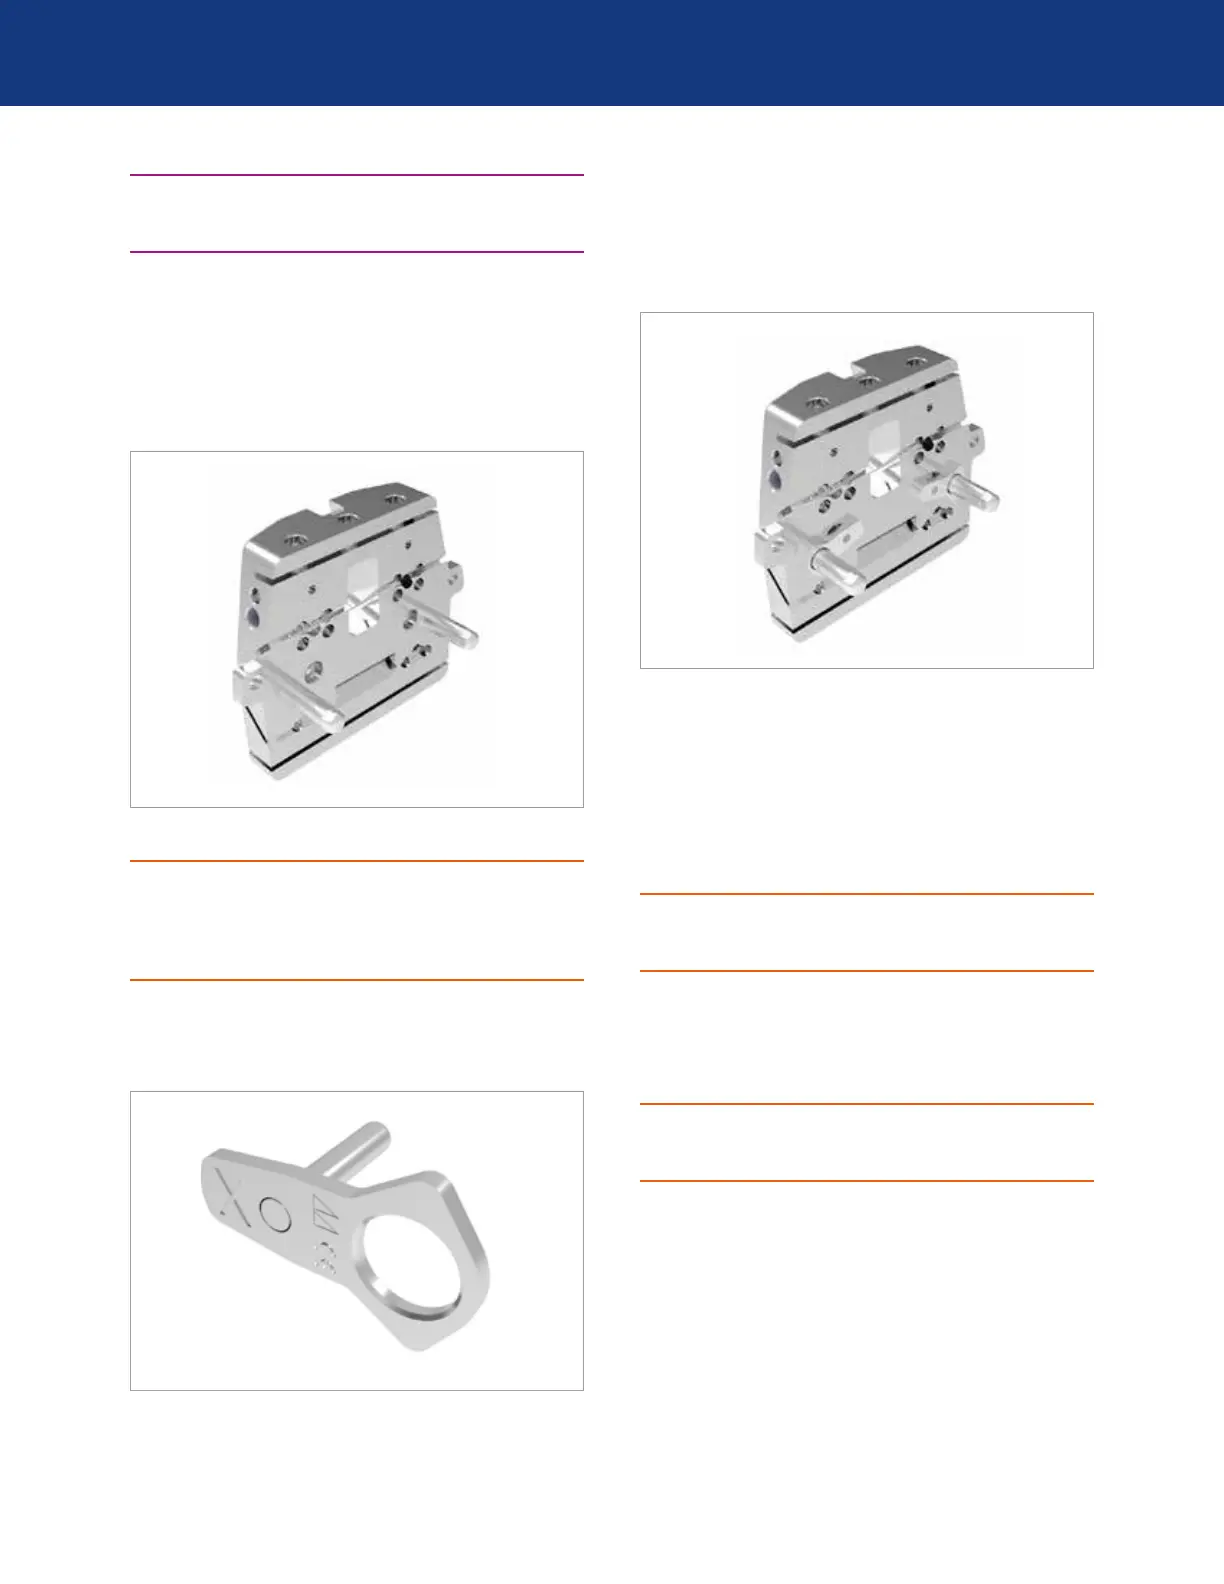
Remove the femoral sizer from the bone. Select the 4in1
block which corresponds to the size previously determined.
Prepare the 4in1 cut block by assembling the pegs to the
back of the cutting block. Apply the 4in1 block onto the
distal femoral resection.
Check the level of the anterior cut by placing the angel wing
into the slot of the anterior resection.
16.
CAUTION
The position of the 4in1 cutting block pegs DOES NOT
CORRESPOND to the position of the final femoral
component lugs. Preparation for the lugs of the final
femoral component is in a later step.
If one or both distal condyles were over-resected, move the
position of the 4in1 block distally using the dedicated 1 and
2 mm washers.
17.
To apply the washer, slide it over the posterior peg of the
4in1 block until it contacts the flat surface of the back of
the 4in1 block. Secure the washer by inserting the short
fixation peg on the washer into the cancellous bone screw
hole. Confirm the washer lies flush.
18.
NOTE: The position of the cancellous bone screw holes
relative to the posterior fixation pegs changes from size to
size.
Secure the 4in1 block by inserting two headed pins into the
lateral oblique fixation holes.
Option 2: Posterior Referencing Pins
CAUTION
If a correction washer is required, the posterior referencing
pins cannot be used.
Once the size has been established, pre-drill the medial and
lateral posterior referencing pin holes through the femoral
sizer. Then insert one pin in the medial hole and one pin in
the lateral hole.
CAUTION
While drilling, ensure that contact between the femoral
sizer and the distal resection is maintained.
Remove the femoral sizer by sliding it off the medial and
lateral pins inserted.