17
7. EXTENSION GAP CHECK
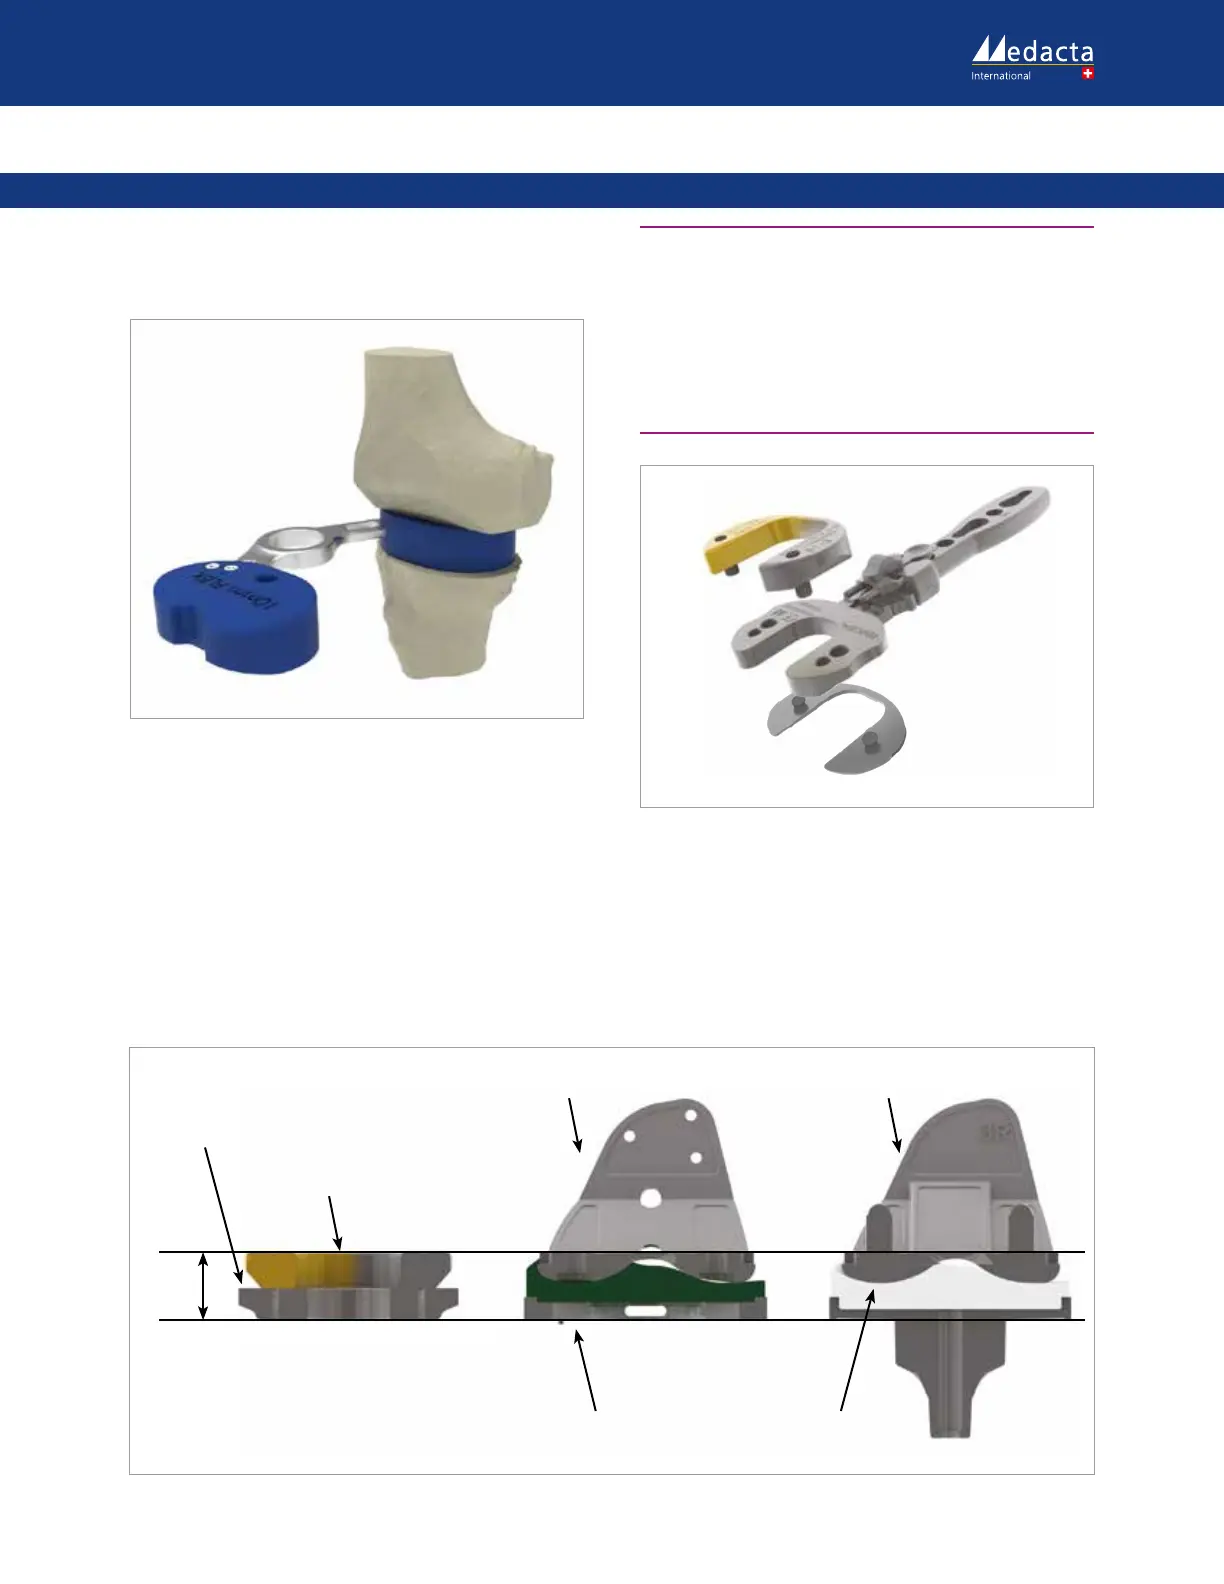
Test the extension gap with the flexion-extension spacer
(available thicknesses: 10, 11, 12, 13, 14 mm). Use the side
marked as “EXT”.
34.
Retract the medial and lateral soft-tissues and view the
interfaces between the femoral resection, spacer, and tibial
resection. Manually apply a varus-valgus stress with the
knee in full extension.
Confirm that laxity is negligible.
OPTION
As an alternative, modular spacers can be used in order to
check the extension gap. The femoral spacer simulates the
thickness of the femoral component, while the independent
cut reference spacer simulates the thickness of the tibial
component plus the minimum 10 mm insert. Assemble the
independent cut reference spacer with the femoral spacer
and the removable handle and introduce it into the joint
space.
35.
In case of laxity, the thickness of the different PE inserts
(11, 12, 13, 14, 17 and 20 mm) can be simulated by using
different tibial spacers (11, 12, 13, 14, 17 and 20 mm).
The femoral spacer must be fixed to the reference spacer
on the side marked “FEMORAL”. Similarly, the tibial spacer
must be fixed to the reference spacer on the side marked
“TIBIAL”.
19 mm
Trial femur
Femoral spacer
Independent cut
reference spacer
Trial tibia 10 mm tibial insert
Final implant
36.