GMK Sphere Calipered Kinematic Alignment Surgical Technique
22
9. FINISHING THE FEMUR AND TIBIA
9.1 FEMORAL FINISHING
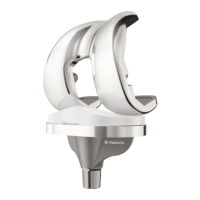
Once trial reduction has been deemed satisfactory, secure
the femoral trial by inserting two pins into the anterior
holes. Drill the holes for the femoral pegs through the holes
in the distal condyles of the femoral trial.
45.
CAUTION
Clear the posterior condyles from any osteophytes and any
overhanging bone that could impinge during flexion,
especially in the medial compartment.
Remove the pins and the femoral trial. Prepare the femoral
trochlear-milling guide: the size of the femoral implant can
be selected turning the screw inside the blue circle. Sizes
1, 3 and 5 are shown on the right scale, while sizes 2, 4 and
6 can be selected on the left scale.
When implanting a size 7 femoral implant, size 6 must be
selected on the femoral trochlear-cutting guide, as peg
position does not change between the two sizes. Please
note that peg position does not change between size 1 and
1+, 2 and 2+, and so on.
46.
Fixation holes
Position the trochlear-milling guide on the distal resection
plane using the built-in pegs and insert two pins into the
fixation holes. For enhanced stability, it is recommended to
use a different row of pin holes on the medial and lateral
side of the guide. Position the reamer at the lower end of
the reaming guide and ream the femoral box by sliding the
reamer upwards onto the guide.
CAUTION
The reaming guide might overhang the anterior cut,
depending on femoral size. Reaming should be stopped
when bone contact is lost, even though the upper end of the
guide has not been reached. Make sure to stop reaming
before coming in contact with the anterior femoral soft
tissues to avoid damaging them.
47.
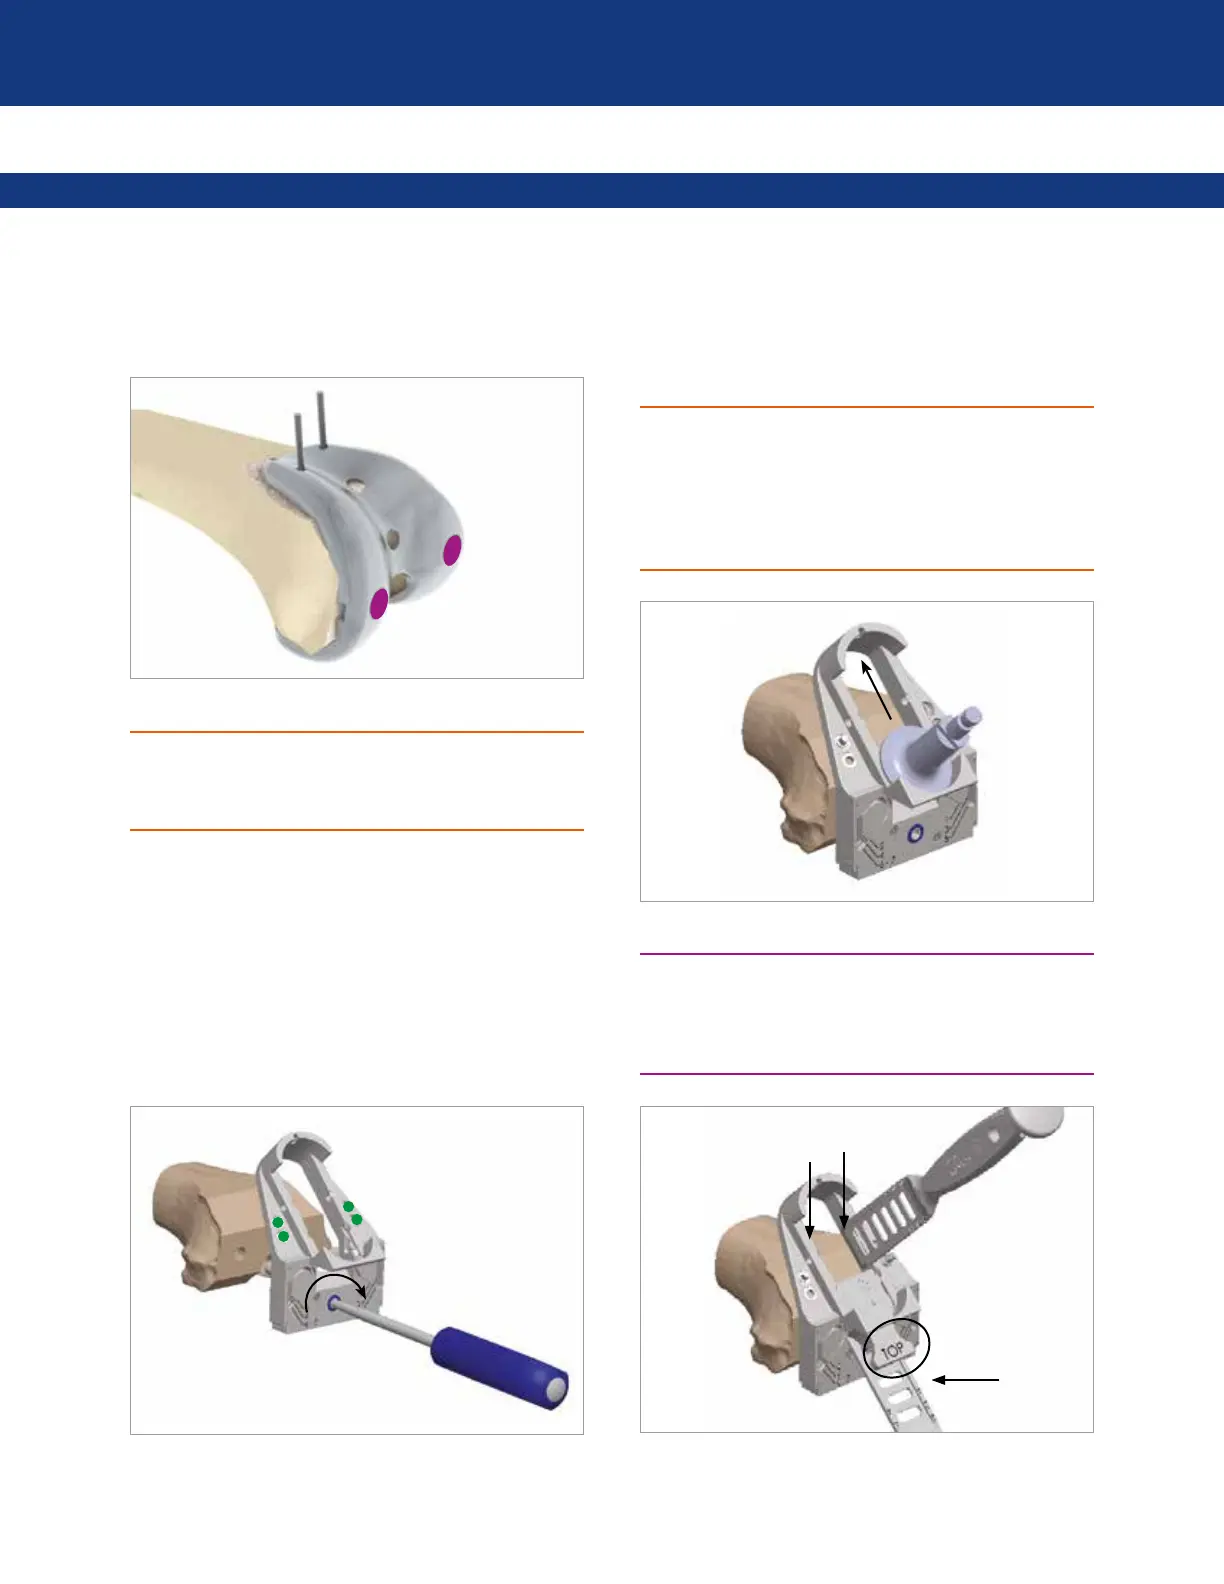
OPTION
The femoral trochlear-milling guide can be used also with
the osteotome. Assemble the adapter ensuring the “TOP”
mark is facing up. Perform the cuts following the sequence
shown in the figure to finish the trochlea.
1
2
3
48.