23
Option : osteotome
Femoral finishing can be performed with the osteotome by
using the femoral trochlear-cutting guide.
A
2
1
4
3
6-7
5
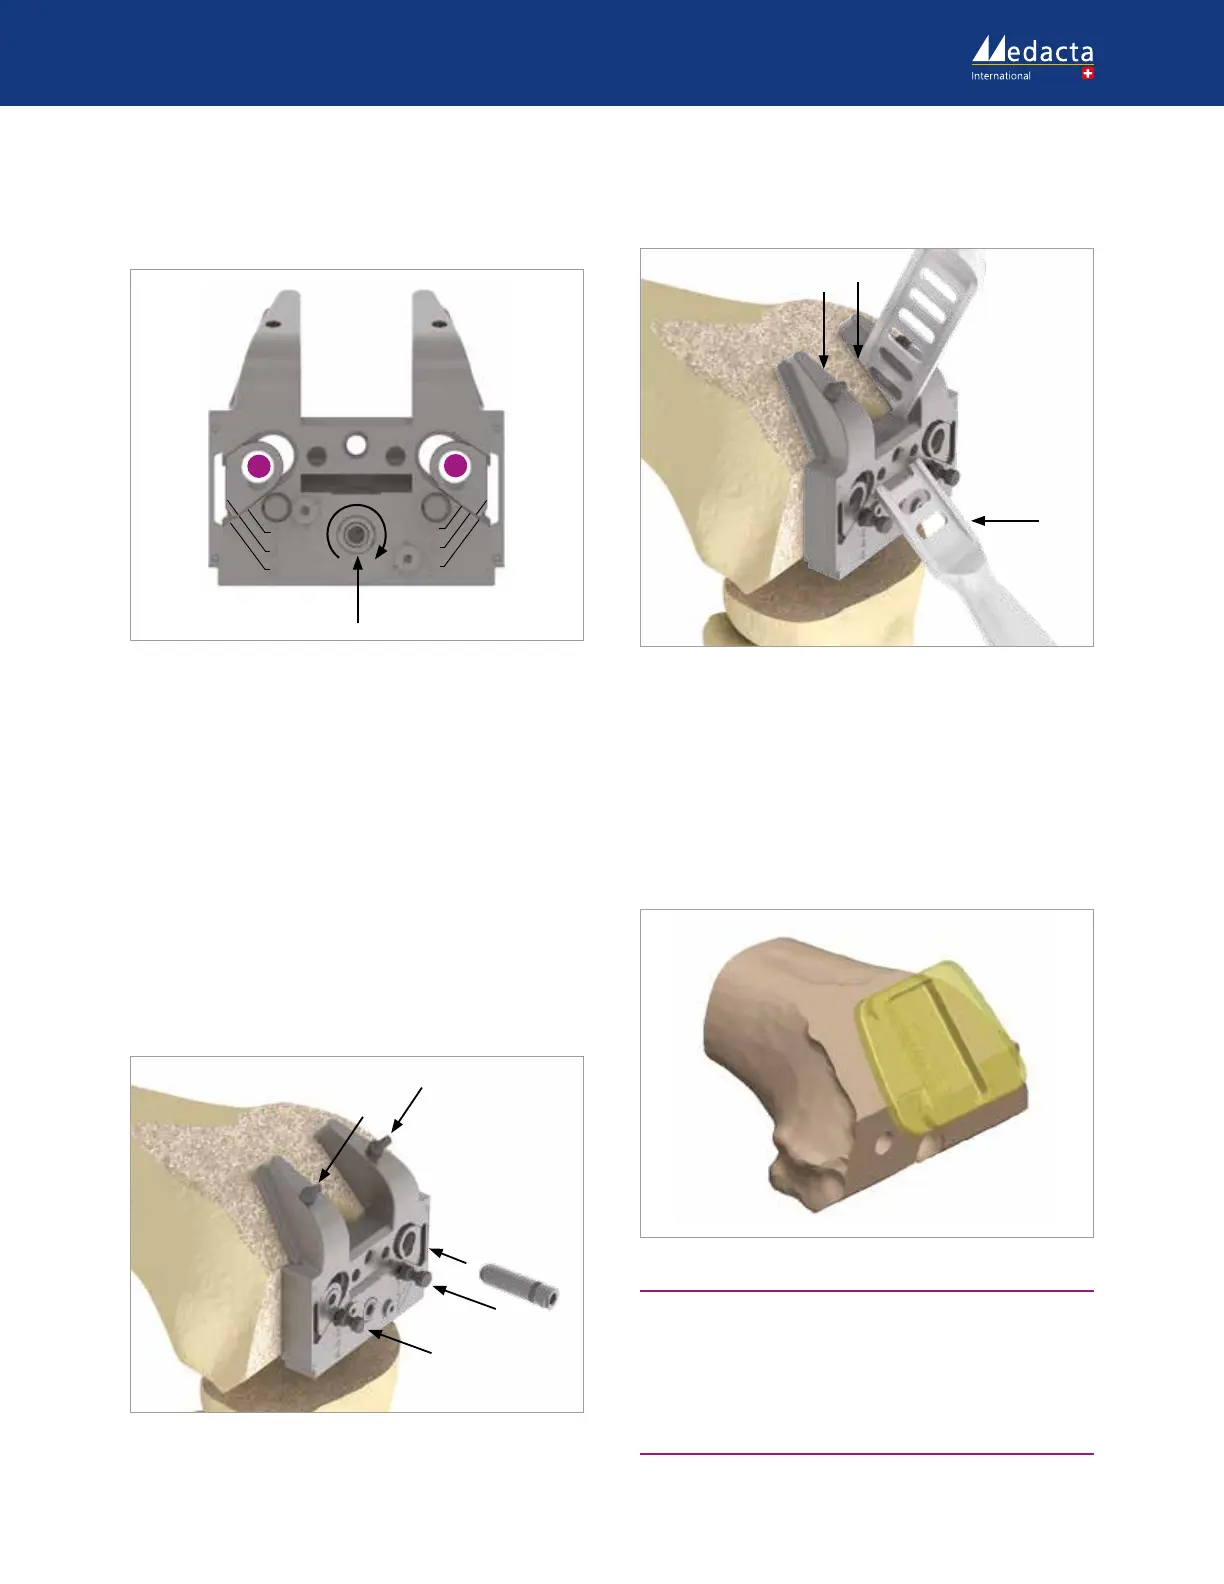
49.
Femoral peg holes
Remove the femoral trial, and prepare the femoral trochlear
cutting guide by turning the screw (A) and selecting the size
of the femoral implant. Sizes 1, 3 and 5 can be selected on
the right scale, while sizes 2, 4 and 6 can be selected on the
left scale. When implanting a size 7 femoral implant, size 6
must be selected on the femoral trochlear-cutting guide, as
peg position does not change between the two sizes.
Please note that peg position does not change between
size 1 and 1+, 2 and 2+ and so on.
Place the femoral trochlear-cutting guide on the resected
femur and insert two pegs into the previously drilled holes
(B). Use the built-in pins to stabilize the femoral
trochlearcutting guide (C,D). For enhanced stability, insert
two additional pins into the anterior holes of the guide (E,F).
B
F
E
D
C
50.
Perform the cuts following the sequence shown in the
figure to finish the trochlea.
1
2
3
51.
9.2 FEMORAL FINISHING CHECK
Remove the femoral trochlear milling guide and check the
performed femoral box cut by superimposing the box cut
verifier on the trochlea. The femoral box cut is correct if the
medial and lateral flanges of the box cut verifier are flush
with the femoral bone. If a correction is needed, refine the
cut using the manual rasp.
52.
OPTION
The femoral box cut can be checked using the manual rasp
(ref. 02.02.10.0173). Remove the femoral trochlear milling
guide and lay the rasp on the base of the femoral box. The
cut is correct if the upper surface of the manual rasp and
the femoral bone are flush. If a correction is needed, refine
the cut using the manual rasp.