MVR Lite-UG01-EN-200324-OB
<8>
MVR Lite User Guide - English
To Get Started:
1. Connect a camera with an HDMI output connector to the matching MVR Lite HDMI input connector. It is recommended to keep
any cable connections as short as possible to avoid electromagnetic interferences caused by cables.
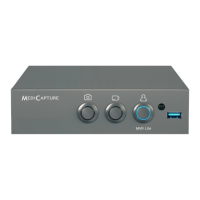
2. Insert the supplied MediCapture USB ash drive in the front panel. (Connect USB ash drive and all external pointing
devices rst, e.g., mouse, keyboard, touch screen, etc. before switching on the device from the back panel.)
3. Turn on the unit from the back panel power switch.
Turn on your camera system(s) after MVR Lite has nished its boot sequence.
4. Prior to recording images and video for the rst time, it is recommended to check the initial settings found in the
INFORMATION Page .
As long as no patient study was started, this INFORMATION page gives you access to MVR Lite Settings .
The following settings are recommended to be checked prior to the rst use of MVR Lite:
5. Once your settings have been customized, use your imaging equipment as you normally do. Tap on the Start eld to
create a new patient folder and to type in patient information. Choose Capture Photo or Record Video by pushing the
corresponding button. Press again to stop recording.
6. When you wish to end the study, press the END OF STUDY icon [or F3 on your keyboard]. Afterwards, you can either
nish the study or review and edit.
If you wish to continue with the last active study, please tap on the upper return icon [or ESC on your keyboard] to
go back.
7. When you nish the study, it is safe to remove the USB ash drive from the MVR Lite. Insert the stick into the USB
connector of a computer. Drop and drag your recordings from the stick to your computer for viewing, archiving, etc.
Note: Do not remove the ash drive from MVR Lite while recording!
a) User Interface Language
➤ Settings ➤ System ➤ Language
Note: You can select the touch keyboard layout
(language) every time the touch keyboards appears.
Simply tap on the “globe” icon to change the layout.
b) Time Zone, Date and Time
➤ Settings ➤ System ➤ Date and Time
c) Patient Information denition
➤ Settings ➤ System ➤ Patient Info
d) Set Network settings* For Network storage, the
MVR Remote App and network printing, please use
Auto-IP setup or Manual IP setup.
➤ Settings ➤ Advanced ➤ Connections ➤ Network
e) Network Storage properties.* Set properties of your
shared folder on the network storage target.
➤ Settings ➤ Advanced ➤ Connections ➤ Network
Storage
f) Storage target selection. For Multi-Storage you can
select two* options. This setting is very important as it
also denes your Review options in the Archive and
search options for existing Patient Information.
➤ Settings ➤ System ➤ Storage
g) Video quality and codec format H.264 or HEVC
➤ Settings ➤ Video/Audio ➤ Recording Quality
h) Photo format JPG or PNG
➤ Settings ➤ Video/Audio ➤ Photo Settings
i) User Accounts. You can dene User Accounts with
specic passwords to protect the device and data
from misuse.
➤ Settings ➤ Advanced ➤ User Accounts
j) Printer Selection and Number of Print Copies
(Network printers only available when Network is
activated!) Please ask your IT-Administrator to connect
MVR Lite to LAN network rst.
➤ Settings ➤ System ➤ Printer
k) Audio-Recording ON/OFF and microphone selection
➤ Settings ➤ Video/Audio ➤ Audio Input
* Note. Only available when Network is activated by
activation key.