5-3
MAINTENANCE MA-5081-E B4 NS ADHESIVE MELTER MANUAL
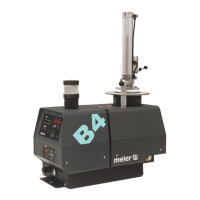
Before disconnecting any hydraulic component or opening any distributor
outlet, the following steps must be performed:
1. Disconnect the equipment’s power switch located on the side, next to
the power supply input.
2. Manually purge (or using the corresponding programmer control) the
applicator used.
3. Open the purge valve (in case of the equipment has one), located on
the distributor next to the filter turning it anti-clockwise. To do so, use
a slotted screwdriver. When the adhesive exits without pressure, close
the valve by turning it clockwise.
Cleaning the tank
Both the cylindrical hopper and hot-melt tank will need cleaning occasionally
to maintain their melting and anti-adherence properties. The tank interior is
covered in PTFE and sufficiently slanted to help the unloading of the hot-melt
adhesive and prevent it from remaining inside which would result in burning.
Also, when adhesives are mixed, reactions may occur between them, causing
degeneration and problems unloading to the pump.
It is therefore recommended that the tank is cleaned each time:
• A different hot-melt adhesive is used.
• Too much carbon deposit is generated inside.
Changing adhesive type
1. Use up as much of the adhesive as possible.
If you need to unload the adhesive before it has been used up, follow
the instructions in the section ‘Emptying the tank’.
2. Clean the remains of the hot-melt adhesive from inside the tank.
Warning: Use the appropriate protective equipment for high temperatures.
3. Add the new block of adhesive, wait until it has melted and pump
through the system (hose and applicator).
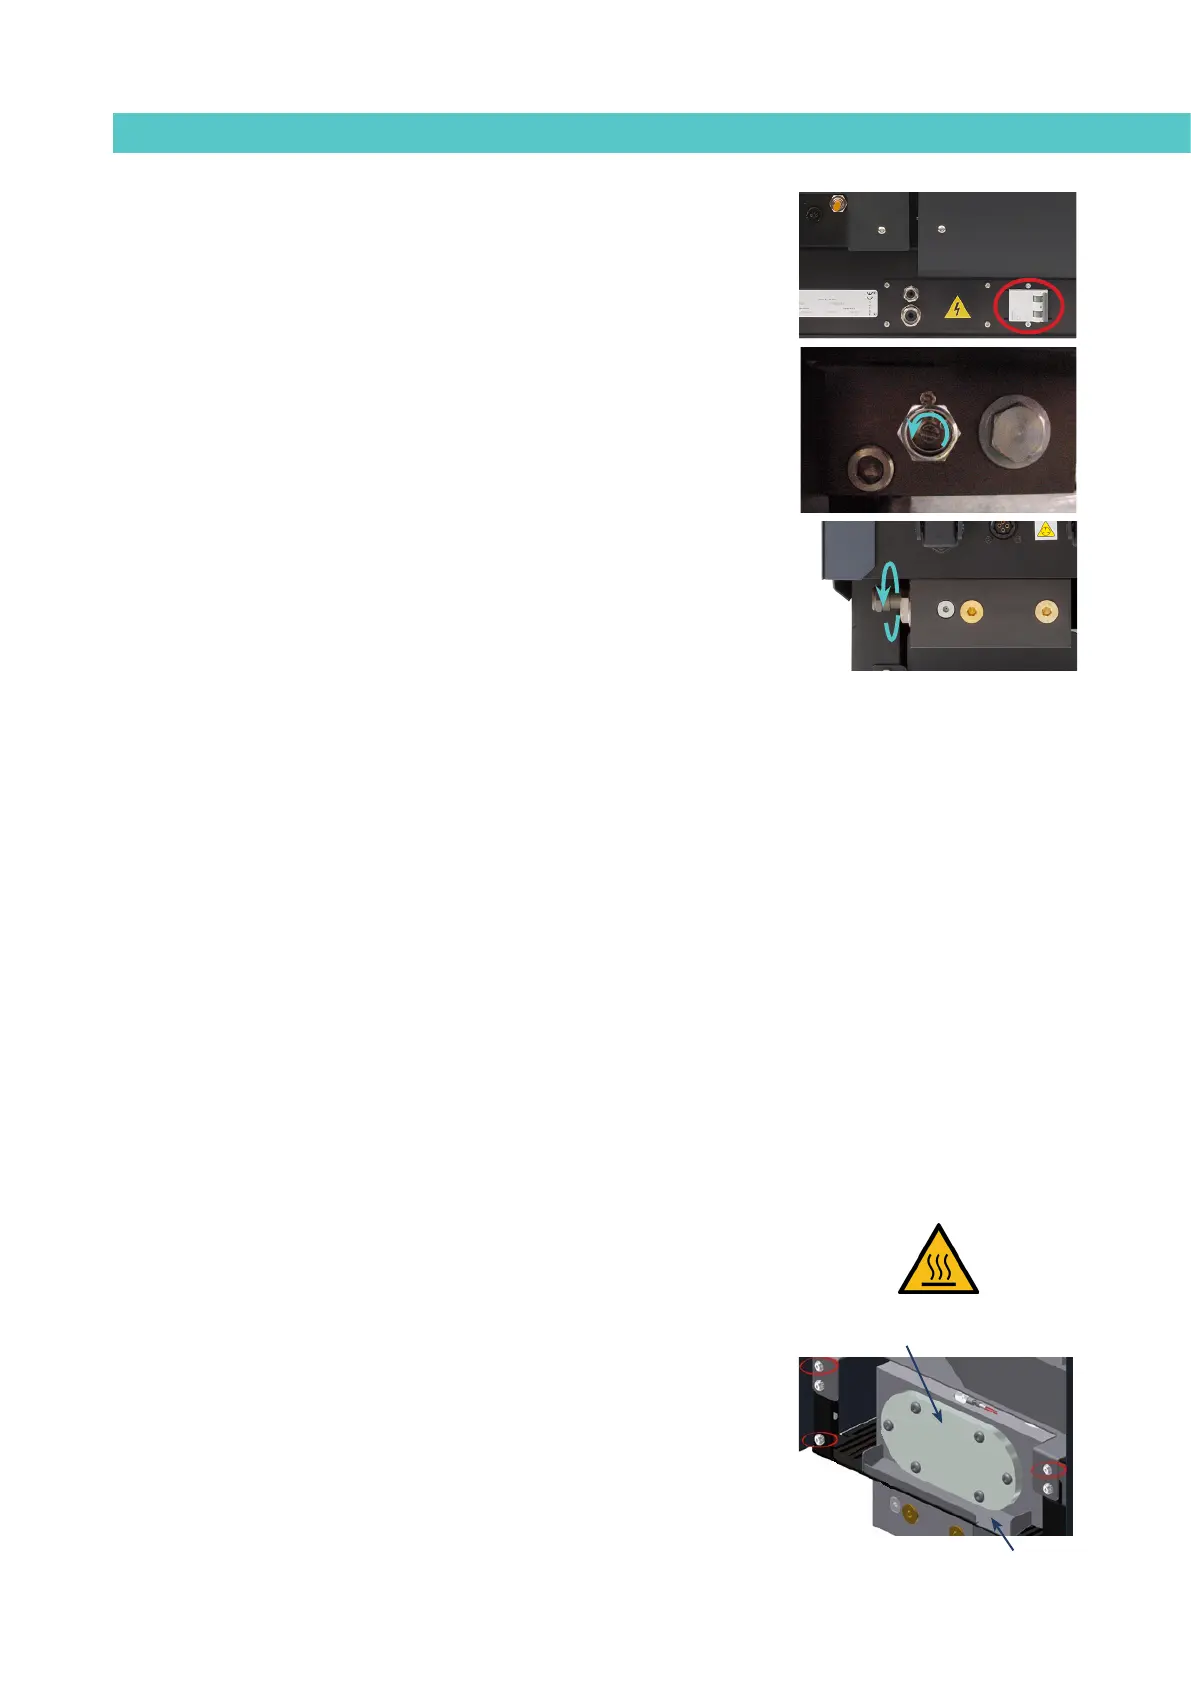
Cleaning burnt adhesive
1. Empty the adhesive directly from the reserve tank so that the carbon
deposit does not pass through the pump circuit. To do this, remove the
six screws to release the tank cover.
Overflow
Remove 6 screws
 Loading...