•
•
•
•
1.
Make sure the system air flow is compatible with your installation selection. It is important to keep the airflow within the rack
in the same direction.
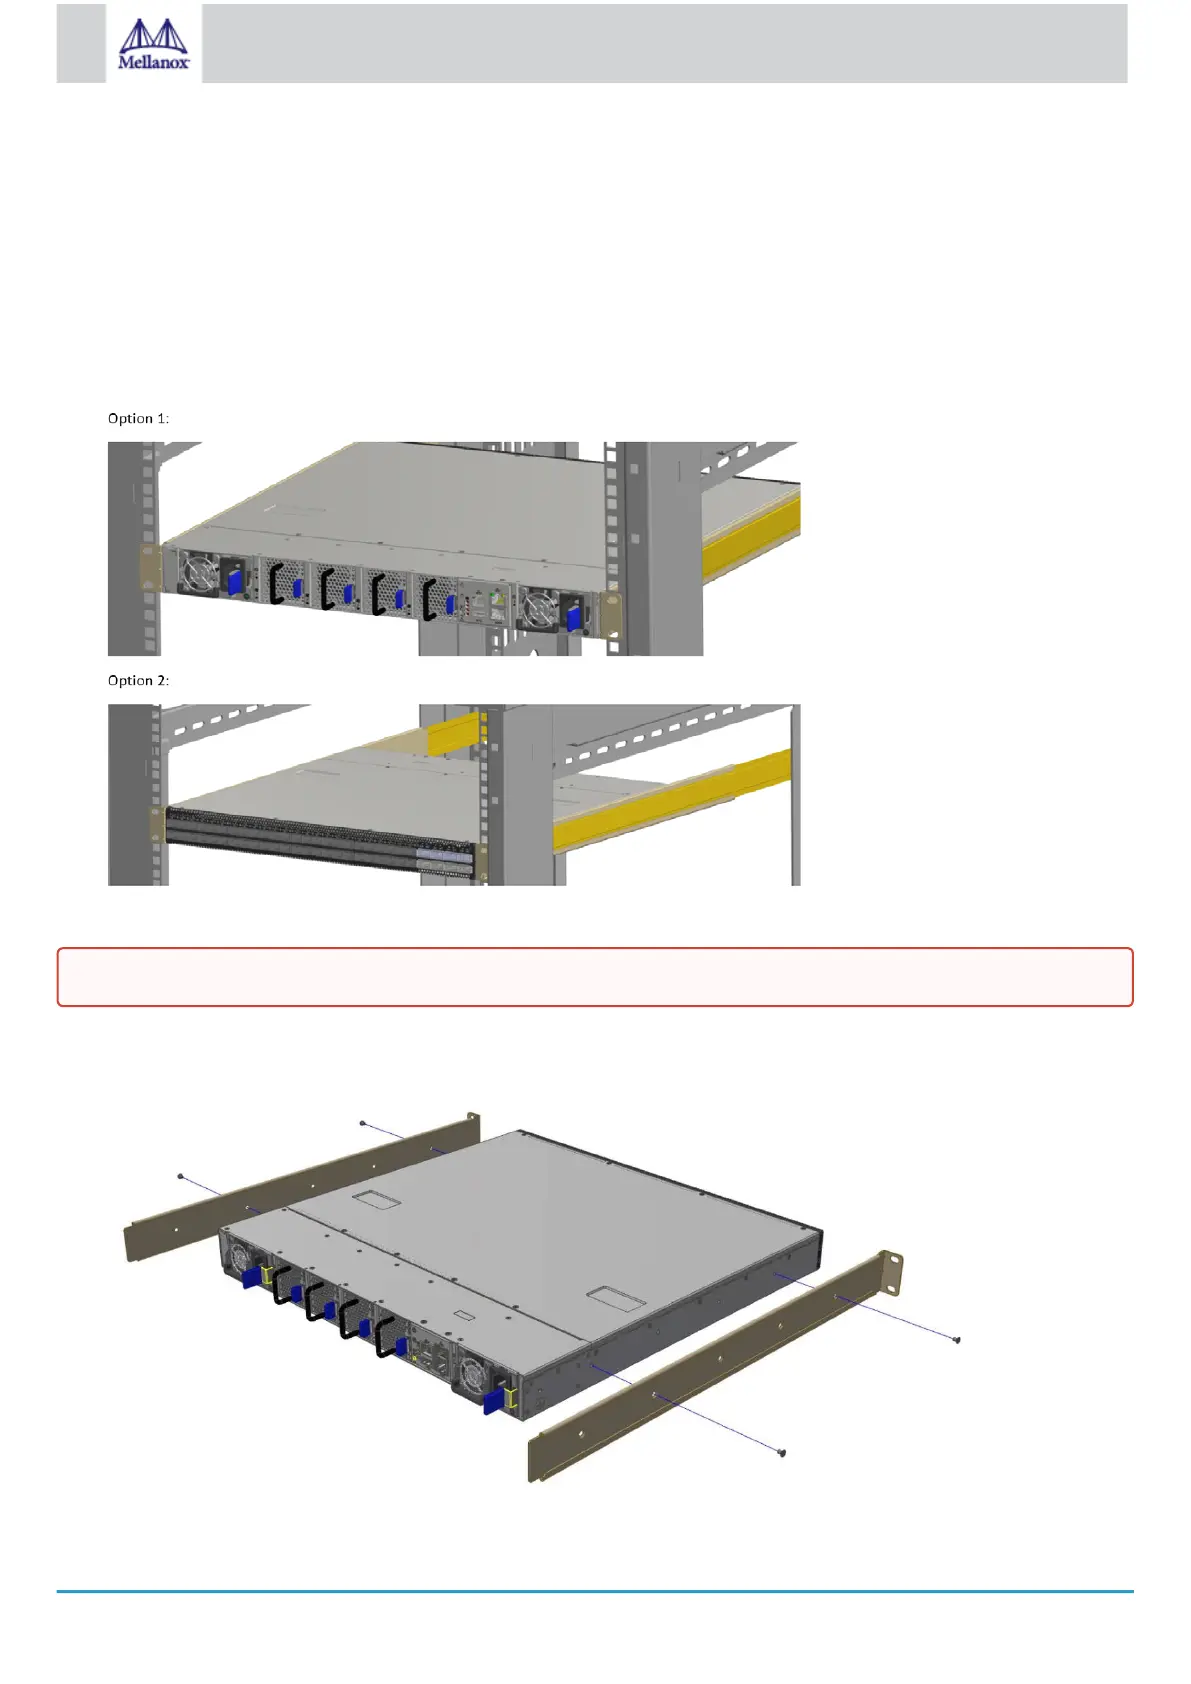
Note that the part of the system to which you choose to attach the rails (the front panel direction, as demonstrated in Option 1
or the FRUs direction, as demonstrated in Option 2) will determine the system’s adjustable side. The system’s part to which
the blades are attached, will be adjacent to the cabinet.
In case there are cables that cannot bend within the rack, or in case more space is needed for cable bending radius, it is
possible to recess the connector side or the FRU side by 3.5" (8.9 cm), by optional placement of the system’s rails.
The FRU side is extractable. Mounting the rack blades inverted to the FRU side (Option 2) will allow you to slide the FRUs,
in and out.
Installation Options
To mount the system into the rack:
Attach the left and right rack mount rails (A) to the switch, and secure the chassis in the rails by screwing 2 flat head Phillips
screws (D) in the designated points on each side (a total of 4 screws). To tighten the screws, use a torque of 1.5±0.2 Nm.
Attaching the Rails to the Chassis
At least two people are required to safely mount the system in the rack.
 Loading...