DIRECT FUEL INJECTION
Page 3B-28 90-855347R1 JANUARY 1999
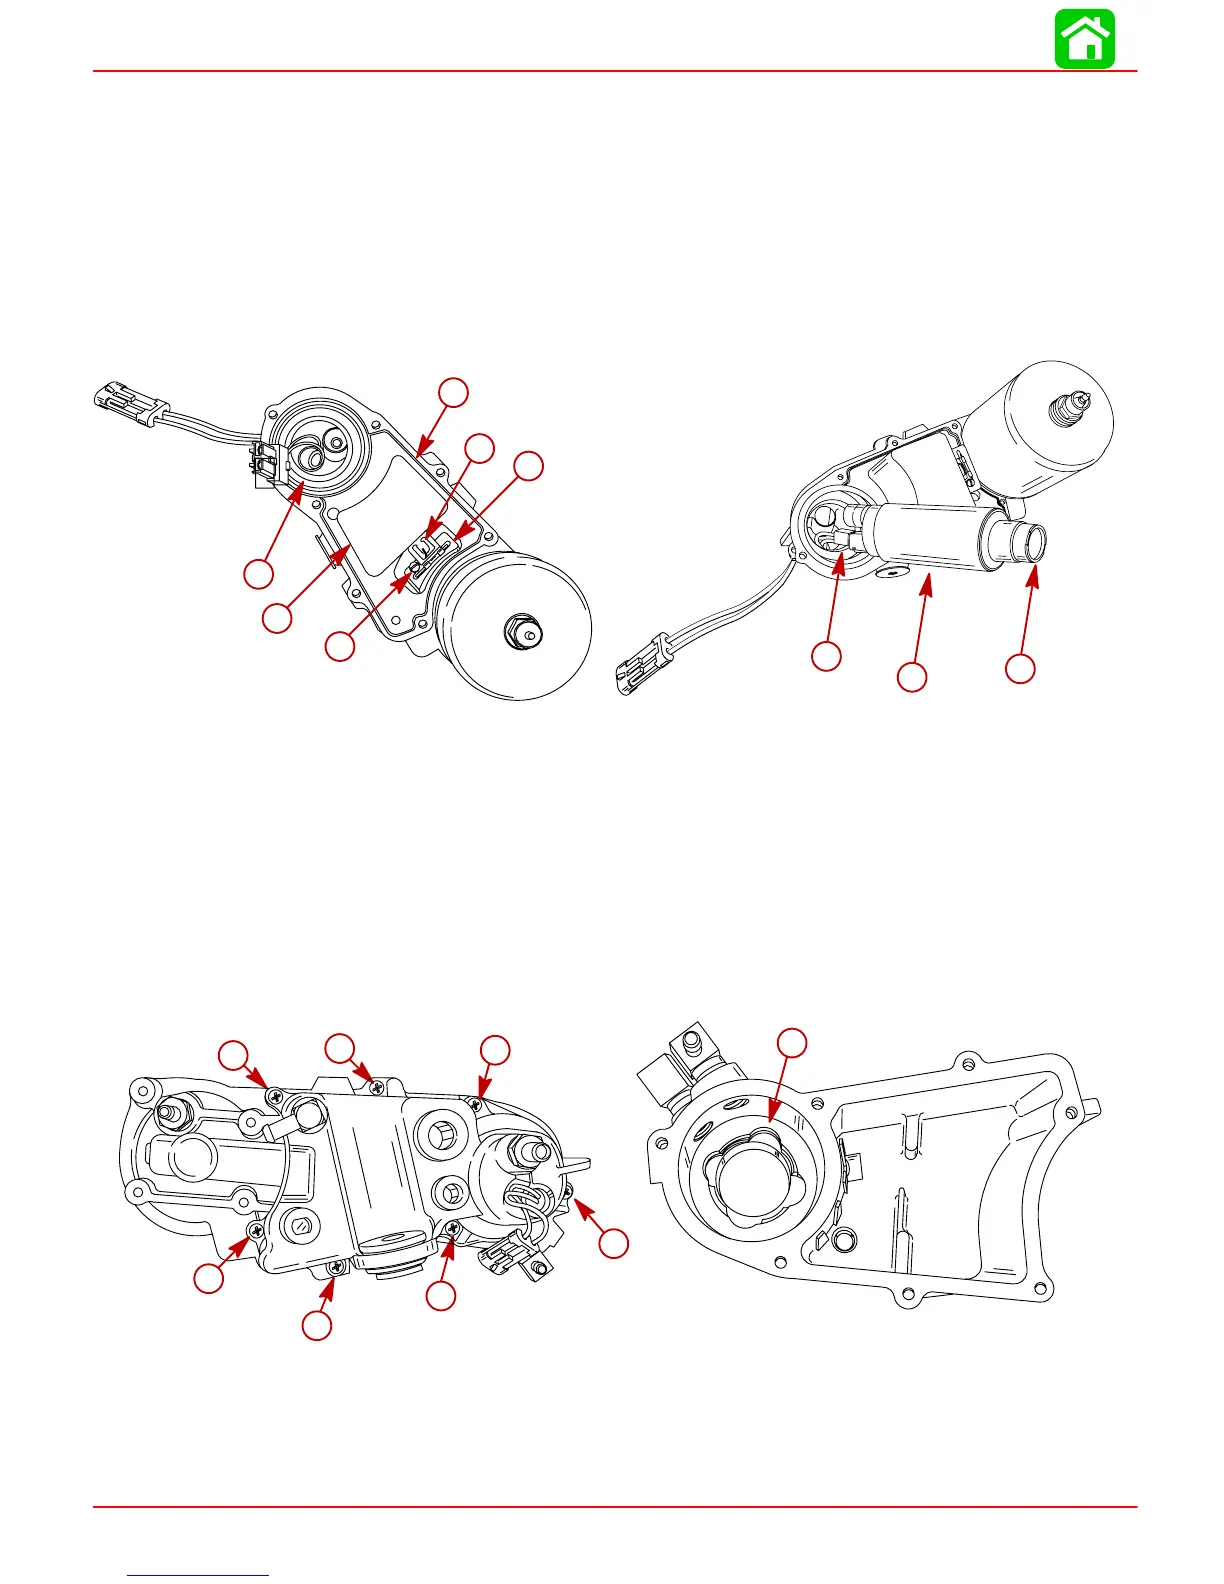
Vapor Separator Reassembly
1. Reinstall phenolic sealing plate onto vapor separator cover.
2. Secure float, needle and pivot pin assembly to separator cover with screw. Torque
screw to 10 lb. in. (1.0 Nm)
3. Apply 2-4-C w/Teflon to lips of seal in separator cover.
4. Connect electrical harness to fuel pump. Inspect fuel pump filter screen for debris. Re-
move screen and clean as required.
5. Seat fuel pump and harness into separator cover being careful not to pinch harness.
56057
c
a
g
h
i
56058
b
e
d
a
c
f
a
b
c
d
e
a-Sealing Plate
b-Float
c-Needle
d-Pivot Pin
e-Screw [Torque to 10 lb. in. (1.0
N·m)
f-Seal (Seal shoulder faces OUT)
g-Harness
h-Filter
i-Fuel Pump
6. Apply 2-4-C w/Teflon to lips of seal in separator tank.
7. Install separator cover with pump onto separator tank.
8. Secure cover to tank with 7 screws. Torque screws to 30 lb. in. (3.5 Nm).
57342
57343
a
b
b
b
b
b
b
b
a-Seal
b-Screws [Torque to 30 lb. in. (3.5 Nm)]
 Loading...


