EasyManuals Logo

Mercury Optimax 135 Service Manual

Mercury Optimax 135
522 pages
To Next Page IconTo Next Page
To Previous Page IconTo Previous Page
Page #339 background imageLoading...
Page #339 background image
POWER TRIM
Page 5B-34 90-855347R1 JANUARY 1999
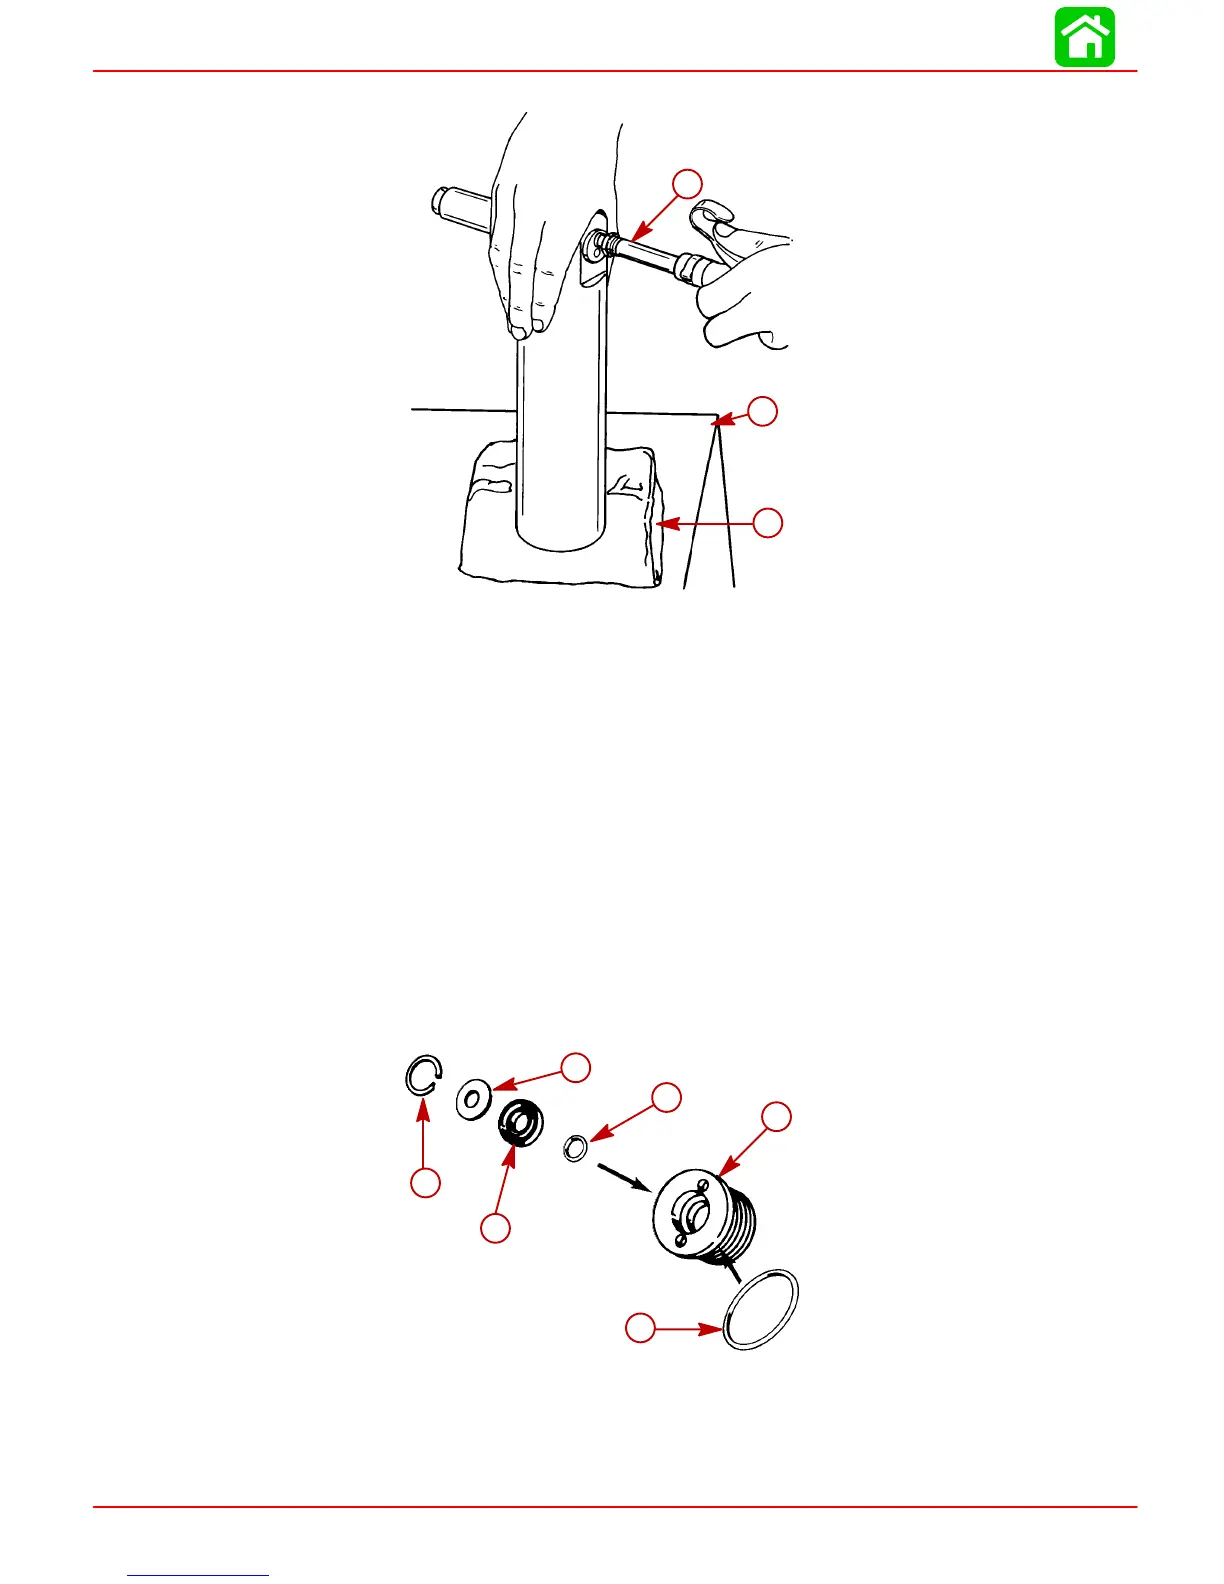
8. Place cylinder as shown. Hold down on cylinder and inject air into shaft opening.
51353
c
b
a
a-Shop Cloth
b-Solid Surface
c-Air Nozzle
9. Remove shaft after Memory Piston Cup has been expelled. Replace allen plug re-
moved in Step 5 and tighten securely.
CLEANING AND INSPECTION
1. Inspect all internal parts for damage or wear. Clean and replace parts as necessary.
2. Inspect tilt rod for scratches. Replace scraper seal in rod end cap if tilt rod is scratched
or worn.
3. Slight scratches or tool marks less than 0.005 in. (0.1 mm) deep in cylinder are accept-
able.
Scraper Seal Replacement
1. Remove components from end cap.
a
b
b
c
d
e
a-Cap
b-O-ring (2)
c-Scraper Seal
d-Washer
e-Retaining Ring

Table of Contents

Questions and Answers:

Question and Answer IconNeed help?

Do you have a question about the Mercury Optimax 135 and is the answer not in the manual?

Mercury Optimax 135 Specifications

General IconGeneral
Engine TypeV6
Horsepower135 HP
Fuel Induction System2-stage direct fuel injection
Full Throttle RPM Range5000-5750 RPM
Alternator Output60 amp / 756 watt
Starting SystemElectric
SteeringRemote
Dry Weight431 lbs
Shaft Length20", 25"

Related product manuals