CHARGING & STARTING SYSTEM
Page 2B-6 90-855347R1 JANUARY 1999
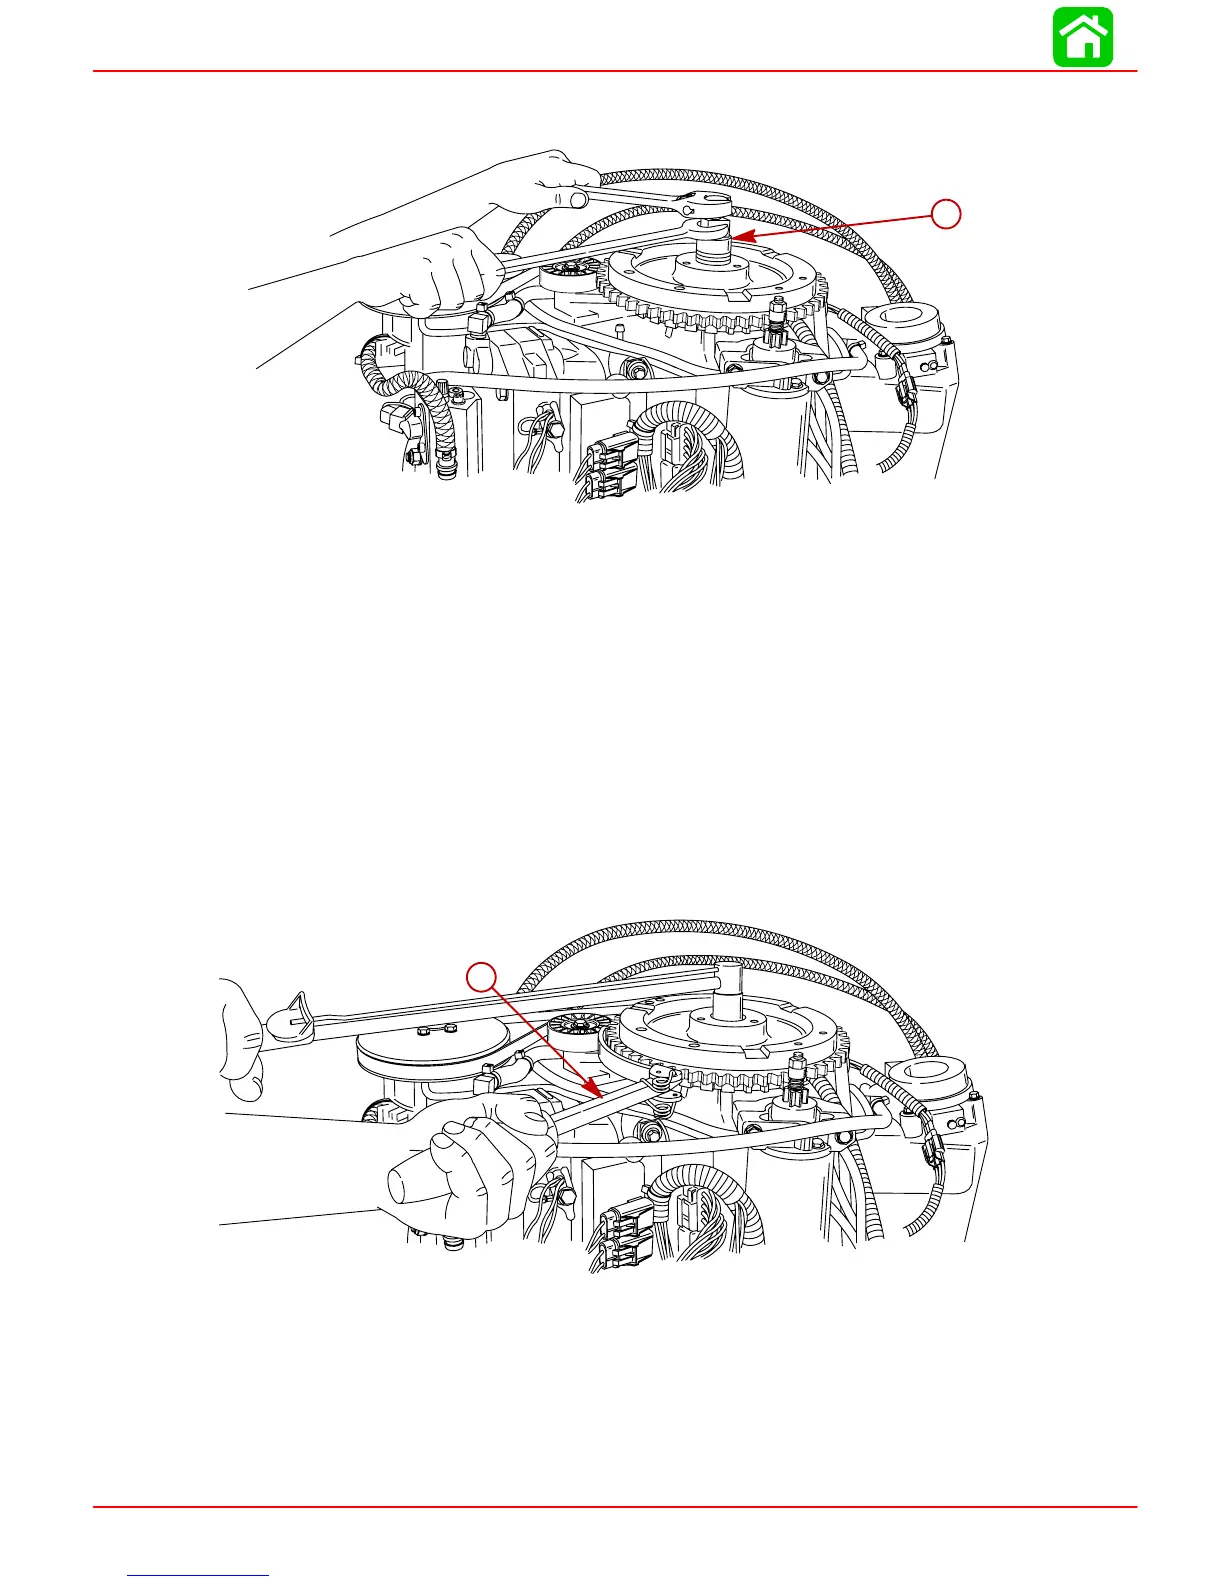
5. Hold flywheel tool with wrench while tightening bolt down on protector cap. Tighten
bolt until flywheel comes free.
57413
a
a-Flywheel Puller (91-73687A2)
NOTE: Neither heat or hammer should be used on flywheel to aid in removal as damage
to flywheel or electrical components under flywheel may result.
6. Remove flywheel. Inspect flywheel for cracks or damage.
Installation
IMPORTANT: Do not apply grease to the flywheel taper or corresponding crank-
shaft splines. The application of grease to these areas will result in flywheel hub
breakage when tightening flywheel nut.
1. Install flywheel.
2. Install flywheel washer and nut.
3. Hold flywheel with Flywheel Holder (91-52344). Torque nut to 125 lb-ft (169.5 Nm).
57414
a
a-Flywheel Holder (91-52344)