RIGHT HAND NON-RATCHETING
90-855347R1 JANUARY 1999 Page 6A-33
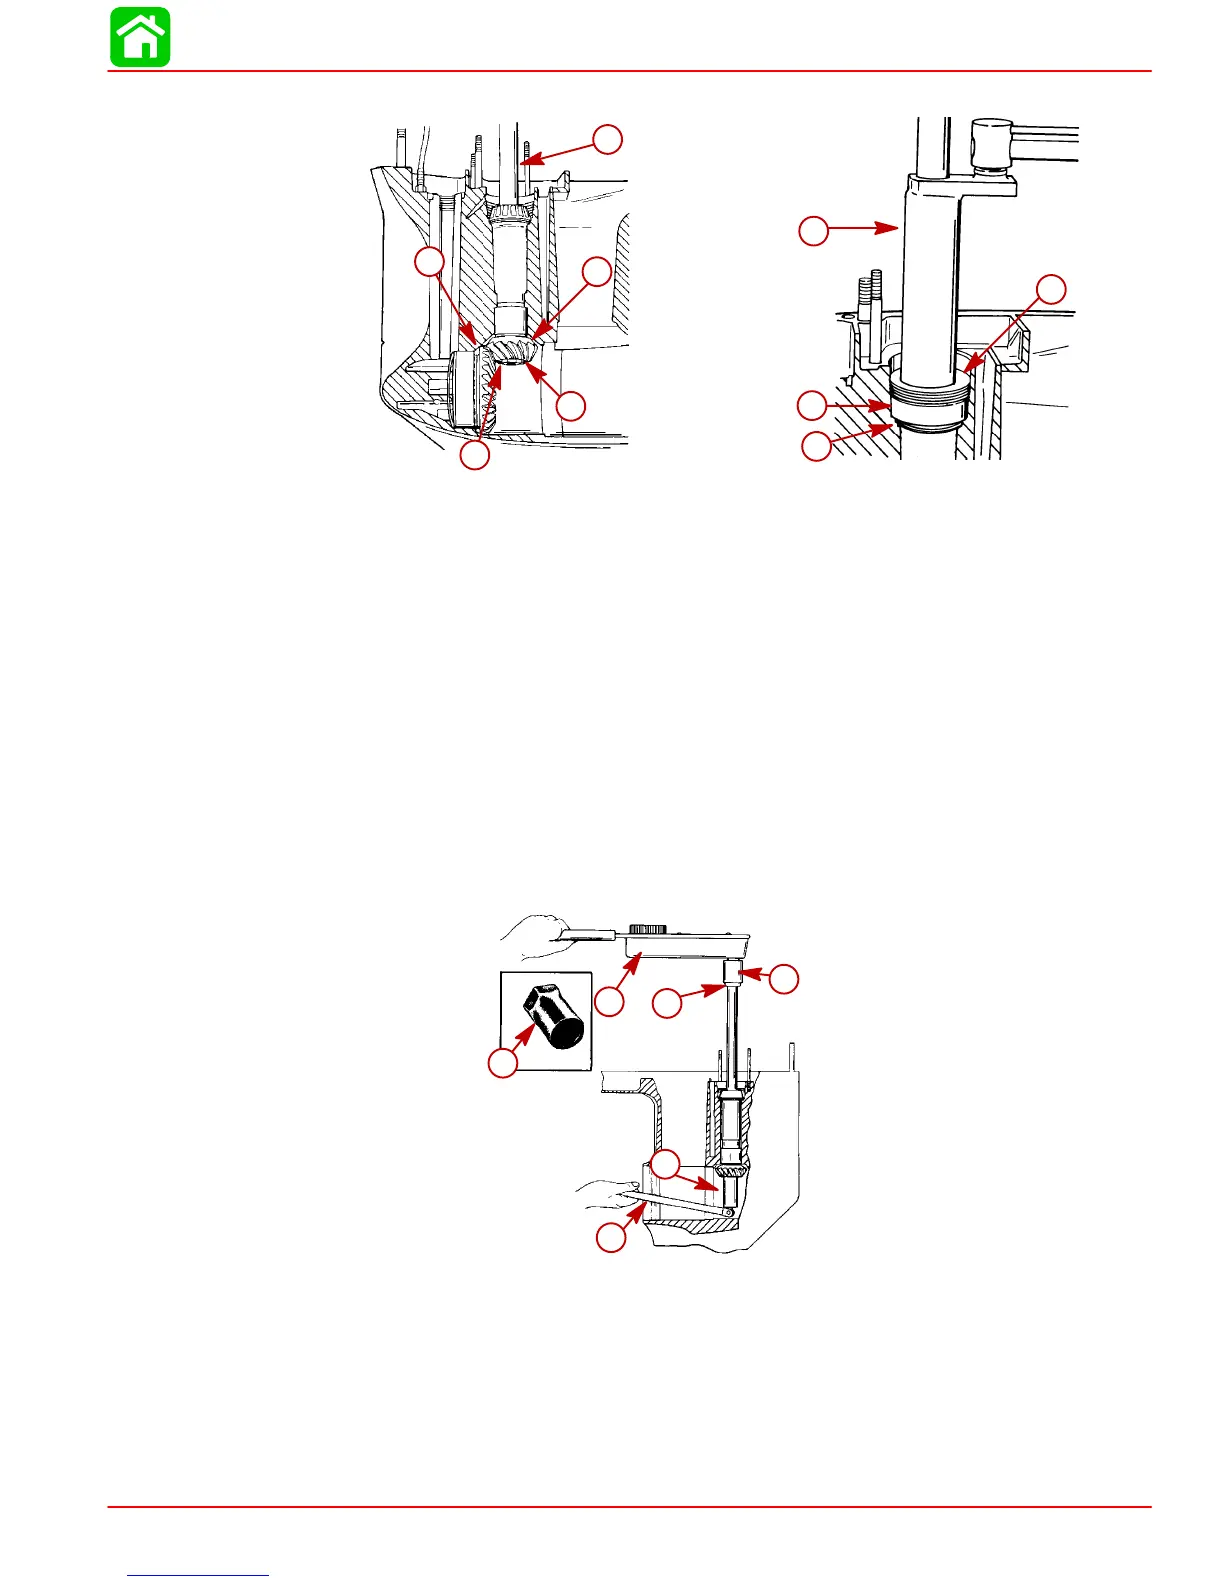
9. Install bearing race and bearing retainer.
51880
51867
f
g
h
i
a
b
c
d
e
a-Driveshaft (rotate to engage splines with pinion gear)
b-Forward Gear Assembly
c-Pinion Gear
d-Washer (located above pinion nut)
e-Pinion Nut (apply Loctite 271 on threads and install with flat side away from
pinion gear)
f-Shim(s)
g-Bearing Race
h-Bearing Retainer (Word “OFF” must be visible) Torque to 100 lb. ft.
(135.5 Nm)
i-Bearing Retainer Tool (91-43506)
10. Use a socket and flex handle to hold pinion nut (pad area where flex handle will con-
tact gear housing while torquing nut).
11. Place Driveshaft Holding Tool (91-34377A1) or (91-90094) over crankshaft end of
driveshaft. Torque pinion nut to 75 lb. ft. (101.5 Nm).
a
b
a
c
c
d
a-Driveshaft Holding Tool (91-34377A1)
b-Torque Wrench; Torque Nut to 75 lb. ft. (101.5 Nm)
c-Socket
d-Breaker Bar
IMPORTANT: Wipe any excess Loctite from pinion nut and pinion gear.
 Loading...


