Section 4 - Custom Border Configuration (GeoFence)
Page 34 90-8M0072763 eng JUNE 2012
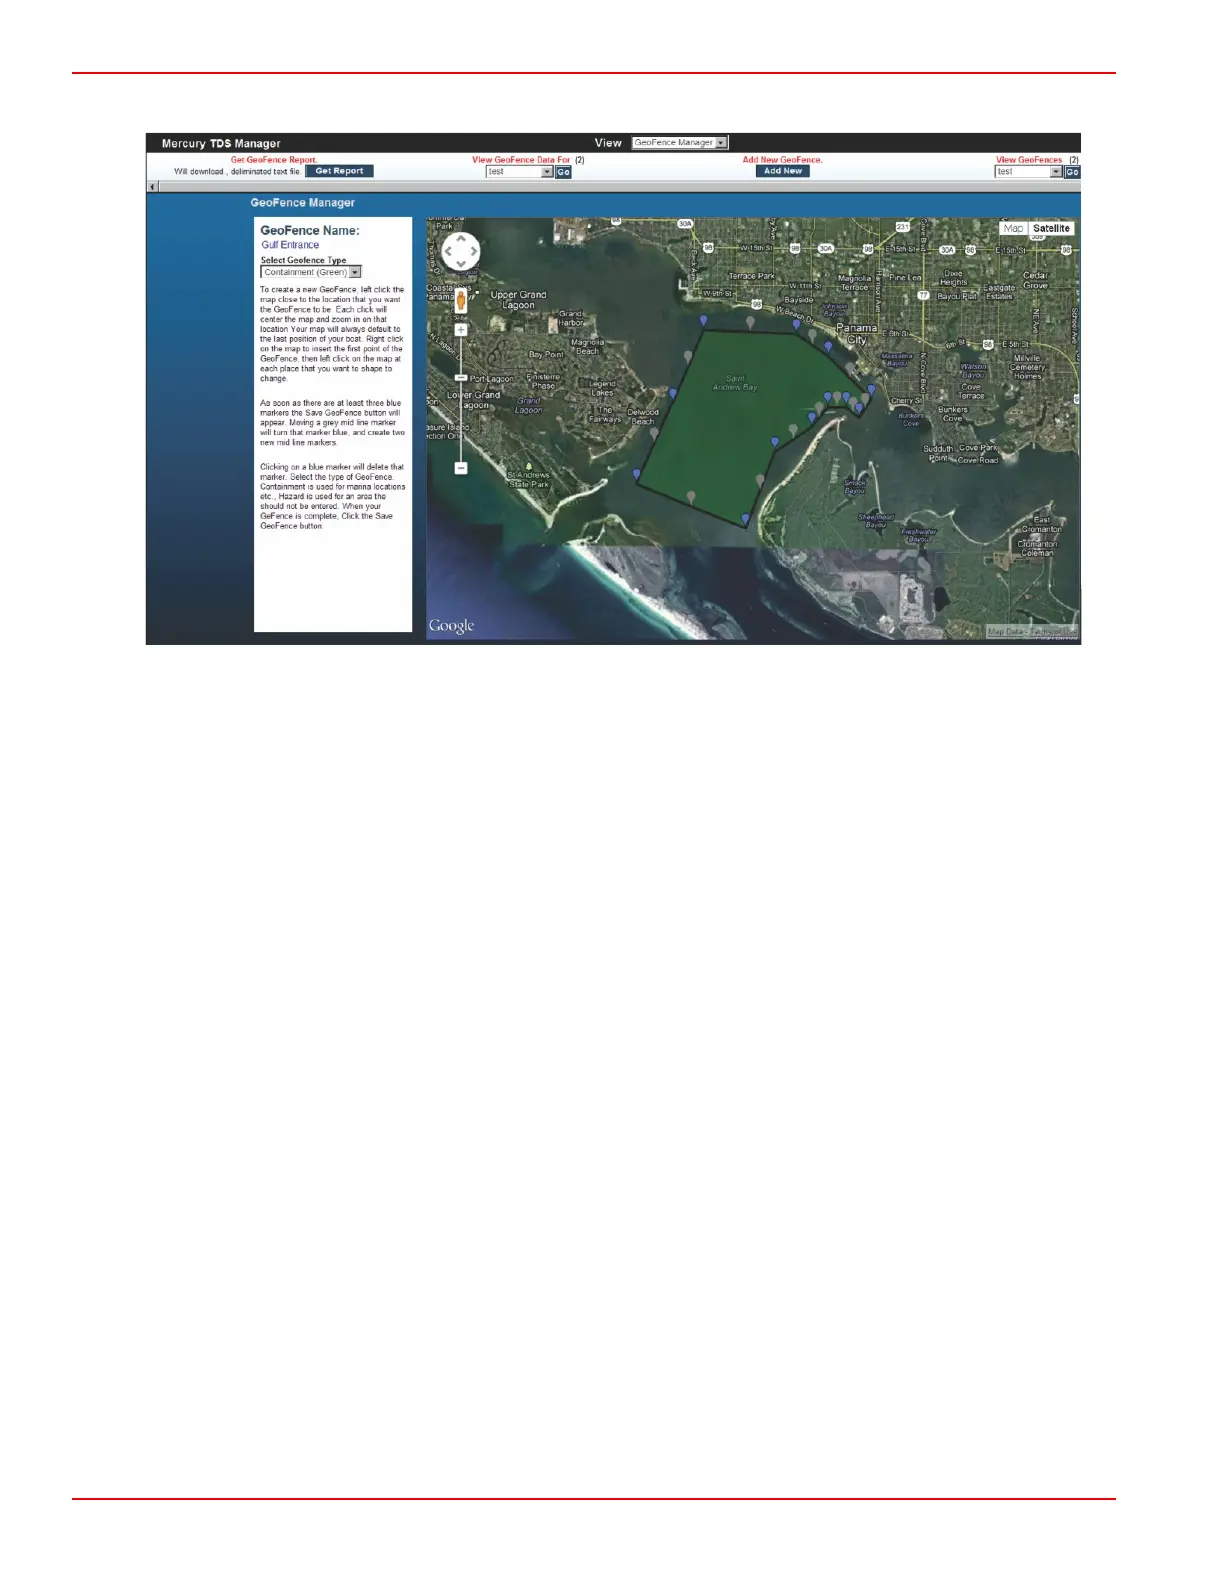
• Clicking on the blue waypoint will delete that marker.
6. When the fence is finished, click on the Save GeoFence icon.
7. To refresh the screen, click on the GeoFence Manager drop‑down.
Edit, Rename, or Delete a GeoFence
1. Open the GeoFence Manager from the View drop‑down.
2. Go to View GeoFences on the right‑hand side of the GeoFence Manager screen.
3. Use the drop‑down and highlight the GeoFence that is to be edited, renamed, or deleted. Click on the GO button.
4. A column will open to the left of the map area with the GeoFence centered on the screen.
5. To edit the fence;
a. Click, hold, and drag the blue icon to the desired location.
b. Click, hold, and drag the grey icon to the desired location. Moving the grey icon will turn the icon blue and two midline
grey icons will appear. Click on Save GeoFence changes when done.
6. To change the name of the GeoFence, click on Edit GeoFence Name. Enter the name of the GeoFence.
7. To delete the GeoFence, click on Delete this GeoFence.
• When deleting a GeoFence, a web page popup will appear that states Are you sure you wish to delete? Click on OK
to delete or Cancel to return to the page.
8. Click on GeoFence Manager to update the view.
 Loading...