Install the AP832e
© 2013 Meru Networks, Inc. Installing AP832e ix
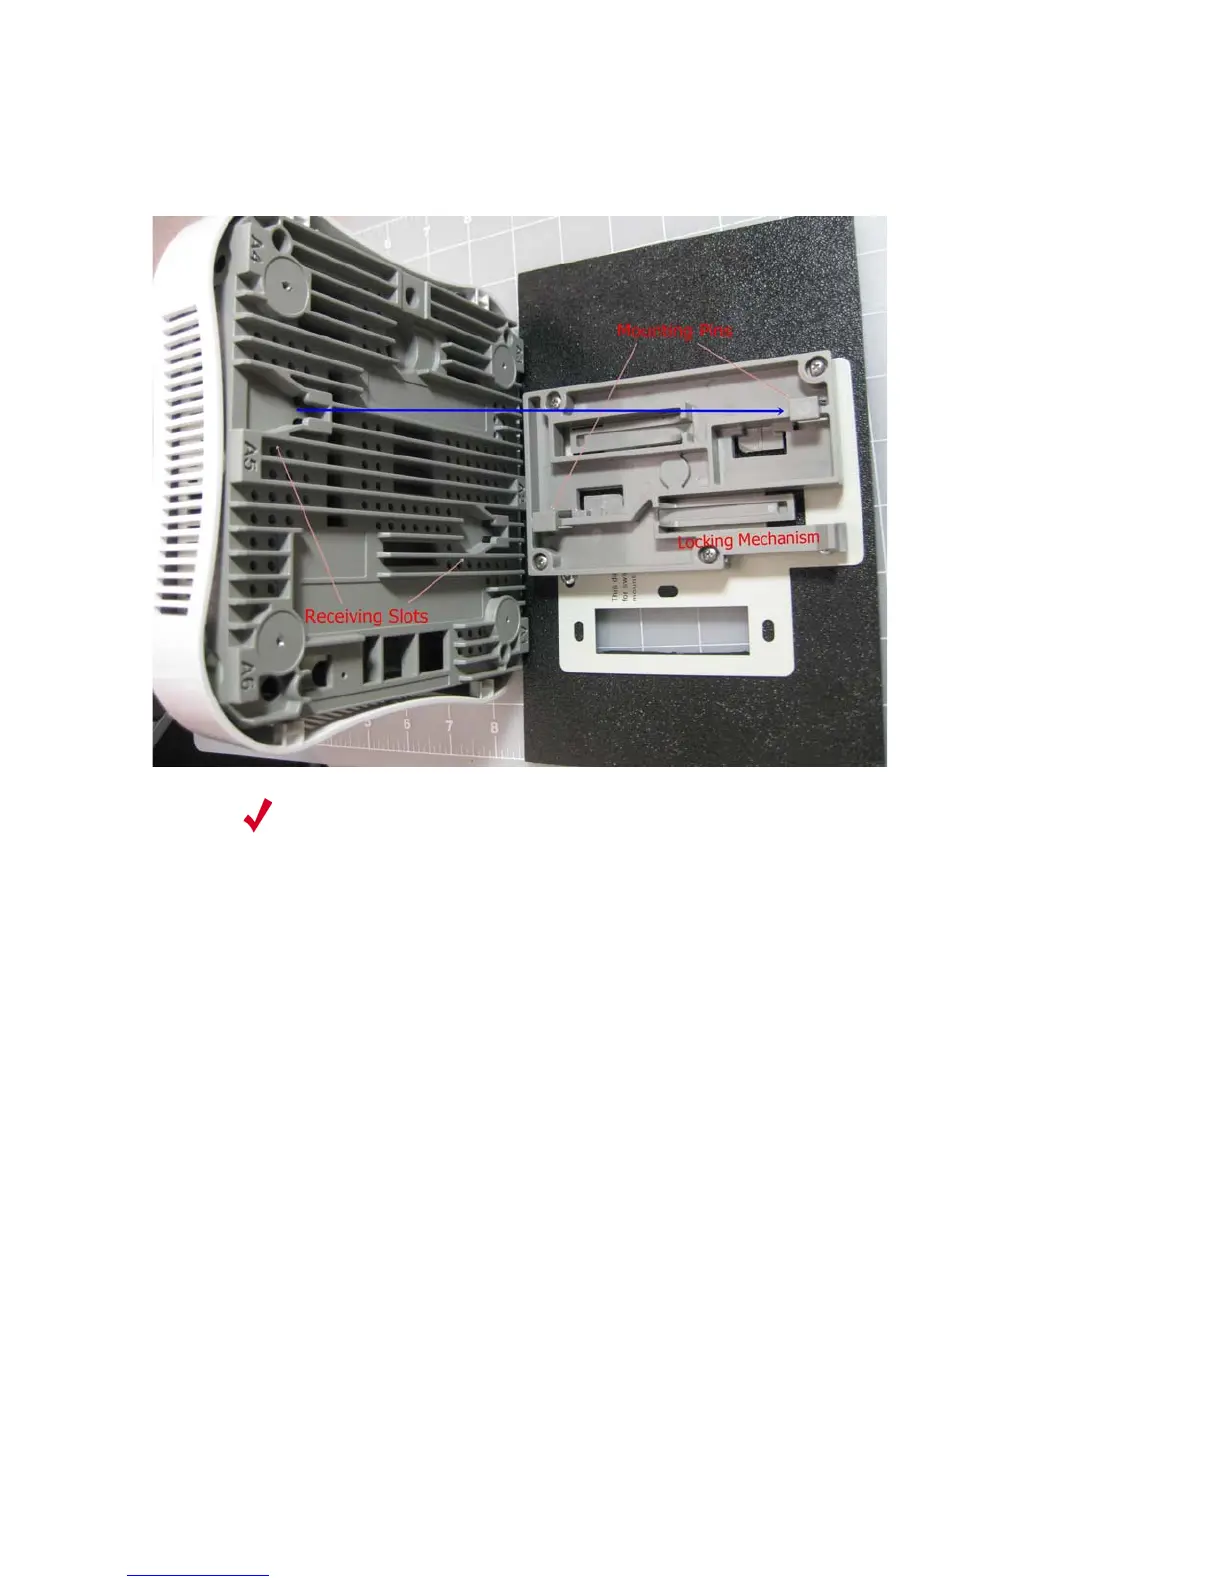
Figure 4: Attaching the AP to the Wall Mount
7. Slide the AP horizontally to lock the tabs into place.
8. If not already connected, you may now connect the Ethernet cable and DC power (if used) and
verify that the AP comes online.
Mount AP832e Below a Suspended Ceiling
The provided ceiling mounting brackets allow the AP832e to attach to suspended ceiling T-rails. The
AP ships with two different ceiling mounting bracket options to accomodate varying sizes of ceiling T-
rails. Be sure to attach the correctly-sized bracket to your AP prior to attempting to deploy it. Note
that each plastic bracket contains descriptive text to indicate the ceiling T-rail size for which it is
designed.
To mount an AP832e below a suspended ceiling:
1. Determine the location on the ceiling rail where the AP will be mounted and remove the ceiling
tiles.
2. Attach the AP to the mounting bracket by pressing the bracket’s Mounting Pins (shown in Figure 4)
to the AP’s Receiving Slots and sliding the bracket until it locks in place.
3. Press the AP and bracket against the rail and twist to lock it into place.
Note:
Figure 4 shows an AP832i model being attached to the bracket, but the
process is identical for either AP.
 Loading...