27
AQUALAB VSA
4. INSTALLATION
Please read all instructions before operating the AQUALAB VSA to ensure the instrument
performs to its full potential. Please contact Customer Support at any time for assistance
with installation and setup.
PRECAUTIONS
METER instruments are built to the highest standards, but misuse or neglect may damage
the device and possibly void the manufacturer’s warranty. Before using the AQUALAB VSA,
follow the recommended user instructions and arrange proper protections to safeguard the
instrument from damage.
The VSA requires a computer and software to generate and analyze isotherm data. You can
disconnect and connect the computer once you begin a test without losing any data.
Follow the steps listed in Table2 to set up the AQUALAB VSA.
Table2 Installation
Preparation
Select Clean, Level Location
Preserve cleanliness to prevent contamination of the sample chamber.
Maintain a level surface to reduce the chance of spilling sample material and
contaminating the sample chamber.
Select a location where the temperature and humidity remains fairly stable to
avoid changes that can affect accuracy (away from air conditioner and heater
vents, open windows, etc.). Appendix B provides more details.
Select a stable surface free from vibration.
NOTE: Always ensure the sample chamber is empty prior to moving the instrument.
Installation
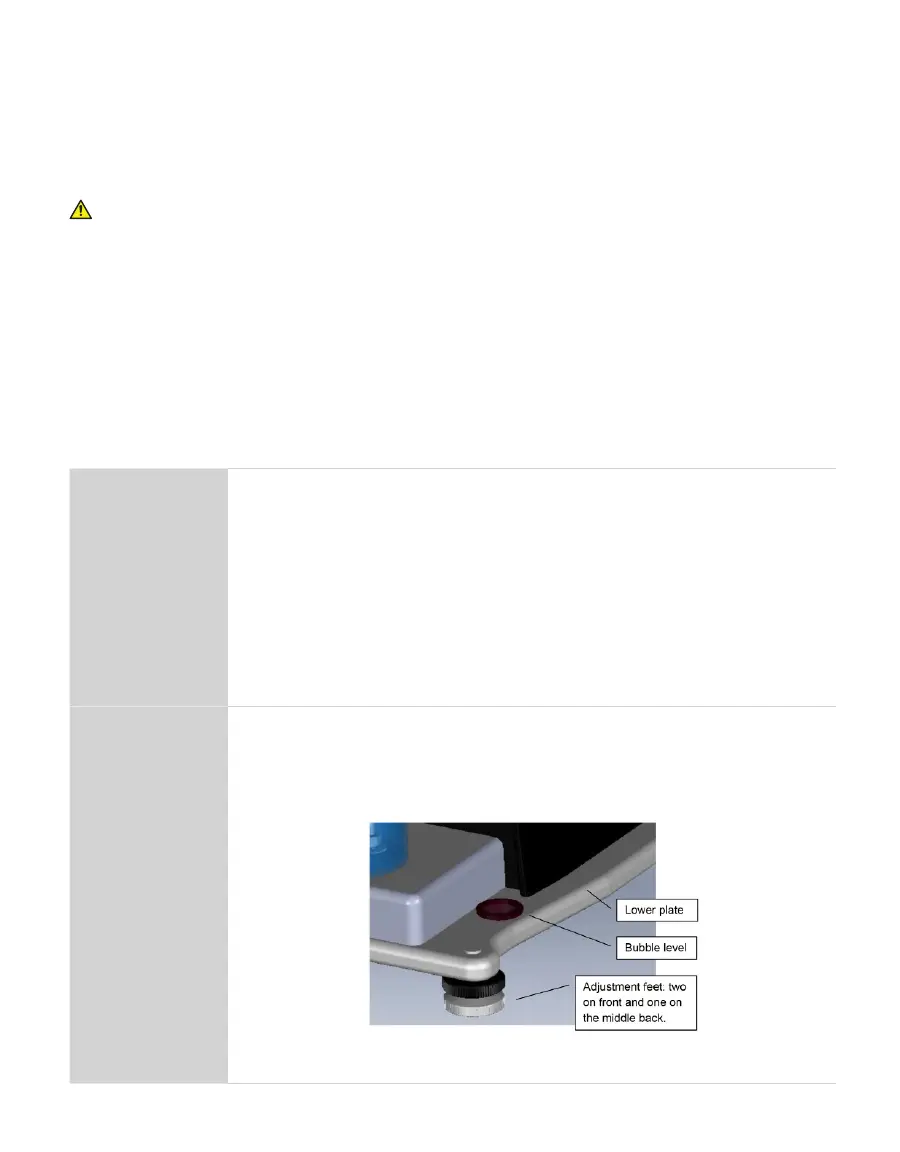
Level the Instrument
Use the bubble level and the three adjustable feet to level the VSA.
NOTE: The small rubber feet on the back of the lower plate prevent tip-over and do not
need to be touching the table.
Adjustment and bubble level