CONTENTS
GENERAL SAFETY WARNINGS AND PRECAUTIONS
STEP 1 2
1.1 - SAFETY WARNINGS 2
1.2 - INSTALLATION WARNINGS 2
1.3 - OPERATION WARNINGS 2
KNOWLEDGE OF THE PRODUCT AND PREPARATION
FOR INSTALLATION
STEP 2 3
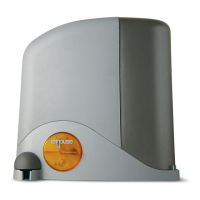
2.1 - PRODUCT DESCRIPTION AND INTENDED USE 3
2.2 - DEVICES AND ACCESSORIES REQUIRED TO SET UP A COMPLETE
SYSTEM 3
STEP 3 - CHECKS AND TASKS PRIOR TO INSTALLATION 4
3.1 - CHECKING SUITABILITY OF GATE TO BE AUTOMATED AND RELATIVE
ENVIRONMENT 4
3.2 - CHECKING THE PRODUCT APPLICATION LIMITS 4
3.3 - PRELIMINARY CHECKS FOR INSTALLATION 5
3.3.1 - Ensure all equipment and materials for work are available 5
3.3.2 - Establish the position of devices in the system 5
3.3.3 - Setting the route of the connection cables 5
3.3.4 - Selecting and sizing all connection cables 7
3.3.5 - Installation site preparation work 7
3.4 - VERY IMPORTANT! ESTABLISHING THE INSTALLATION PROCEDURE TO
BE FOLLOWED 7
INSTALLATION: ASSEMBLY AND CONNECTION OF
COMPONENTS
STEP 4 - INSTALLING THE WTISC / WT1SK GEARMOTORS 9
4.1A - INSTALLATION WITH STANDARD LENGTH ARMS 9
4.1B - INSTALLATION WITH SHORT ARMS 9
STEP 5 - INSTALLATION AND CONNECTION OF OTHER DEVICES 16
5.1 - CONNECTING GEARMOTOR WT1SK 16
5.2 - INSTALLING AND CONNECTING THE FLASHING LIGHT FL100 16
5.3 - INSTALLING AND CONNECTING THE PAIR OF PHOTOCELLS PH100 16
5.4 - CONNECTING DEVICES TO CONTROL UNIT TERMINALS 16
CONTROL UNIT POWER SUPPLY AND PROGRAMMING
STEP 6 - INITIAL POWER-UP AND CONNECTION CHECK 20
6.1 - CONNECTING THE CONTROL UNIT TO THE POWER MAINS 20
6.2 - IDENTIFYING THE CONTROL UNIT KEYS AND LEDS 20
6.3 - CHECKING ELECTRICAL CONNECTIONS AFTER INITIAL POWER-UP 20
STEP 7 - STANDARD CONTROL UNIT PROGRAMMING 20
7.1 - LEARNING THE IDENTITY OF CONNECTED DEVICES 20
7.2 - LEARNING THE MAXIMUM LEAF OPENING ANGLE
20
7.3 - OPERATING PARAMETER SETTINGS 21
7.3.1 - Programming the gate leaf speed 21
7.3.2 - Programming the “work cycle”, i.e. behaviour of the automation after
an opening manoeuvre 21
7.4 - CHECKING RADIO TRANSMITTER OPERATION 21
AUTOMATION TESTING AND COMMISSIONING
STEP 8 - SET-UP OF ELECTRICAL POWER LINE FOR PERMANENT POWER
SUPPLY 22
8.1 - CONNECTING THE AUTOMATION PERMANENTLY TO THE POWER
MAINS 22
8.1.1 - Replacement of the power cable 22
8.1.2 - Installing safety devices on the electrical power line 22
STEP 9 - AUTOMATION TESTING AND COMMISSIONING 22
9.1 - TESTING 22
9.2 - COMMISSIONING 23
STEP 10 - MAINTENANCE AND DISPOSAL 23
10.1 - PERIODIC MAINTENANCE 23
10.2 - DEVICE DISPOSAL 23
FURTHER INFORMATION
A - OTHER TASKS REGARDING INSTALLATION AND CONNECTIONS 24
A.1 - Removing the control unit 24
A.2 - Removing the power supply unit 24
A.3 - Replacing the power supply unit fuse 24
A.4 - Installing and connecting the backup battery PR2 24
A.5 - Connecting the solar power supply system (PF) 25
A.5.1 - PF application limits: maximum possible number of cycles per day
within a set period of the year. 25
A.6 - “Stand-by” function when PR2 and/or PF devices are installed 26
A.7 - Using the “ECSBus” input/output 26
A.8 - Using the “STOP” input 26
A.9 - Installing and connecting additional pairs of photocells 27
A.10 - Learning the identity of new devices connected or removed 27
B - ADVANCED SETTINGS 28
B.1 - Modifying parameters 28
B.2 - List of modifiable parameters (Table 8) 28
B.3 - Checking parameter settings 28
C - MEMORISING OR DELETING RADIO TRANSMITTERS 28
C.1 - Memorising other transmitters with respect to those supplied in the kit 28
C.2 - “Mode I” memorisation procedure 28
C.3 - “Mode II” memorisation procedure 28
C.4 - Duplicating an existing and previously memorised transmitter 30
C.5 - Deleting ALL radio transmitters memorised on the control unit 30
C.6 - Using transmitters memorised in “Mode II” 30
D - TROUBLESHOOTING 30
E - DIAGNOSTICS AND SIGNALS 30
E.1 - Led signals on photocells 30
E.2 - Led signals on control unit 30
E.3 - Flashing light signals 30
TECHNICAL SPECIFICATIONS OF THE PRODUCT
- Gearmotor WT1SC 33
- Gearmotor WT1SK 33
- Indicator light FL100 34
- Photocells PH100 34
TECHNICAL DOCUMENTATION
- EC declaration of conformity – (Annex 1) 37
- EC declaration of conformity – (Annex 2) 39
- User’s guide - (appendix 3) 41
- Goniometer 43
Original instructions
English
English – 1