© Microhard 39
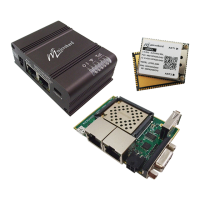
3.0 Hardware Features
Config Button:
The Config button on the pMDDL can be used to either reset the modem into its factory default
configuration, or it can be used to perform a firmware recovery procedure.
Factory Default Settings: While power is applied and the pMDDL in an operational state, press and hold
the Config Button for more than 10 seconds to reset to a factory default Master, alternatively hold the
button for 5 seconds for a factory default Slave.
Firmware Recovery: To load the firmware on the unit it is recommended to use the normal WebUI to
perform a firmware update (Maintenance). In the event that the firmware cannot be loaded using the
standard WebUI (non responsive unit), pressing and holding the Config Button while powering-up the
module will force the pMDDL into a firmware recovery mode. There are 3 main modes, HTTP, TFTP and
Master Reset. The table below shows the time required to hold the Config button while power is applied:
HTTP Recovery: Set an IP on a PC to 192.168.1.1. Open a web browser and Navigate to
192.168.1.39. This will open a simple webpage which will allow a firmware file to be loaded.
TFTP Recovery: Set an IP on a PC to 192.168.1.1. Use a TFTP session to push the firmware file
to the modems recovery IP of 192.168.1.39. See Appendix for Firmware Recovery Procedure.
Master Reset: Runs Master Reset, file system is erased.
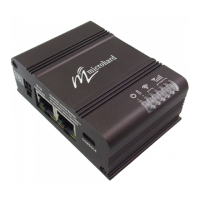
RS232 Serial:
The RS232 Serial data port can be used to communicate with
RS232 Serial devices or it can be configured to operate as a
console port. See Table 3-3 for pin assignments.
CPU/Status:
The CPU/Status LED indicates that power has been applied to
the module. A Solid LED indicates normal operation, while
flashing indicates boot or firmware upgrade status.
TX/RX LEDs:
The TX/RX LEDs indication wireless traffic to/from the pMDDL
module.
RSSI LEDs:
The RSSI LEDs indicate the Received Signal Strength on the
Wireless Link. On a Master it will indicate an average RSSI value
based on connected units. On a Slave the RSSI LEDs will represent the signal strength between the Slave
and the Master it is connected to. (The more LEDs illuminated, the stronger the signal)
0 to 5 seconds
HTTP Recovery
5 to 10 seconds
TFTP Recovery
10 to 15 seconds
Master Reset
15+ seconds
No Effect
Name Data Port Input or
Output
DCD 1 O
RXD 2 O
TXD 3 I
DTR 4 I
SG 5
DSR 6 O
RTS 7 I
CTS 8 O
RING 9 O
Table 3-3: Data DE9 RS232 Pin Assignment