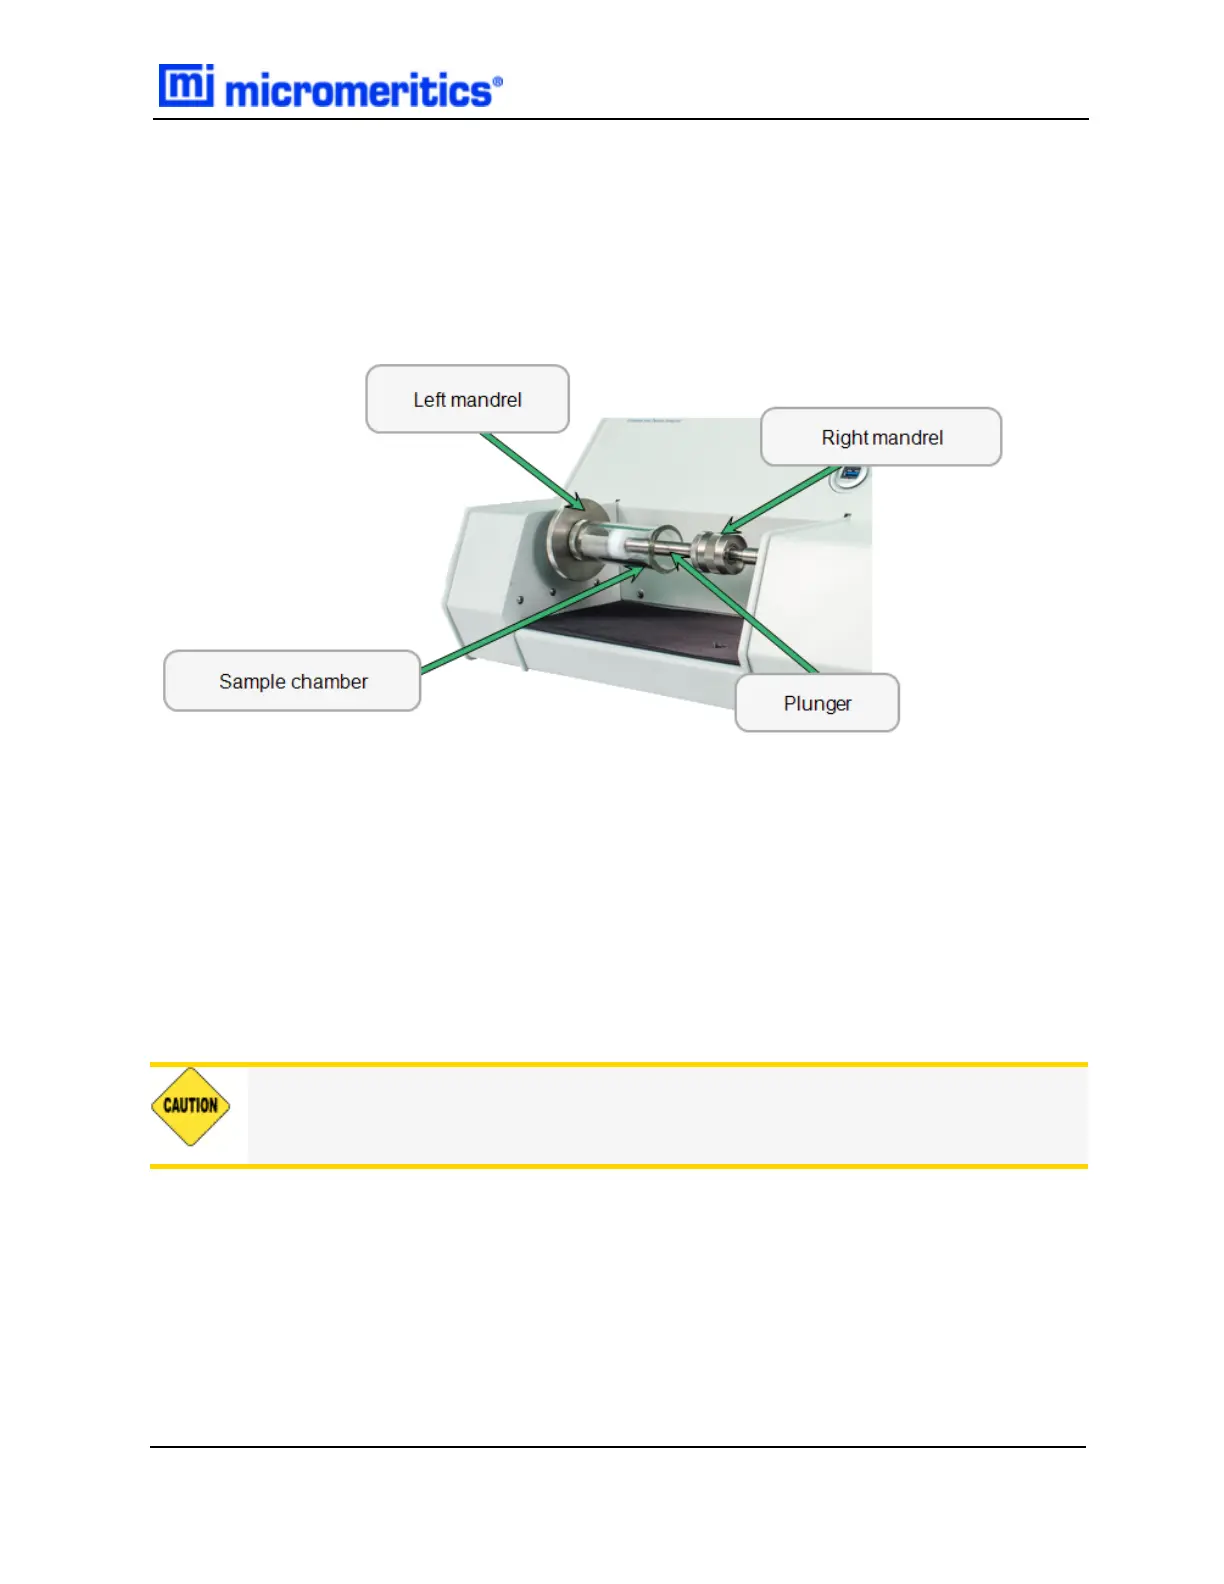
MOUNT THE CHAMBER AND PLUNGER
1. Ensure the plunger is inserted partially into the loaded chamber.
2. Hold the chamber/plunger between the two mandrels on the instrument, with the chamber
end to the left.
3. Screw the chamber onto the threads in the center of the left mandrel. Turn the chamber away
from you until it is firmly secured. Hold the mandrel to stabilize it while mounting the chamber.
4. Extend the plunger part way out of the chamber until the right mandrel is inserted into the hole
on the top of the plunger.
5. Turn the coupling on the mandrel away from you to screw the plunger onto the right mandrel.
Continue turning/screwing until the plunger is firmly secured. Hold the plunger to stabilize it
while turning the coupling.
6. Extend the plunger part way out of the chamber until the right mandrel is inserted into the hole
on the top of the plunger.
7. Turn the coupling on the mandrel away from you to screw the plunger onto the right mandrel.
Continue turning/screwing until the plunger is firmly secured. Hold the plunger to stabilize it
while turning the coupling.
It is important that the chamber/plunger is secured firmly to each mandrel.
Mount the Chamber and Plunger
GeoPyc 1365 Operator Manual
136-42800-01 (Rev -) — Dec 2016
5 - 5
 Loading...