5.
Press a Set or Store to store the result.
6.
Press Report to display calcs you’ve recorded.
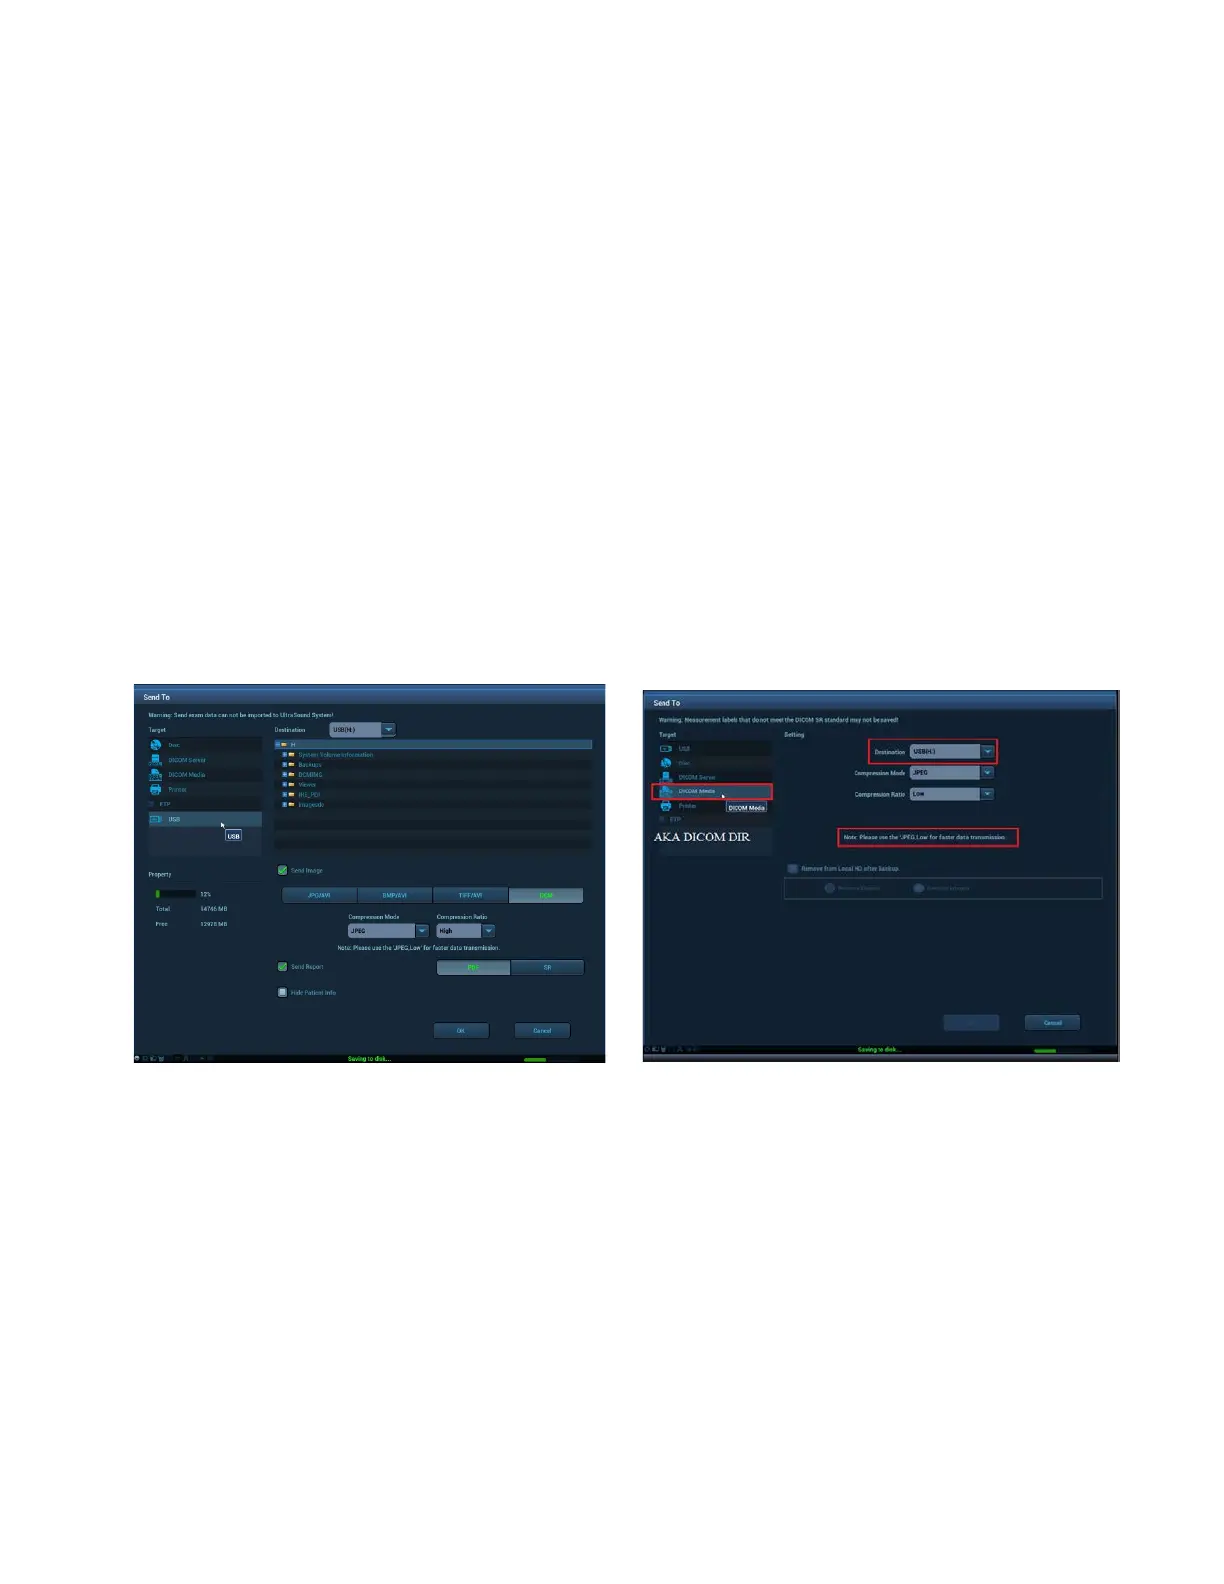
Send Exams to USB
1.
Press Archive (back row of QWERTY keyboard).
2.
Point to the exam to send to USB.
3.
Select Send Exam from the drop down menu. This will launch a page to select the destination
4.
Select the Target Media from the list.
5.
Select file type (JPG/AVI, BMP/AVI, TIFF/AVI, DCM).
6.
Select OK at bottom of screen.
Send Exams to USB or Disc in DICOM format with Showcase Viewer and Directory
1.
Press Archive (back row of QWERTY keyboard).
2.
Point to the exam to send to USB.
3.
Select Send Exam from the drop down menu. This will launch a page to select the destination
4.
Select DICOM Media from the list.
5.
Select the Destination
6.
Select OK at bottom of screen.
Review Images in Current Exam
1.
Press Current Exam (back row of QWERTY keyboard).
2.
All stored images for exam appear in a Multi-Image Format.
3.
To view an image in Full Image with Thumbnails format, point with the cursor and Double Click a
Set key.
4.
To return to live imaging, press the Exit Review OLED or press Current Exam again.
5.
To return to the Multi-Image Format of Image Review, press the Format button or OLED
assigned to Format.
6.
To page through current exam images, press Page Forward, Page Backward or First/Last
on the QWERTY keyboard or OLEDs.
Review and Delete Images using Thumbnails
1.
While in live scanning or Full Image with Thumbnail format, press the Pointer button.