20 (2720)A
REPAIR GUIDE
2782-12712782-1271
2782-12712782-1271
2782-1271
2782-12602782-1260
2782-12602782-1260
2782-1260
2782-12712782-1271
2782-12712782-1271
2782-1271
2782-1270 (2)2782-1270 (2)
2782-1270 (2)2782-1270 (2)
2782-1270 (2)
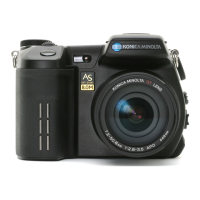
5. Insert and install 2782-1271 and 2782-1260 respectively into the groove and the hole of the holder 5. Insert and install 2782-1271 and 2782-1260 respectively into the groove and the hole of the holder
5. Insert and install 2782-1271 and 2782-1260 respectively into the groove and the hole of the holder 5. Insert and install 2782-1271 and 2782-1260 respectively into the groove and the hole of the holder
5. Insert and install 2782-1271 and 2782-1260 respectively into the groove and the hole of the holder
battery B.battery B.
battery B.battery B.
battery B.
Holder battery BHolder battery B
Holder battery BHolder battery B
Holder battery B
GrooveGroove
GrooveGroove
Groove
Holder battery AHolder battery A
Holder battery AHolder battery A
Holder battery A
HoleHole
HoleHole
Hole
6. Confirm 2782-1270 and 2782-1271 after assembling. 6. Confirm 2782-1270 and 2782-1271 after assembling.
6. Confirm 2782-1270 and 2782-1271 after assembling. 6. Confirm 2782-1270 and 2782-1271 after assembling.
6. Confirm 2782-1270 and 2782-1271 after assembling.
Note that they should notNote that they should not
Note that they should notNote that they should not
Note that they should not
be combined.be combined.
be combined.be combined.
be combined.
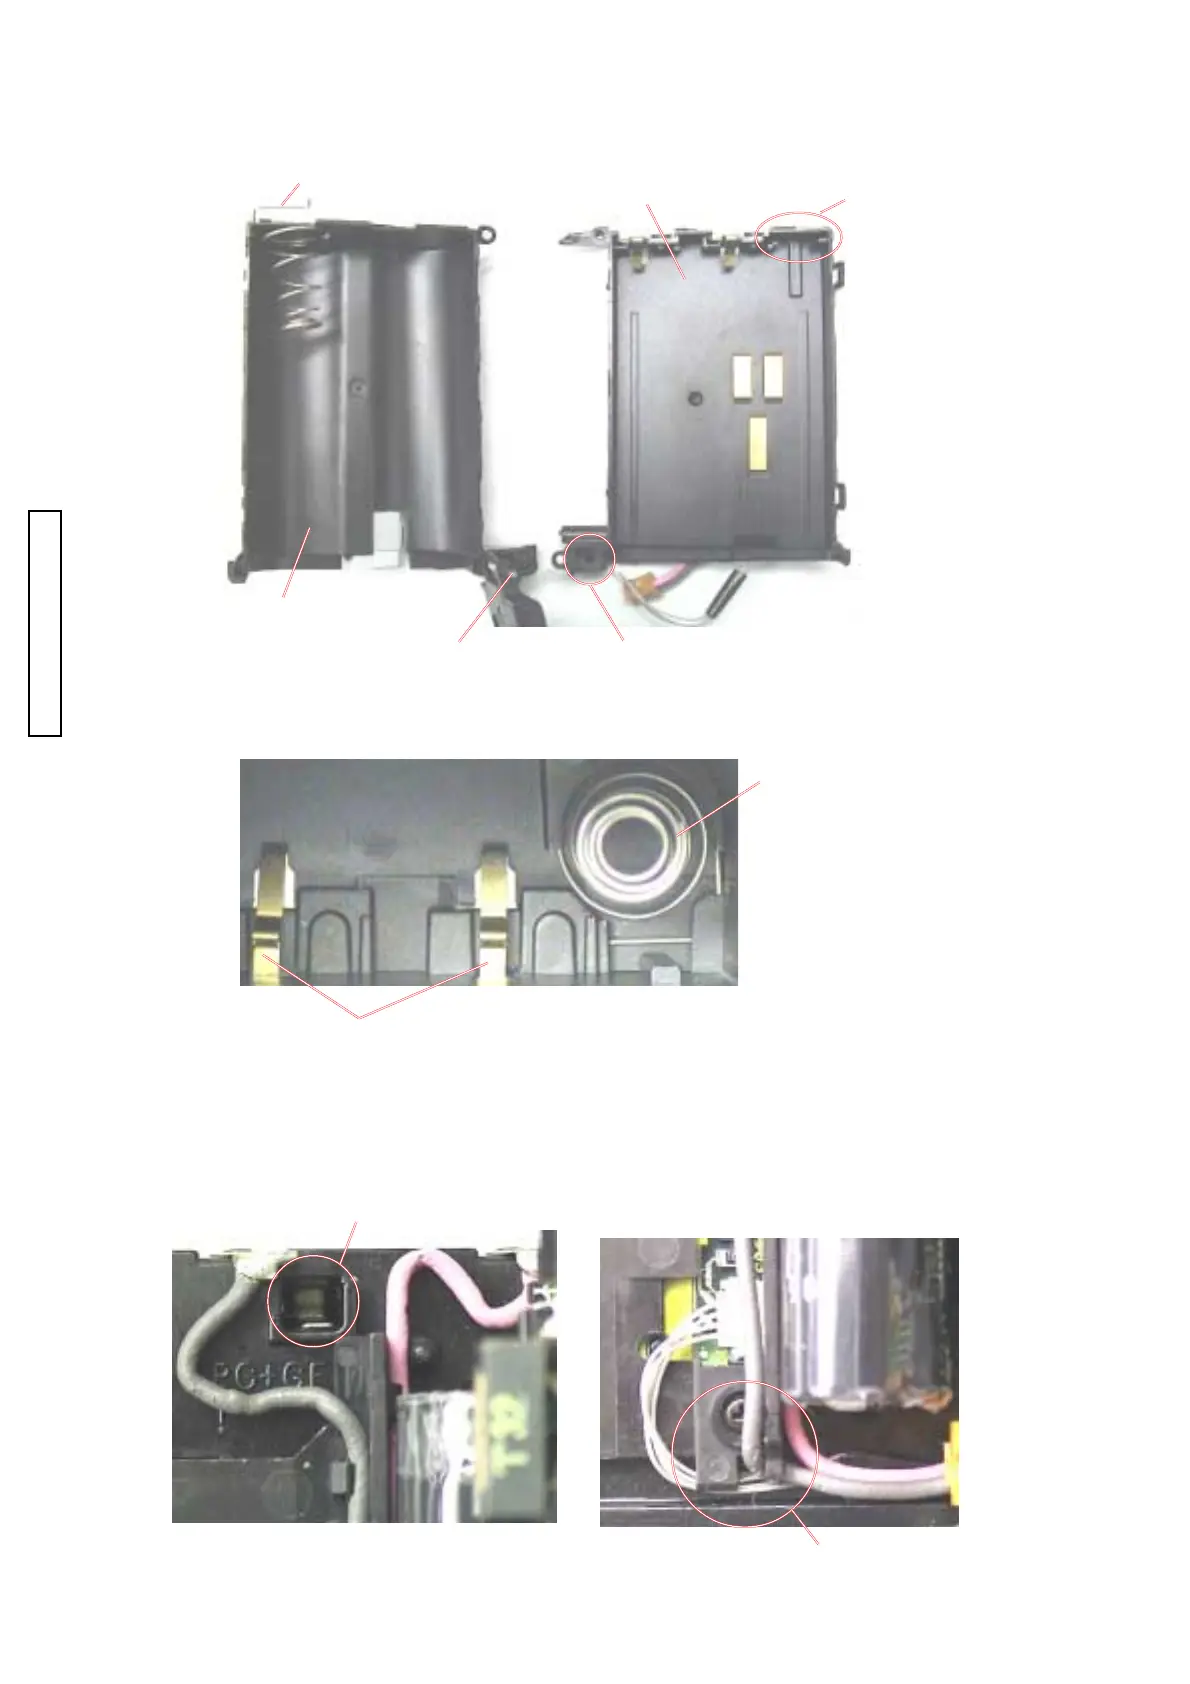
Fig.3 Assembly of the compl PWB ST-1, the compl PWB DM-1 and the cover cardFig.3 Assembly of the compl PWB ST-1, the compl PWB DM-1 and the cover card
Fig.3 Assembly of the compl PWB ST-1, the compl PWB DM-1 and the cover cardFig.3 Assembly of the compl PWB ST-1, the compl PWB DM-1 and the cover card
Fig.3 Assembly of the compl PWB ST-1, the compl PWB DM-1 and the cover card
1. Assemble each compl PWB and arrange the harness.1. Assemble each compl PWB and arrange the harness.
1. Assemble each compl PWB and arrange the harness.1. Assemble each compl PWB and arrange the harness.
1. Assemble each compl PWB and arrange the harness.
Note that they should not be hooked on the window.Note that they should not be hooked on the window.
Note that they should not be hooked on the window.Note that they should not be hooked on the window.
Note that they should not be hooked on the window.
Fix them with the rib.Fix them with the rib.
Fix them with the rib.Fix them with the rib.
Fix them with the rib.