Adding and Configuring Inputs
24
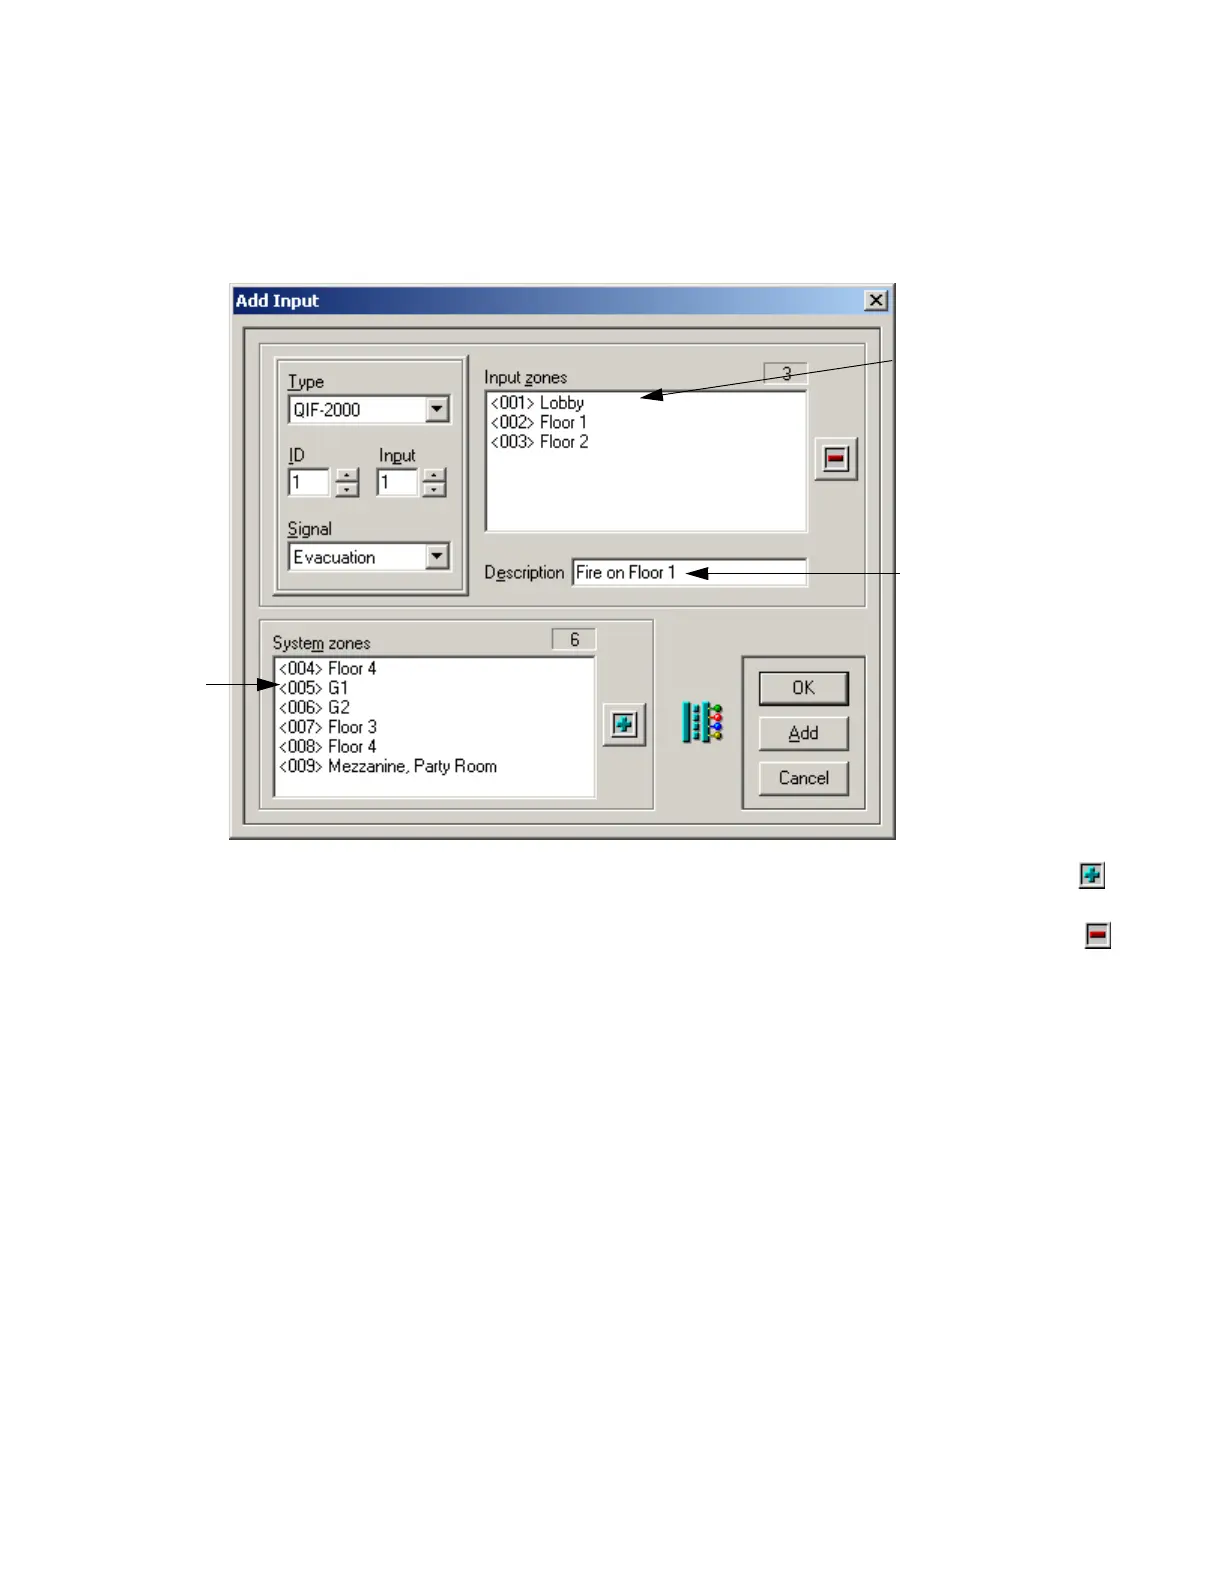
Adding Inputs
To add an input,
1. Select “Inputs” from the left pane. The right pane displays the Inputs list.
2. Select Edit-->Add from the main menu. The Add Input Window displays.
3. Edit the input settings.
•To add zones to the input, either select the desired zone names from the System Zones list and click the
button, or double-click the desired zone.
•To delete zones from the Input Zones, either select the zone names from the Input Zone list and click the
button, or double-click the desired item. The zones to be removed will be moved back to the System Zones
list.
4. When you have finished editing the settings,
• Click Add to add the current input module and begin configuring another one, or
• Click OK to save your settings and return to the Main Window.
Editing Input Properties
You can change any input parameter by selecting the input from the Input list in the Main Window and selecting
Edit-->Properties from the main menu.
List of zones
available for
correlating;
<paging
switch #>,
name
List of zones
correlated to
this input
Giving a
description will
make it easier for
you to configure
the system
 Loading...


