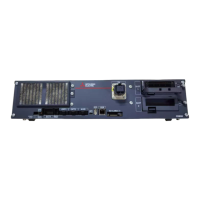
*CR860 controller
Cautions for the basic system structure are shown below.
When installing or connecting a unit or cable to inside the robot controller, do
not touch the conductive parts, circuit boards, or electronic components
directly. Failure to observe this may result in malfunction or failure of the
controller.
• Connecting the power cable
1) Prepare a power cable with an outer diameter of 19mm to 23mm for power supply (8 AWG (8mm
2
) or above,
three cores) and grounding (8 AWG (8mm
2
) or above, one core) and a grounding wire for protective grounding
(8 AWG (8mm
2
)). Use a power cable that incorporates power wires and grounding wire.
2) Loosen the two screws fixing the controller front door, then open it. To open the front door, turn the knob on
the front of the controller counterclockwise.
3) Pull out the disengagement prevention projection on the terminal cover of the earth leakage breaker by
displacing the projection with your finger.
4) Confirm that the primary power matches the specifications.
5) Ensure that the primary power is shut OFF and the earth leakage breaker of the controller is OFF.
6) Put the power cable through the cable entrance on the side of the controller and fix the cable using a power
cable clamp (Capcon).
7) Connect the power cable to the L1, L2, and L3 terminals (M5 screws) of the earth leakage breaker.
8) Connect the grounding wire of the power cable to the grounding terminal (for protective grounding) (M6 screw)
of the NV plate.
9) Press down the terminal cover of the earth leakage breaker (removed in step 3) until the cover snaps into
place.
10) Close the controller front door, then fix it using the front door fixing screws. IP54 cannot be satisfied unless
the front door fixing screws are fixed.
Note 1) Always use the terminal cover for the earth leakage breaker.
Note 2) For measures against noise (surge) of the primary power supply, refer to the "Standard Specifications
Manual" (BFP-A3779).
Section A
Grounding wire
Grounding terminal
(for protective grounding)
Power cable clamp (Capcon)
Power cable
Note2)
Cable entrance
Cable entrance
(attached on the side of the controller)
Front door fixing screw: 2
Earth leakage
breaker
Note1)
Grounding plate
Grounding cable
Details of section B
(attached inside the controller)
Details of section A
Terminal cover
L1, L2, L3 from the left
Disengagement
prevention
projection
NV plate
Power cable
Note2)
Capcon
Section B
Turn the knob on the
earth leakage breaker
counterclockwise.
 Loading...