12-35
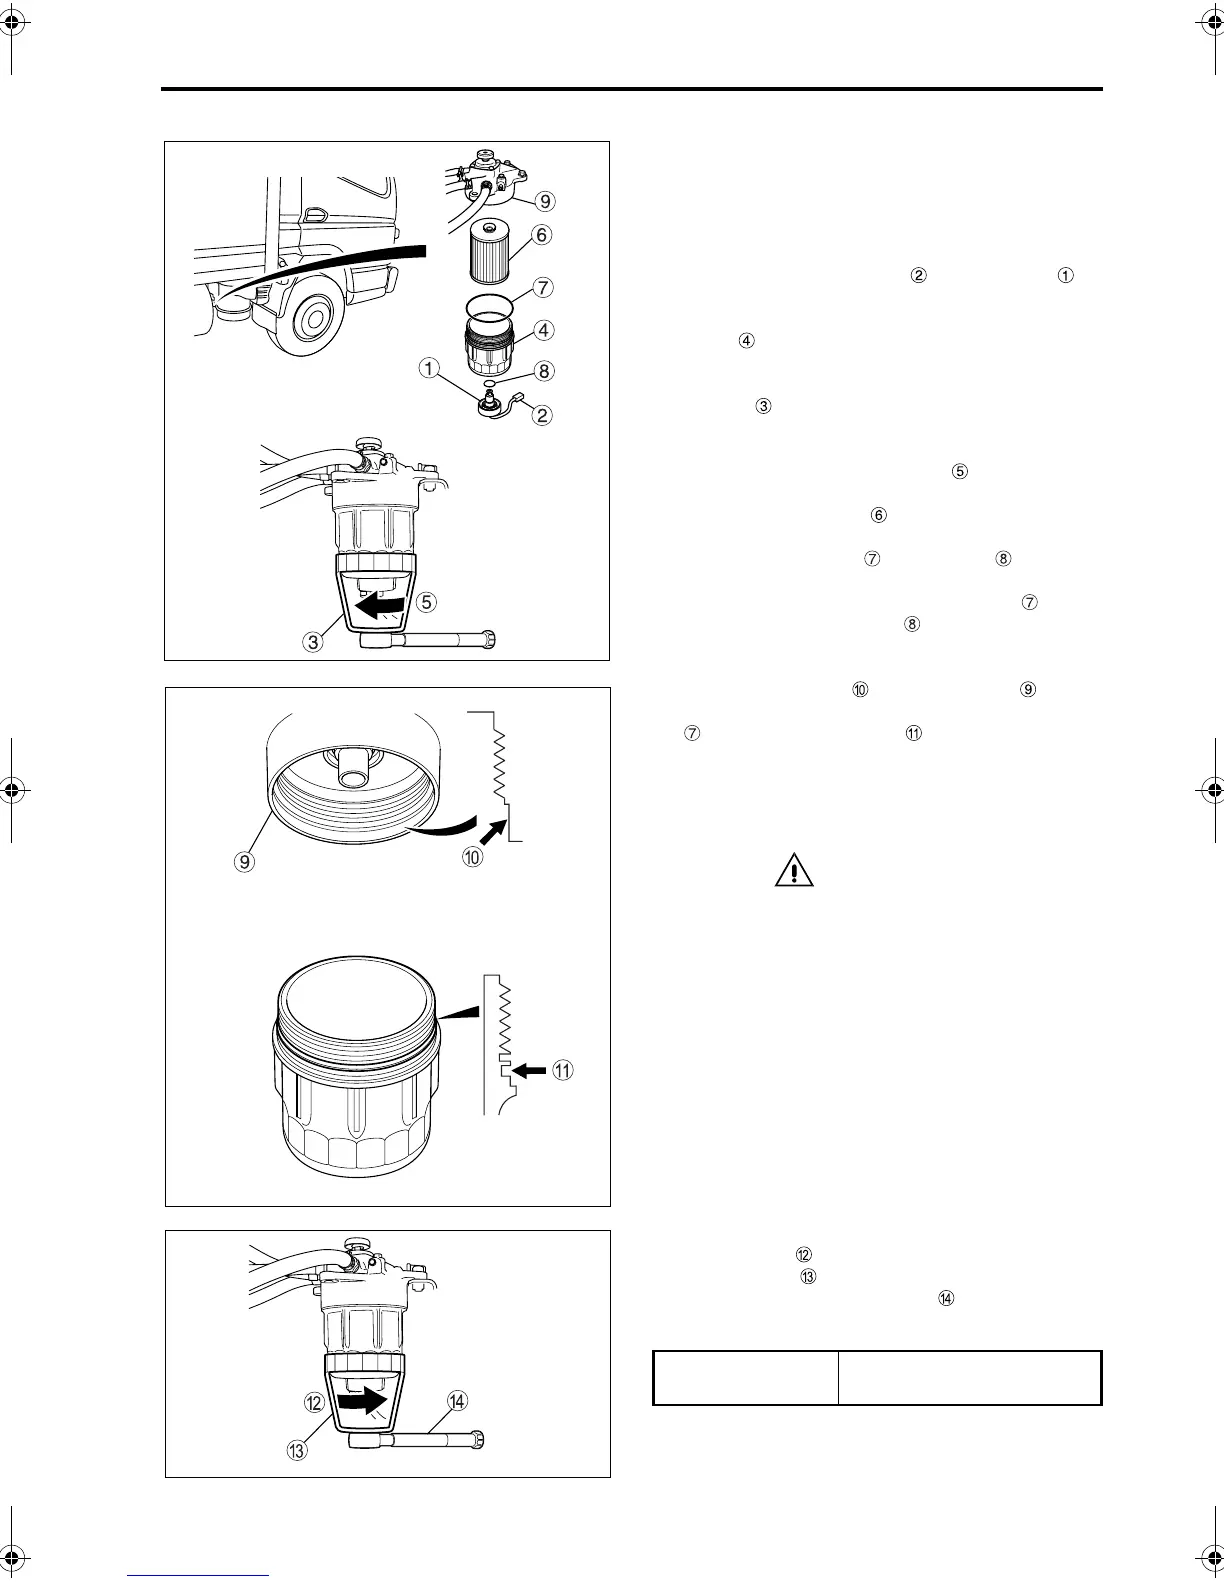
1. Confirm that the parking brake lever is pulled.
Prevent the vehicle from moving by blocking the
wheels with chocks.
2. Clean the filter and the surrounding area to pre-
vent dirt from entering the new element.
3. Place a can under the fuel filter to catch fuel.
4. Disconnect the connector on the sensor .
5. Turn the sensor counterclockwise to loosen it,
and then extract all of the fuel from the filter
case . After the fuel has been extracted,
tighten the sensor by turning it clockwise.
6. Place the sensor and its harness inside the spe-
cial tool (available from an authorized dealer).
7. Remove the filter case using the special tool
(available from an authorized dealer), by turning
it in the direction of the arrow . Drain the fuel
from the filter case.
8. Remove the element and the sensor from the
filter case.
9. Replace the O-ring and O-ring with new
ones. Apply a thin coat of engine oil to each of
the new O-rings and install the O-ring on the
filter case and the O-ring on the sensor.
10. Clean the surfaces of the filter head and fil-
ter case that will come in contact with the O-ring
. The O-ring groove on the filter case
should also be cleaned.
11. Install the element with the hole of its end facing
upward. Be sure to use a genuine replacement
element.
CAUTION
• Use the O-rings that are supplied with the
new replacement element.
• When installing the filter case, be careful not
to let the O-ring twist and be damaged.
• Do not reuse the element.
12. Install the filter case by turning it in the direction
of the arrow . Tighten the filter case using the
special tool (available from an authorized
dealer) and a torque wrench to within the fol-
lowing torque range.
Tightening torque
30 ± 2 N·m (22 ± 1.5 ft.lbs.,
3 ± 0.2 kgf·m)
Z12053
Z11924
Z12054
FEFG.book Page 35 Thursday, March 10, 2005 7:30 PM
 Loading...