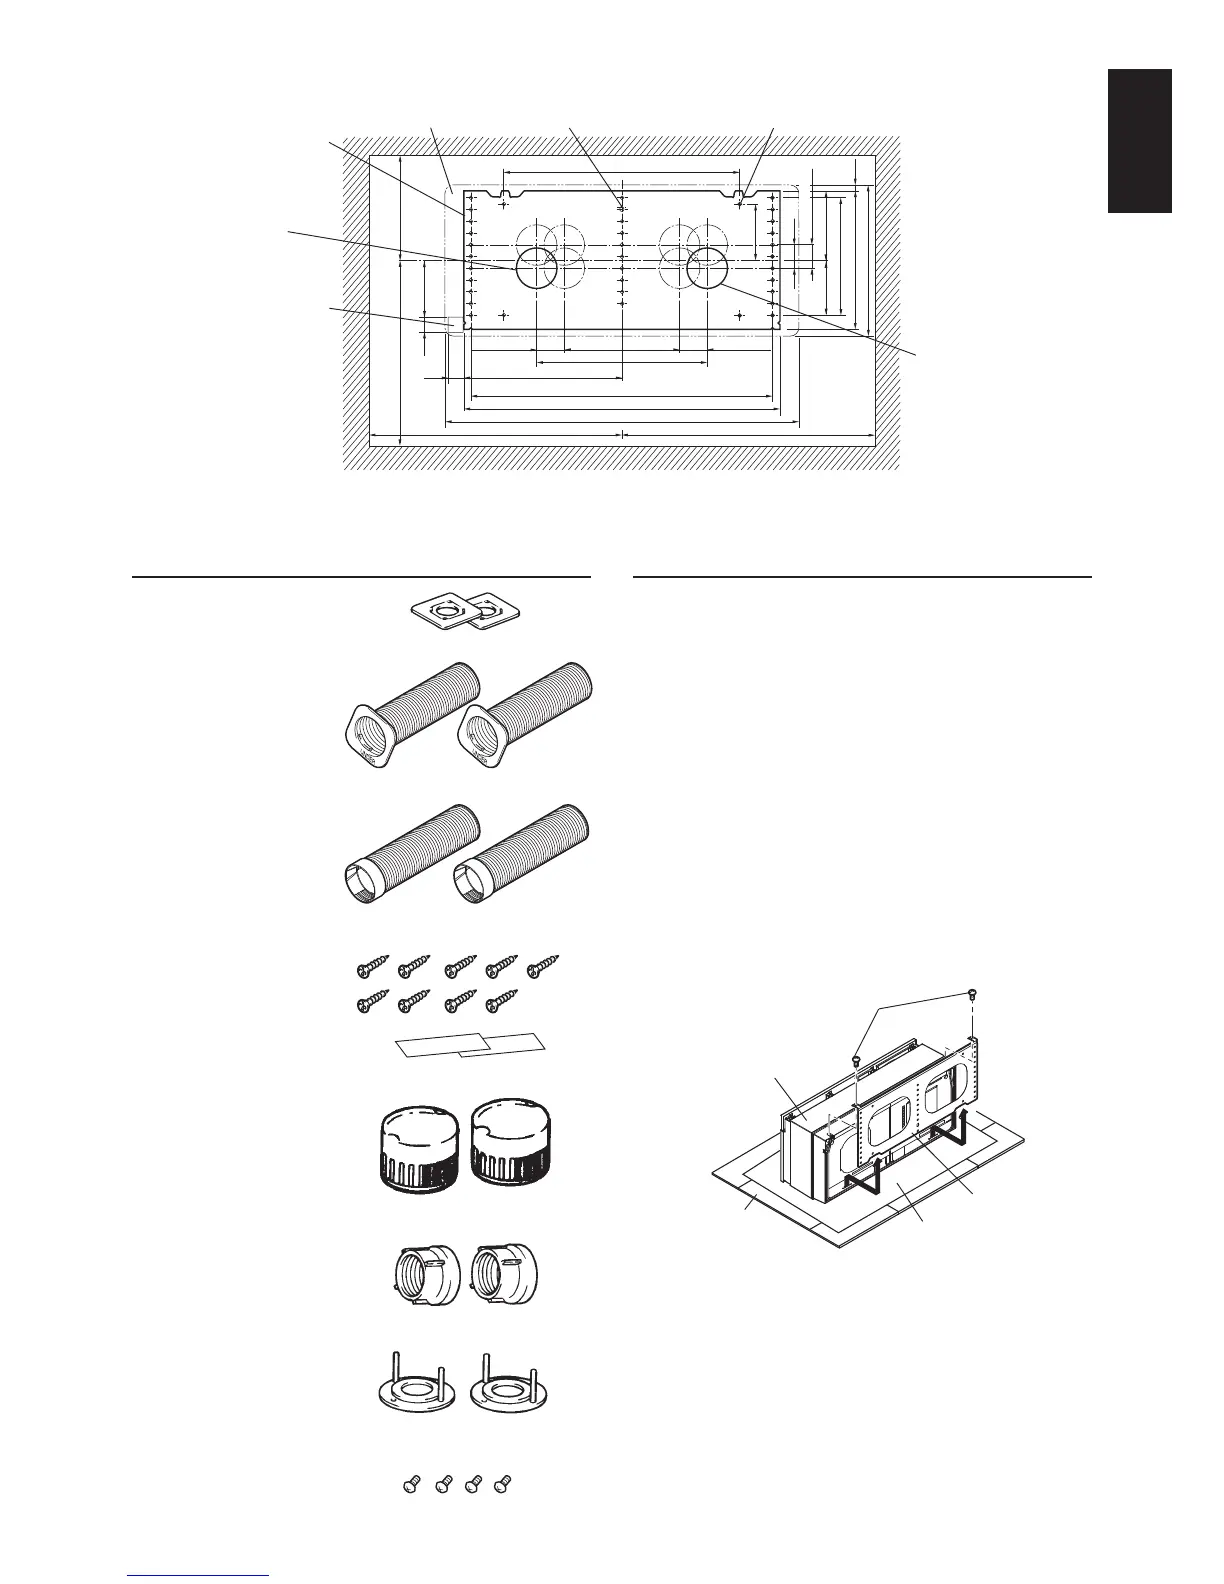
List of included parts
Pipe mounting plates (2)
Air supply/exhaust pipes A (2)
Airsupply/exhaustpipesB(2)
Wood screws (9)
(forattachingthemountingplate)
Aluminium tapes (2)
Weather covers (2)
Flange nuts (2)
Weather cover mounting plates (2)
Weather cover mounting screws (4)
Before installation
Remove the two screws securing the main unit to
remove the mounting plate.
Note
- Keep the screws for securing the main unit
in a safe place. Screws are needed when the
main unit is installed.
- Lossnay surfaces are glossy, so be careful
not to scratch them. Spread out cardboard or
the like, lay the vinyl sheeting used to pack
the main unit on top of it, and with the main
unit placed upside down as shown in the
drawing, remove the mounting plate.
- The shutter of the Lossnay is closed for
shipment.
Main unit
Mounting plate
Screwsforsecuring
main unit
Spread cardboard
or a similar
material
Vinylsheeting
■ Mounting position diagram (seen from inside)
Unit(mm)
200
420
350
530
554
620
360
360
233
97
25
183
95.5
15
25
95
119
20×10=200
238.5
265
13.5
40
277
22
75
75
Mounting plate
Air intake hole
(ø85toø90wallhole)
Require to be securedEdgeofmainunit
Air exhaust hole
(ø85toø90wallhole)
Mounting hole 36 – ø6
Power and connection
cable pullout area
(VL-100EU
5-Eonly)
min. min.
(min.)
(min.)
(min.)
(Adjustable)
(Adjustable)
(Adjustable)
(max.)
 Loading...