16
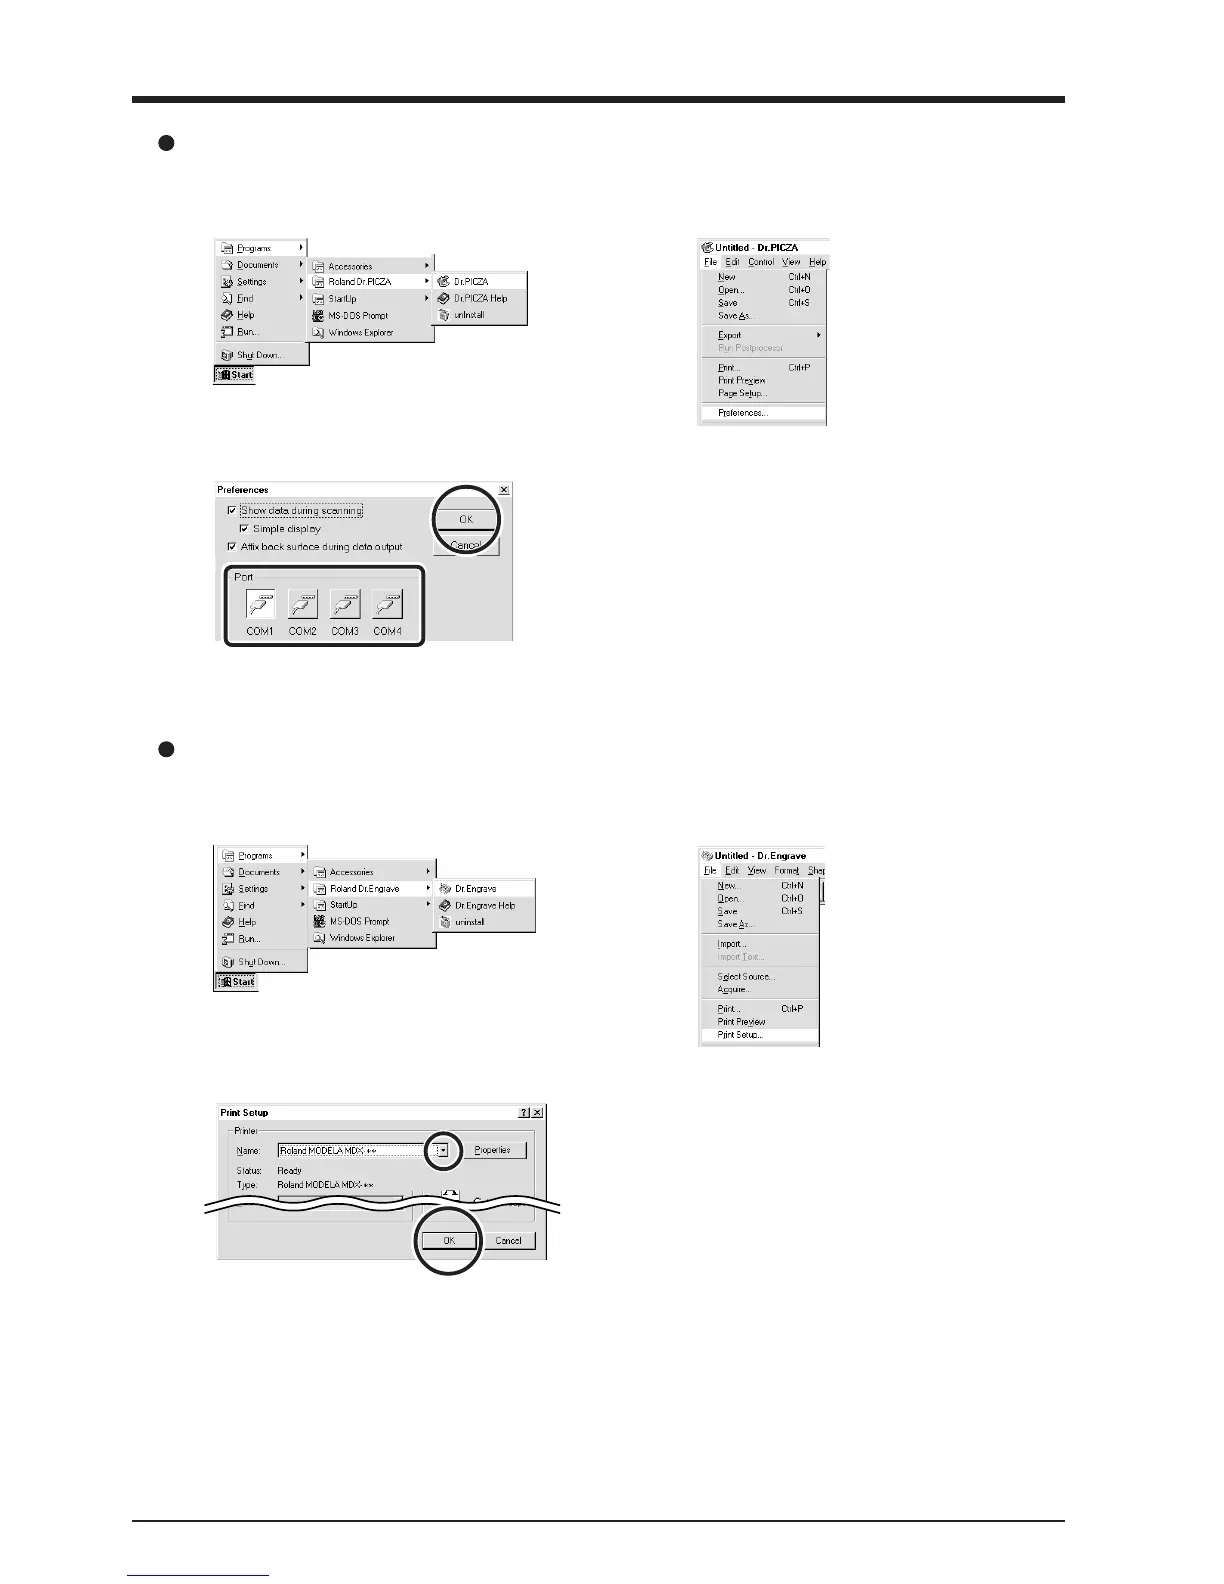
Dr.PICZA
1
Click [Start]. Point to [Roland Dr.PICZA] and click
[Dr.PICZA].
2
From the [File] menu, click [Preferences...].
The [Preferences] dialog box appears.
3
Select the port where the cable is connected, then
click [OK].
If You’re Using Windows NT4.0/2000/XP
If the printer port for the Windows driver and the communica-
tion port for Dr. PICZA are set to the same port, you cannot use
Dr. PICZA.
To perform scanning, you need to temporarily set the Windows
driver printer port to a different port.
After you finish scanning, return the setting for the Windows
driver to its original value.
1
Click [Start]. Point to [Roland Dr.Engrave] and click
[Dr.Engrave].
2
From the [File] menu, click [Print Setup...].
The [Print Setup] dialog box appears.
Dr.Engrave
3
Click the drop-down arrow for the name and click
[Roland MODELA MDX-20]. Then click [OK].