64
Description of Controls
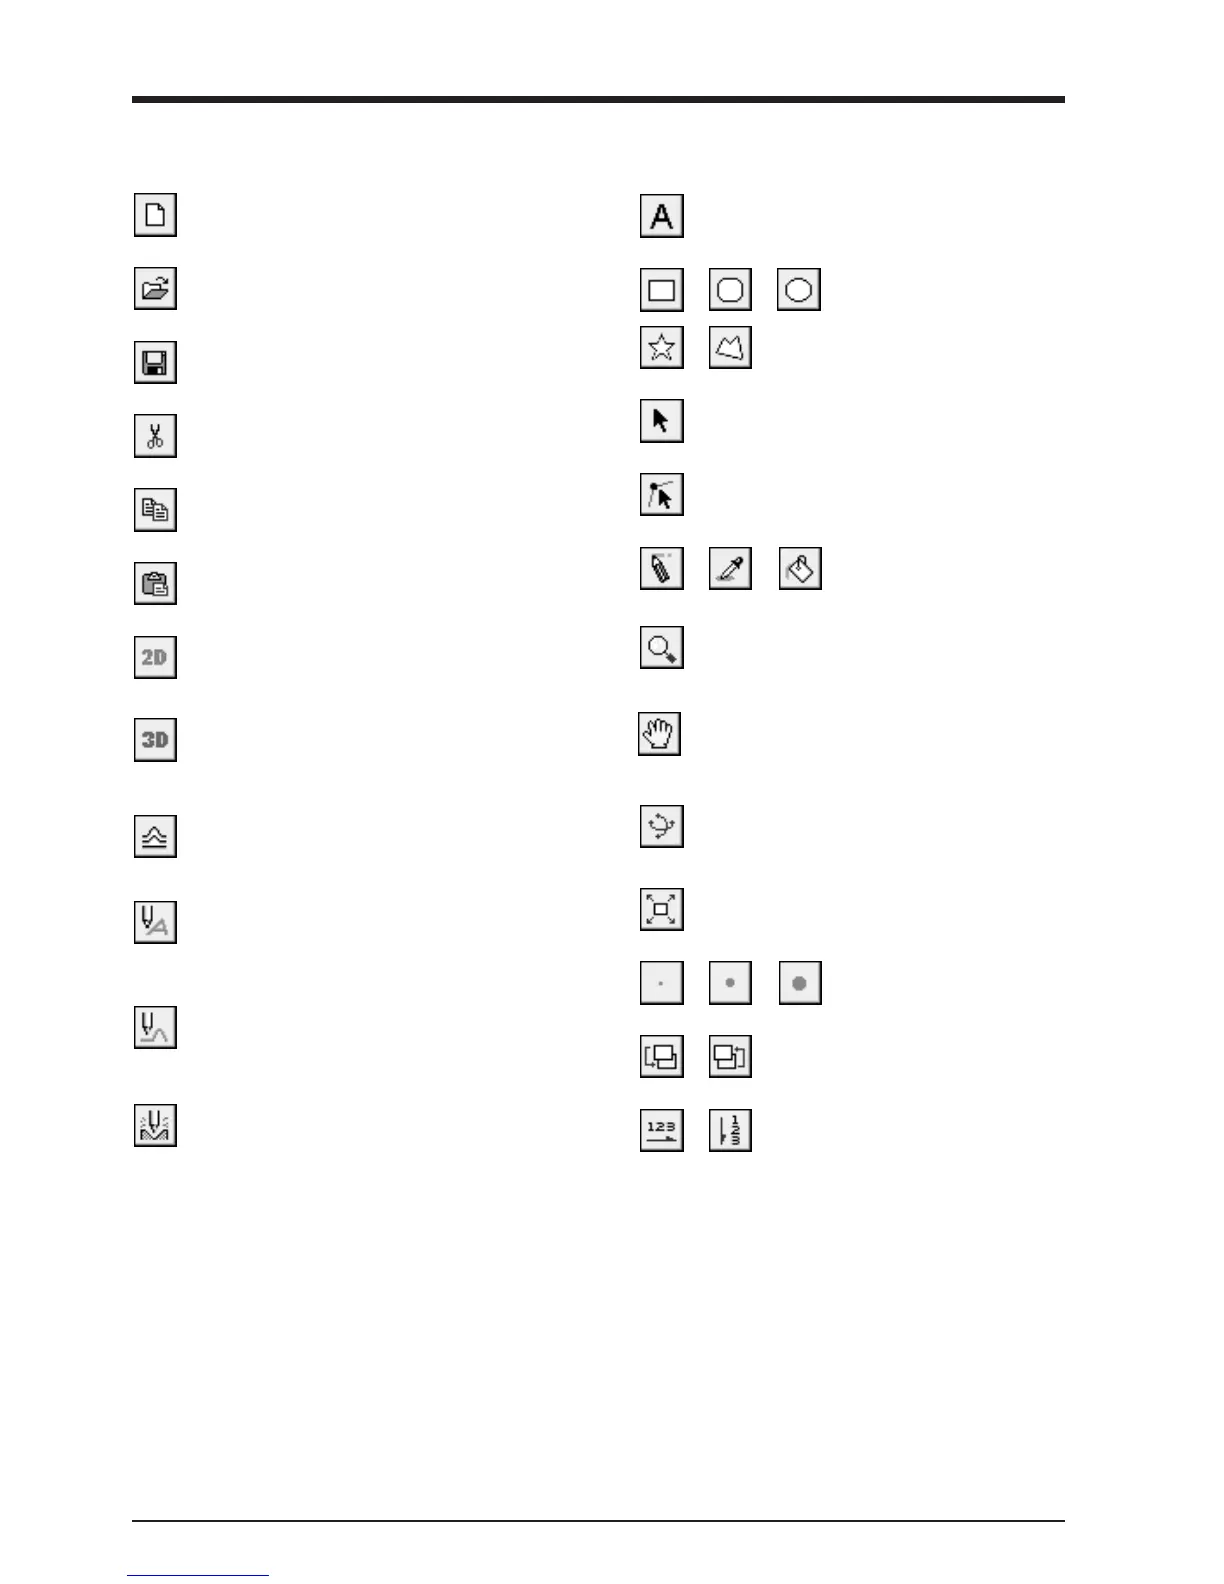
This opens new file.
This opens an existing file.
This saves the file, overwriting the previous data.
This copies the clipboard data to the screen.
This switches to a solid (three-dimensional) display
screen.
Display this screen when you want to check a tool
path or the shape of a relief.
This deletes the selected object and copies it to the
clipboard.
This creates a tool path for engraving for the selected
shapes and text.
The tool path for engraving appears on the 3D screen
as a red line.
This creates a tool path for relief cutting.
The tool path for cutting appears on the 3D screen as
a pink line.
This outputs the tool path to the MODELA and starts
cutting.
This types in the text
This draws the shapes
These are used to retouch
imported images.
This zooms the screen in or out.
The mouse operations for the 2D screen and the 3D
screen are different.
This changes the display location of the object.
This moves the screen display to show areas outside
the window which are not visible.
This changes the perspective of the relief when you
drag the screen.
This is available only during 3D screen.
This command expands or reduces the size of the
object shown to fill the screen.
These select the pen width for
retouching an image.
This copies the selected object to the clipboard.
These set the direction of the text string.
These change the context of an object.
This is used to reposition the vertices of a polygon,
changing its shape.
This selects a shape or text.
This switches to a flat (two-dimensional) shape-
editing screen.
This adds thickness to shapes, text, images or other
flat objects to create a relief (raised engraving).