Pre Start Inspection and Operation
3.25
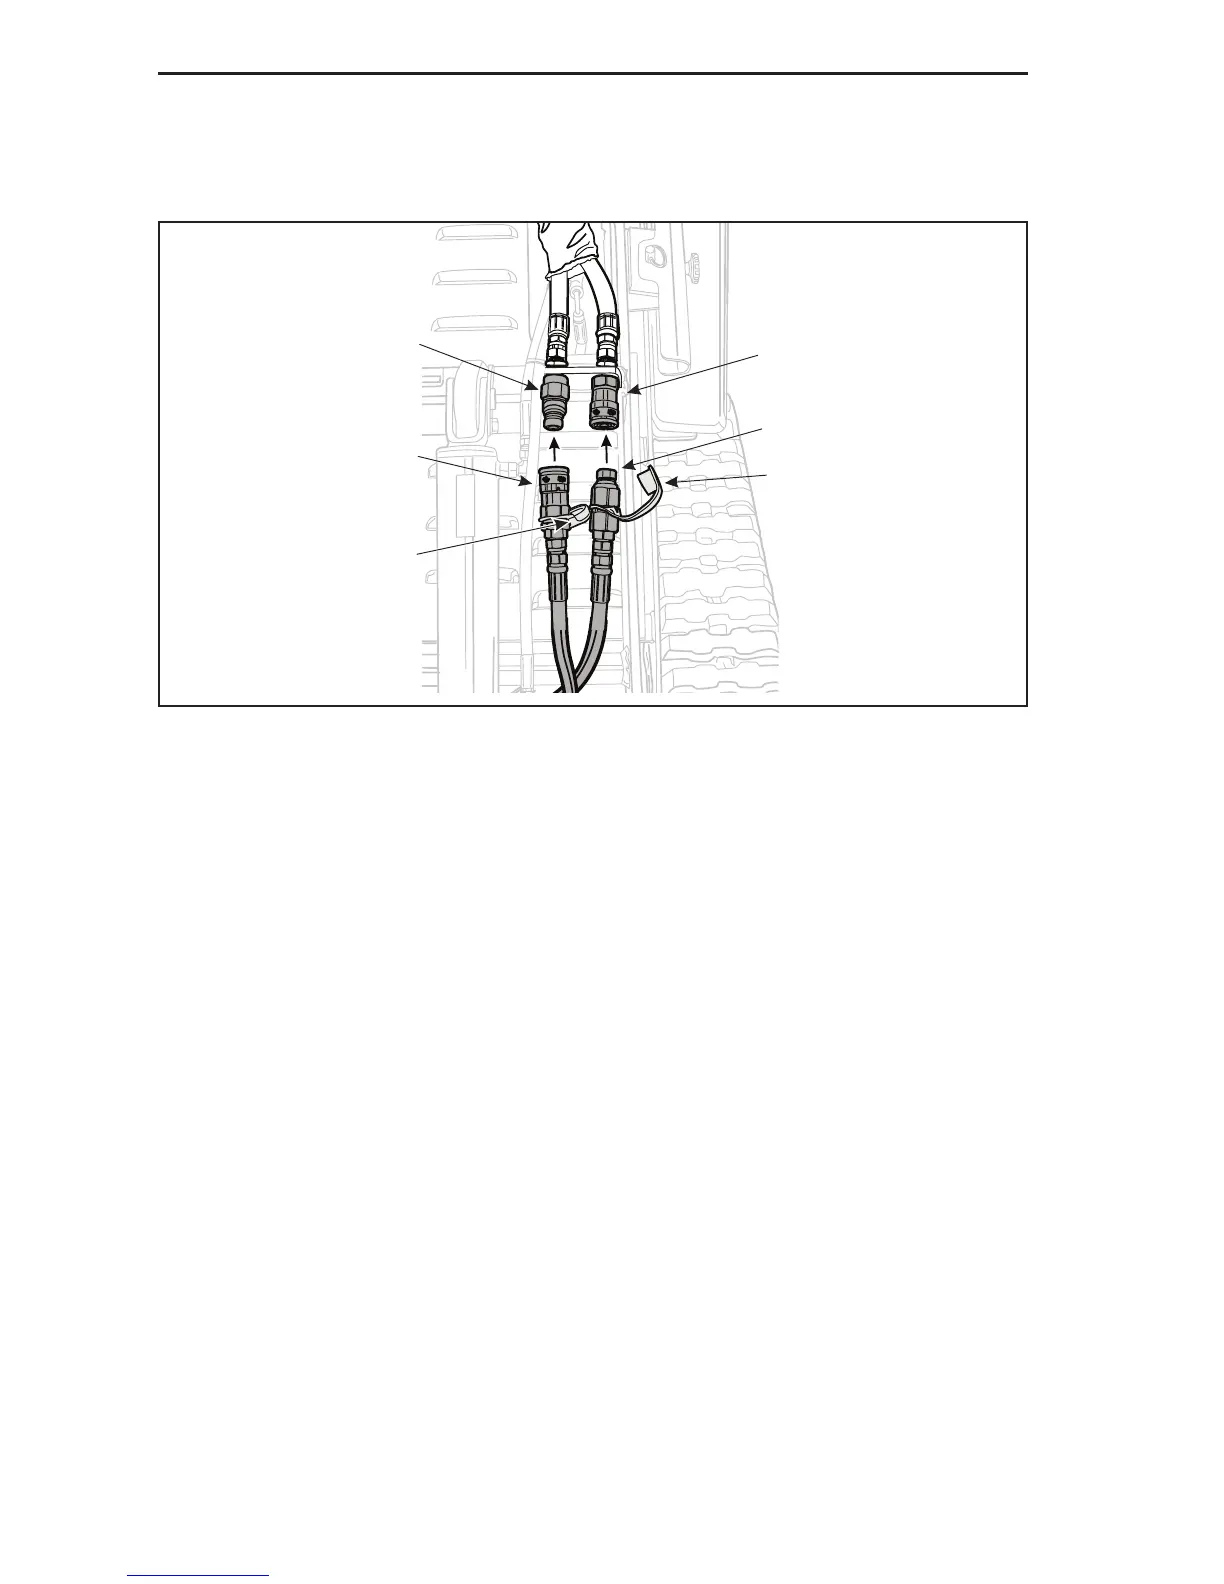
b. Remove the protective covers (Items 3, Figure 3–33) from the attachment quick
connectors.
c. Wipe o the end of each of the connectors (Items 1, 2, 4, 5, Figure 3–33) to remove any
dirt or debris.
Figure 3-33 Auxiliary Hydraulic Quick Connects
d. Insert the attachments male coupling (Item 2, Figure 3–33) into the female bulkhead
quick connect coupling (Item 1, Figure 3–33) on the machine and push until the
connector locks into position.
e. Repeat the above process to connect the attachments’ female quick connect (Item 4,
Figure 3–33) on the other hose to the male bulkhead connector (Item 5, Figure 3–33) on
the machine.
f. Check the security of both connections by gently tugging on the attachment hoses to
make sure that the quick connects are seated properly.
1
2
3
5
4
3