viii List of Figures
List of Figures
Figure 2-1. Receiver Block Diagram ................................................................................................... 2-1
Figure 2-2. Transmitter Block Diagram ............................................................................................... 2-4
Figure 2-3. PLL Synthesizer Block Diagram ....................................................................................... 2-5
Figure 2-4. RX Audio Block Diagram .................................................................................................. 2-6
Figure 2-5. TX Audio Block Diagram (UHF1 and UHF2) .................................................................... 2-7
Figure 2-6. TX Audio Block Diagram (VHF)........................................................................................2-7
Figure 3-1. Programming/Test Cable (PMDN4077_R) ....................................................................... 3-3
Figure 3-2. Cloning Cable (PMDN4076_R) ........................................................................................ 3-3
Figure 3-3. Wiring of the Connectors .................................................................................................. 3-3
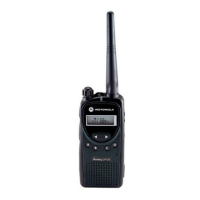
Figure 4-1. LCD Indication .................................................................................................................. 4-1
Figure 5-1. CPS Programming Setup ................................................................................................. 5-1
Figure 5-2. Radio Tuning Setup.......................................................................................................... 5-3
Figure 5-3. Tx High Power Window (High Power) .............................................................................. 5-5
Figure 5-4. Tx Low Power Window (Low Power)................................................................................ 5-6
Figure 5-5. Tx Modulation 12.5 kHz Window ...................................................................................... 5-8
Figure 5-6. Tx Modulation 25 kHz Window ......................................................................................... 5-9
Figure 5-7. Tx MDC Signaling System Modulation 12.5 kHz Window .............................................. 5-11
Figure 5-8. Tx MDC Signaling System Modulation 25 kHz Window ................................................. 5-12
Figure 5-9. Rx 12.5 kHz-band Normal Squelch Tuning Window ...................................................... 5-14
Figure 5-10. Rx 12.5 kHz-band Tight Squelch Tuning Window .......................................................... 5-15
Figure 5-11. Rx 25 kHz-band Normal Squelch Tuning Window ......................................................... 5-16
Figure 5-12. Rx 25 kHz-band Tight Squelch Tuning Window ............................................................. 5-17
Figure 5-13. Program Radio Serial No. Window................................................................................. 5-17
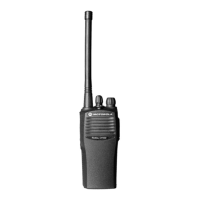
Figure 6-1. Limited Keypad With Channel Knob Model ...................................................................... 6-3
Figure 6-2. Battery and Antenna Removal..........................................................................................6-4
Figure 6-3. Knobs Removal ................................................................................................................ 6-5
Figure 6-4. Chassis Removal.............................................................................................................. 6-5
Figure 6-5. Speaker Wire and Flexible Cable Connection.................................................................. 6-6
Figure 6-6. Speaker Wire Removal..................................................................................................... 6-6
Figure 6-7. Unlatch the Flexible Cable................................................................................................ 6-7
Figure 6-8. Sub-Circuit Board and Accessory Bracket Removal ........................................................ 6-7
Figure 6-9. Main Circuit Board, O-ring and Battery Contact Seal Removal........................................ 6-8
Figure 6-10. Front Circuit Board Removal ............................................................................................ 6-8
Figure 6-11. LCD and Keypad Removal ............................................................................................... 6-9
Figure 6-12. Speaker Removal ........................................................................................................... 6-10
Figure 6-13. Speaker Reassembly .....................................................................................................6-11
Figure 6-14. LCD and Keypad Reassembly ....................................................................................... 6-11
Figure 6-15. Front Circuit Board Reassembly..................................................................................... 6-12
Figure 6-16. Main Circuit Board, O-ring and Battery Contact Seal Reassembly ................................ 6-13
Figure 6-17. Sub Circuit Board and Accessory Bracket Reassembly................................................. 6-13
Figure 6-18. Chassis Assembly and Front Housing Assembly Reassembly ...................................... 6-14
Figure 6-19. CP185 Exploded View.................................................................................................... 6-15
Figure 6-20. “20” Marking on Front Housing.......................................................................................6-17
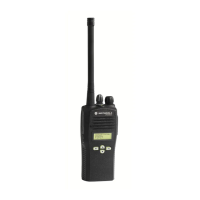
Figure 7-1. Non Keypad With Channel Knob Model ........................................................................... 7-6
Figure 7-2. Battery and Antenna Removal..........................................................................................7-7
Figure 7-3. Knobs Removal ................................................................................................................ 7-8
Figure 7-4. Chassis Removal.............................................................................................................. 7-8
Figure 7-5. Speaker Wire and Flexible Cable Connection.................................................................. 7-9
Figure 7-6. Speaker Wire Removal..................................................................................................... 7-9
Figure 7-7. Unlatch the Flexible Cable.............................................................................................. 7-10

 Loading...