10177245 Rev. 2 / OM-243792 Page 18
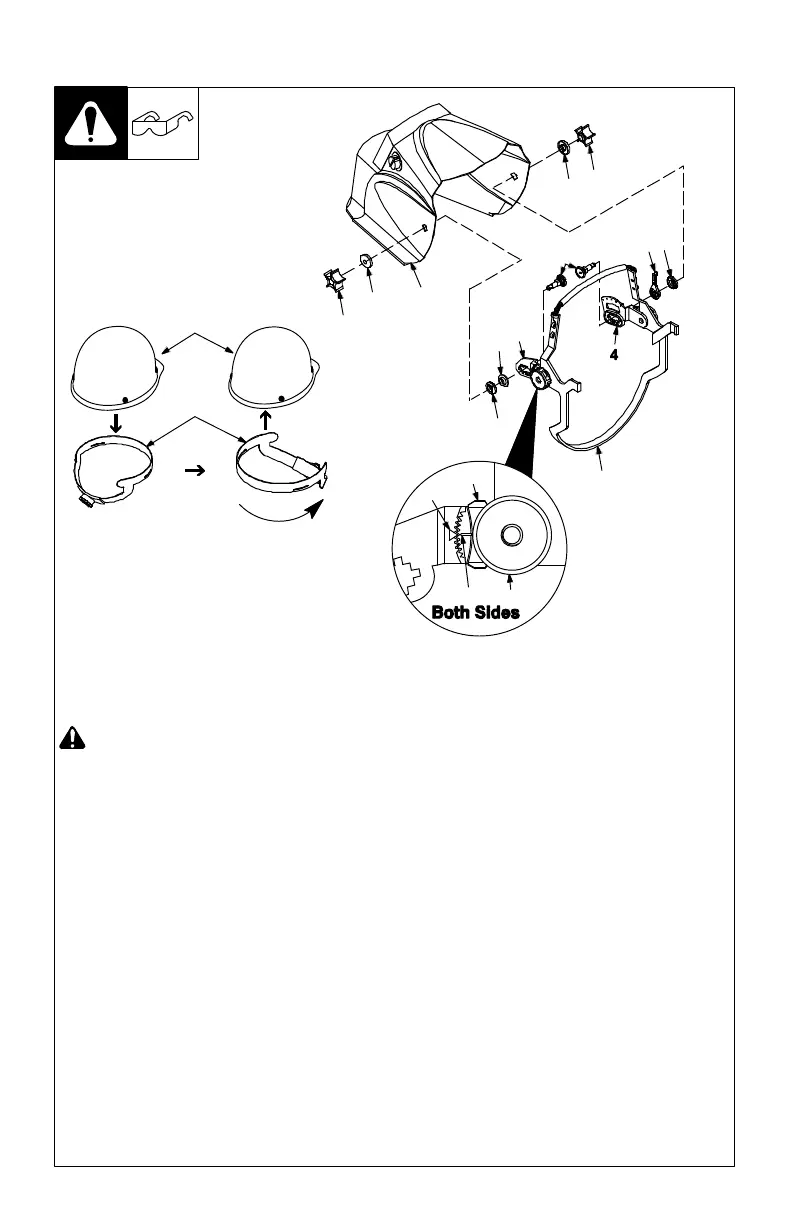
4-3. Installing Non-Slotted Hard Hat Adapter
803952-A / 803953-A
! To ensure compliance
with hard hat safety
standard Z89.1, use on-
ly MSA hard hats with
this welding helmet.
1 Hard Hat
2 Hard Hat Suspension
3 Mounting Bracket
4 Swing Arm
5 Adjustment Tab
6 Black Tension Nut
7 Center Mark
8 Arrow
9 Welding Helmet
10 Gray Tension Knob
11 Outside Washer
12 Helmet Insert
13 Inside Washer
14 Threaded Bolt
15 Positioning Arm
Remove and reverse hard hat
suspension.
Be sure that swing arms are
positioned at 90° to mounting
bracket. Align center mark on
adjustment tabs with arrow on
mounting bracket (this
alignment may change after
installation
for adjusting to
hard hat style and user
preference). Tighten black
tension nuts just enough to
keep swing arms from
moving.
On right side of mounting
bracket, insert bolt through
one of three positioning slots
in swing arm (slots may
change after installation for
adjusting to hard hat style and
user preference). Place
supplied positioning arm over
bolt, and place slot over a
positioning
stud (slot position
may change after installation
for adjusting to hard hat style
and user preference). Slide
bolt through helmet insert and
through helmet. Slide outside
washer onto bolt. Install
o-ring, then install gray
tension knob onto bolt and
tighten enough to prevent
helmet from moving at this
location.
On left side of bracket, insert
bolt through same slot in
swing arm as right side, and
install inside washer onto bolt.
Slide bolt through helmet
insert and through helmet.
Slide outside washer onto
bolt. Install o-ring, then install
gray tension knob onto bolt
and tighten enough to prevent
helmet from moving at this
location.
1
2
3
4
5
6
7
8
9
11
10
11
10
12
13
14
15
12



 To Next Page