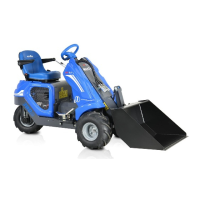
Self-moving multipurpose loader MULTIONE
1 Series
Instruction manual (Traslation of original instructions)
CM170001EN - 01.03.17 - 03 (11.07.18)
29/49
MultiOne SRL
8.3.3 Handling
To move the machine proceed as follows:
1) Turn on the machine (see par. 8.3.2).
2) Release the parking brake lever (see par. 8.3.8).
3) Increase engine rpm by actuating the throttle control lever.
4) Press the pedal into the direction of “Forward” o “Reverse”.
5) Using the steering wheel set the direction of travel.
DANGER
YOU MUST REDUCE SPEED TO IDLE WHEN MAKING STEERING NOT TO AFFECT THE STABILITY OF THE MACHINE.
DANGER
IT IS FORBIDDEN TO MOVE THE MACHINE KEEPING LEFT THE LIFTING BOOM, ATTACHMENT AND ANY LOAD.
IT IS FORBIDDEN LEANING FROM THE DRIVING SEAT WHEN THE MACHINE IS MOVING.
8.3.4 Assembly of the attachment
DANGER
IT IS FORBIDDEN TO ASSEMBLY NON SUITABLE OR NON ORIGINAL ATTACHMENTS TO THE MACHINE.
WARNING
IT IS COMPULSORY TO READ THE MANUAL OF ATTACHMENT INSTRUCTIONS BEFORE PROCEEDING THE ASSEMBLY,
DISASSEMBLY AND USE OF THE ATTACHMENT.
WARNING
THERE ARE RESIDUAL RISKS N. 1, N. 2 AND N. 3 (SEE PAR. 3.2).
8.3.4.1 Mechanical attachment connection
To carry out the assembly of the attachment proceed as follows:
1) Make sure the attachment is positioned on firm and level ground.
2) Turn on the machine (see par. 8.3.2).
3) Push the multifunction lever to the right in order to tilt forward the quick coupler (FIG. 12 - Ref. A).
4) Turn off the machine (see par. 8.3.7).
5) Get down from the machine and get the workplace C (see par. 4.2).
6) Turn down on the two levers (FIG. 12 - Ref. 3) placed on the quick coupler, in order to raise the two hook plugs.
7) Get on the machine again and turn it on (see par. 8.3.2).
8) Moving carefully approach the quick coupler of the machine to the one of the attachment in order to insert the round top profile
(FIG. 12 - Ref. 2) in the special curved housings of the attachment (FIG. 12 - Ref. 1).
9) Move slowly the multifunction lever to the left, in this way the quick coupler leans backward and aligns with the quick coupler of
the attachment (FIG. 12 - Ref. C).
10) Switch off the machine (see par. 8.3.7) and get down.
11) Rotate upwards the two levers (FIG. 12 - Ref. 5) in this way the two plugs of the quick coupler are correctly inserted in the fitted
seats of the attachment.
12) Get on the machine again and turn it on (see par. 8.3.2).
13) Lift the attachment and lean it forward moving the multifunction lever to the right to check visually the two plugs
(FIG. 12 - Ref. 6) of coupling are correctly inserted in the fitted seats of the attachment. If not, relocate the attachment on the
ground and repeat the procedure from step 3).
OPERATION -8

 Loading...