TM1215 Iss. 6.0 RPR750
In the quiescent state, the pager will display *TEST MODE*, instead of status.
Additionally, if the pager is in mute mode the tone alert will be suppressed, unless an
override beep code is transmitted. If a call is sent to a single pager in test mode, then any
message or speech will be ignored, but if an all-call address is used then the pager will
open the speech circuits for 2 to 4 seconds, to test the speech channel.
For test purposes a counter is incorporated, which will record the number of calls (up to
255 before resetting to zero) received in test mode and store this number in the EEPROM,
when the pager is reset, or turned off. This number may be reset, or retrieved by using a
programming unit.
Open channel speech selection (MK6 & 7 variants only) is available in test mode, which is
activated by pressing and holding the CANCEL button for 2 seconds. The speech channel
will then remain open until the CANCEL button is pressed again.
2.5.7 Batteries, Changing the Battery & Battery Care
The pager can be used with any 1.5 Volt nominal AA (LR6) sized primary cell, or for re-
chargeable applications NiMH secondary cells. It should be noted that battery life
expectancy may vary greatly with the cell supplier and chemistry, especially with the re-
chargeable options.
In order to maximise battery life, cancel any alerts as soon as possible and switch-off the
pager when not in use. If the pager is not to be used for a long period, it is recommended
that the battery be removed.
NOTE: Any stored messages will be retained by the pager for approximately 12 hours
when the battery is removed, or the pager is turned off.
To change the battery, ensure that the pager is switched off and proceed as follows: -
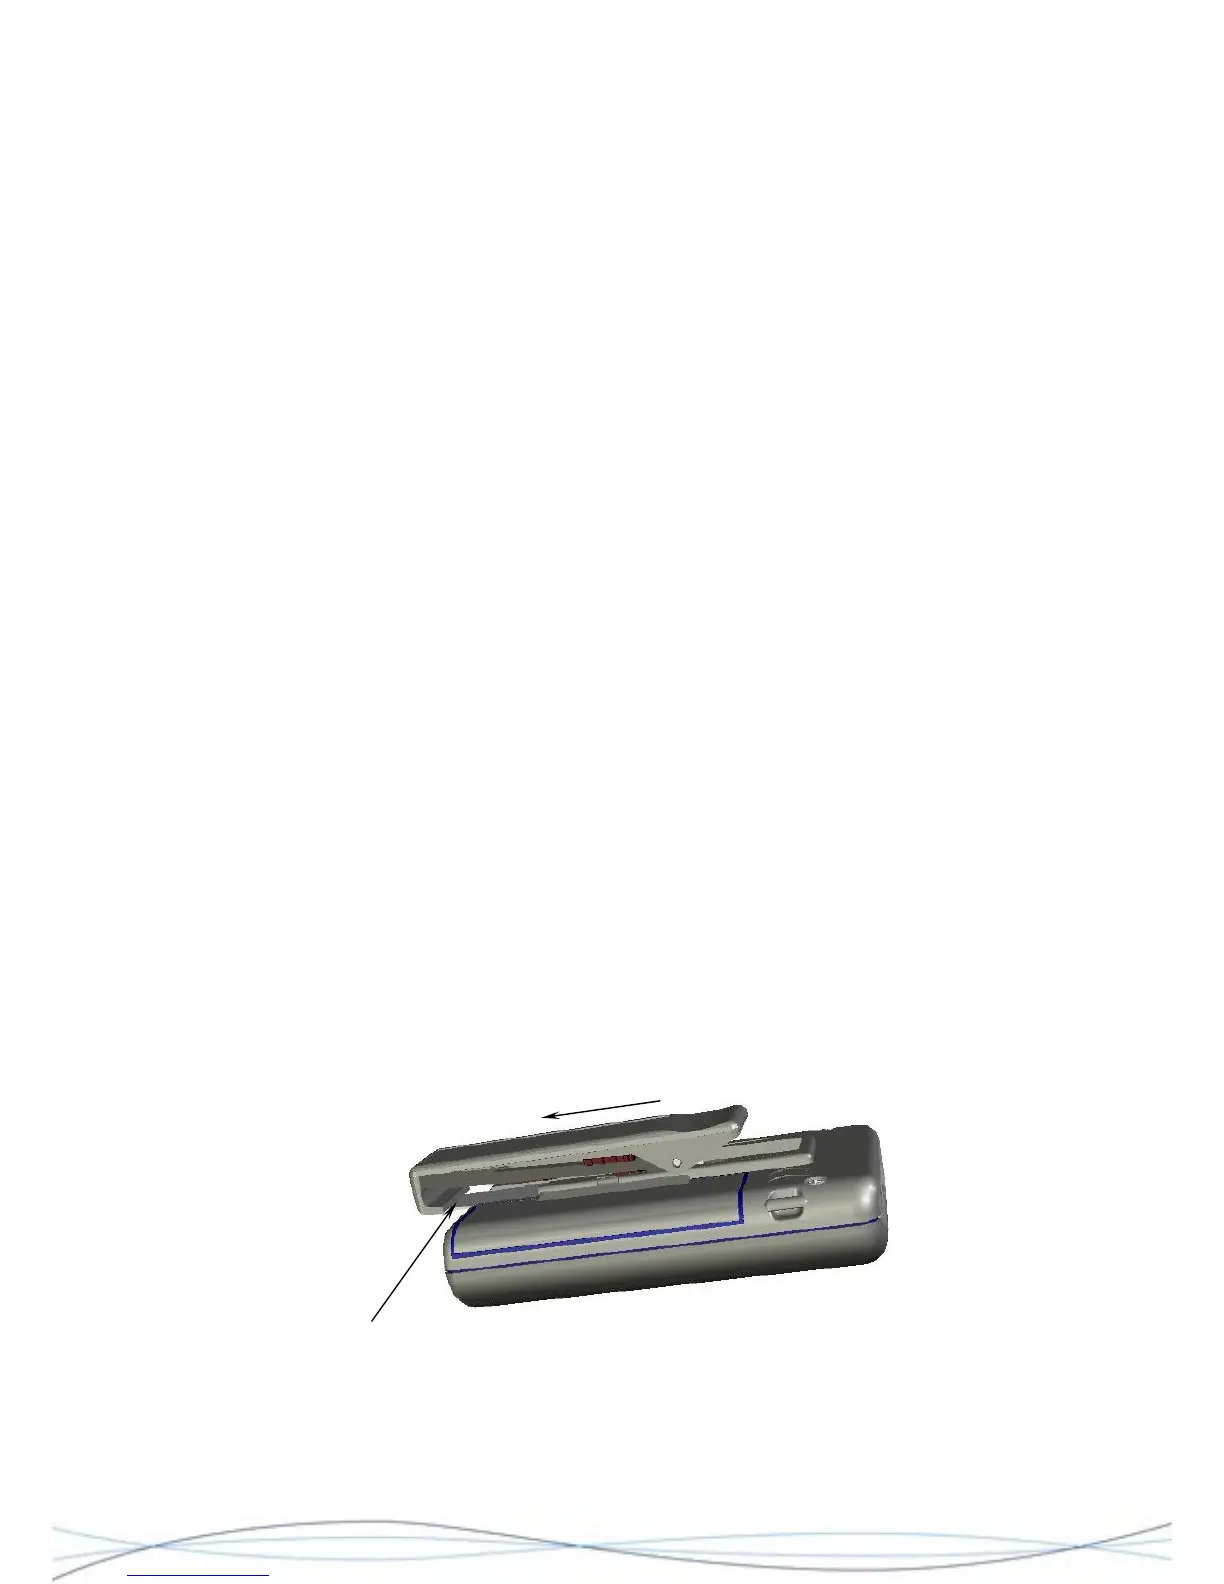
Hold the unit in one hand with the front facing downwards. Insert the blade of the Battery
Door tool under the bottom edge of the metal back-plate for the clip and gently lift enough
to release the clip from its retaining slot. At the same time, slide the clip assembly towards
the base of the unit with your thumb.
Figure: 2.2 Clip Removal
Slide clip
Metal back-plate (insert Battery Door
Tool or thin blade under this edge)
19