Assembling3
Procedures for assembling this product are
explained.
Unpacking this product requires the
・
following number of people.
RJ-901X : Two or more
・
RJ-900X : Three or more
・
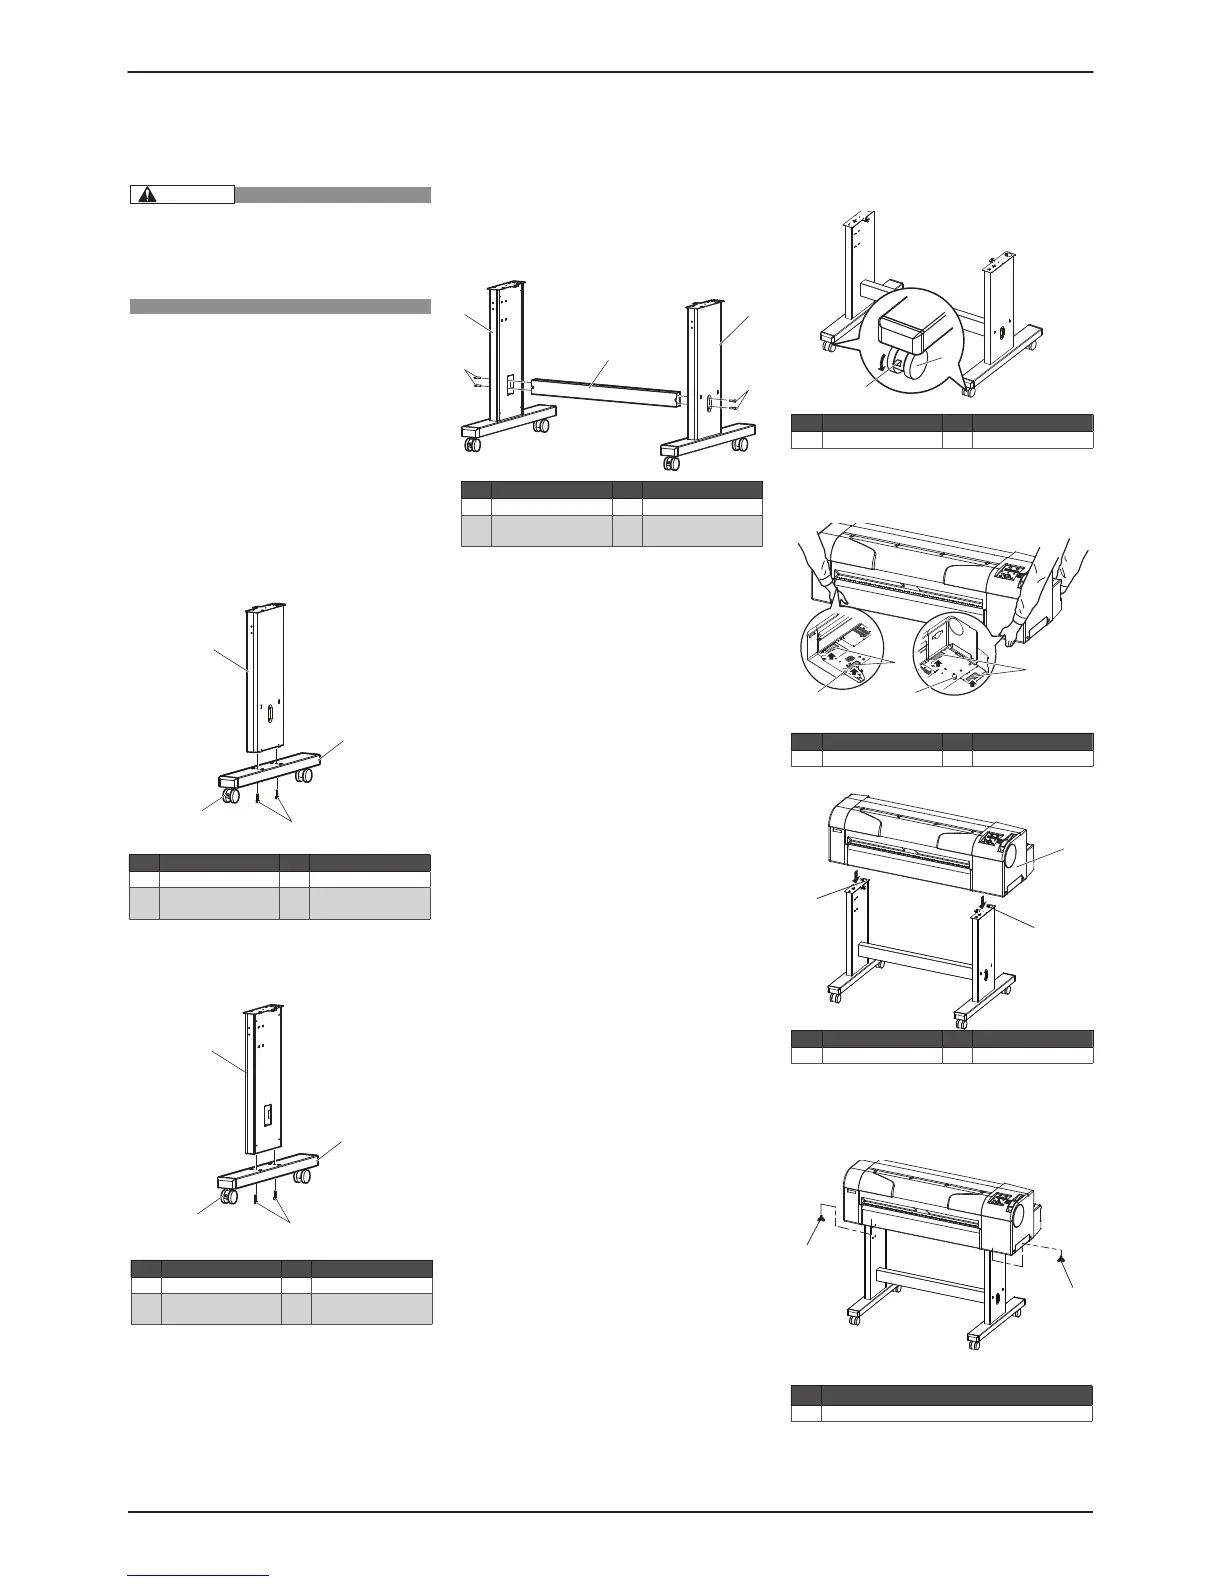
The stand assembling procedure3.1
If you will use the stand, assemble it in accor-
dance with the following steps.
Follow the steps shown below to assemble
1.
the right side of the stand.
Install the (right) support to the leg so that
a.
the caster with the lock is on the front.
Fasten two hexagon socket head cap screws
b.
with the enclosed hexagonal wrench.
Assemble the left side of the stand in a simi-
2.
lar way to step 1.
Follow the steps shown below to attach the
3.
central beam to the legs (left, right).
a.
Attach the central beam and four hexagon
socket head cap screws to the stand (the
left, the right).
Fasten the hexagon socket head cap screws
b.
with the enclosed hexagonal wrench, and
fasten the central beam.
Attach two arm holders to the legs (left,
4.
right).
Confirm that each component is fastened
5.
firmly by gently shaking the stand.
Assembling the stand3.2
Attach the stand to the printer in accordance
with the following steps.
Lock two casters on the front side.
1.
Lift the printer main body, and align the rear
2.
side rubber feet to the holes of the stand.
Attach two butterfly bolts to the stand.
3.
Secure the printer to the stand by bolting the
4.
butterfly bolts.
This completes assembling of the stand.・
No. Name No. Name
1 Right support 3 Caster section
2 Caster lock 4 Hexagon socket head
cap screws
 Loading...