Importer Plus Technical Instruction Manual Configuring the LAN
Page 7-2 Issue 0.02 2010-03-29
2. Modify the IP address of the Importer Plus as follows:
• Select the Network Connections icon.
• Right click on Local Area Connection.
• Select Properties.
• Scroll to and highlight Internet Protocol.
• Click on Properties.
• In the Properties window, click the Use the following IP address option.
• Enter the importer's IP address in the IP address field (see your network manager).
• Check the Subnet mask. It should be: 255:255:255:0
• If necessary, enter the gateway IP address in the Default gateway field (see your
network manager).
•Click OK.
•Click
OK again.
3. Verify the IP address of the Importer Plus as follows:
• Using another PC that is directly or indirectly (via a switch) network connected to the
importer, select: Start > All Programs > Accessories > Communications > Command Prompt
• At the command prompt, type:
ping importer IP address
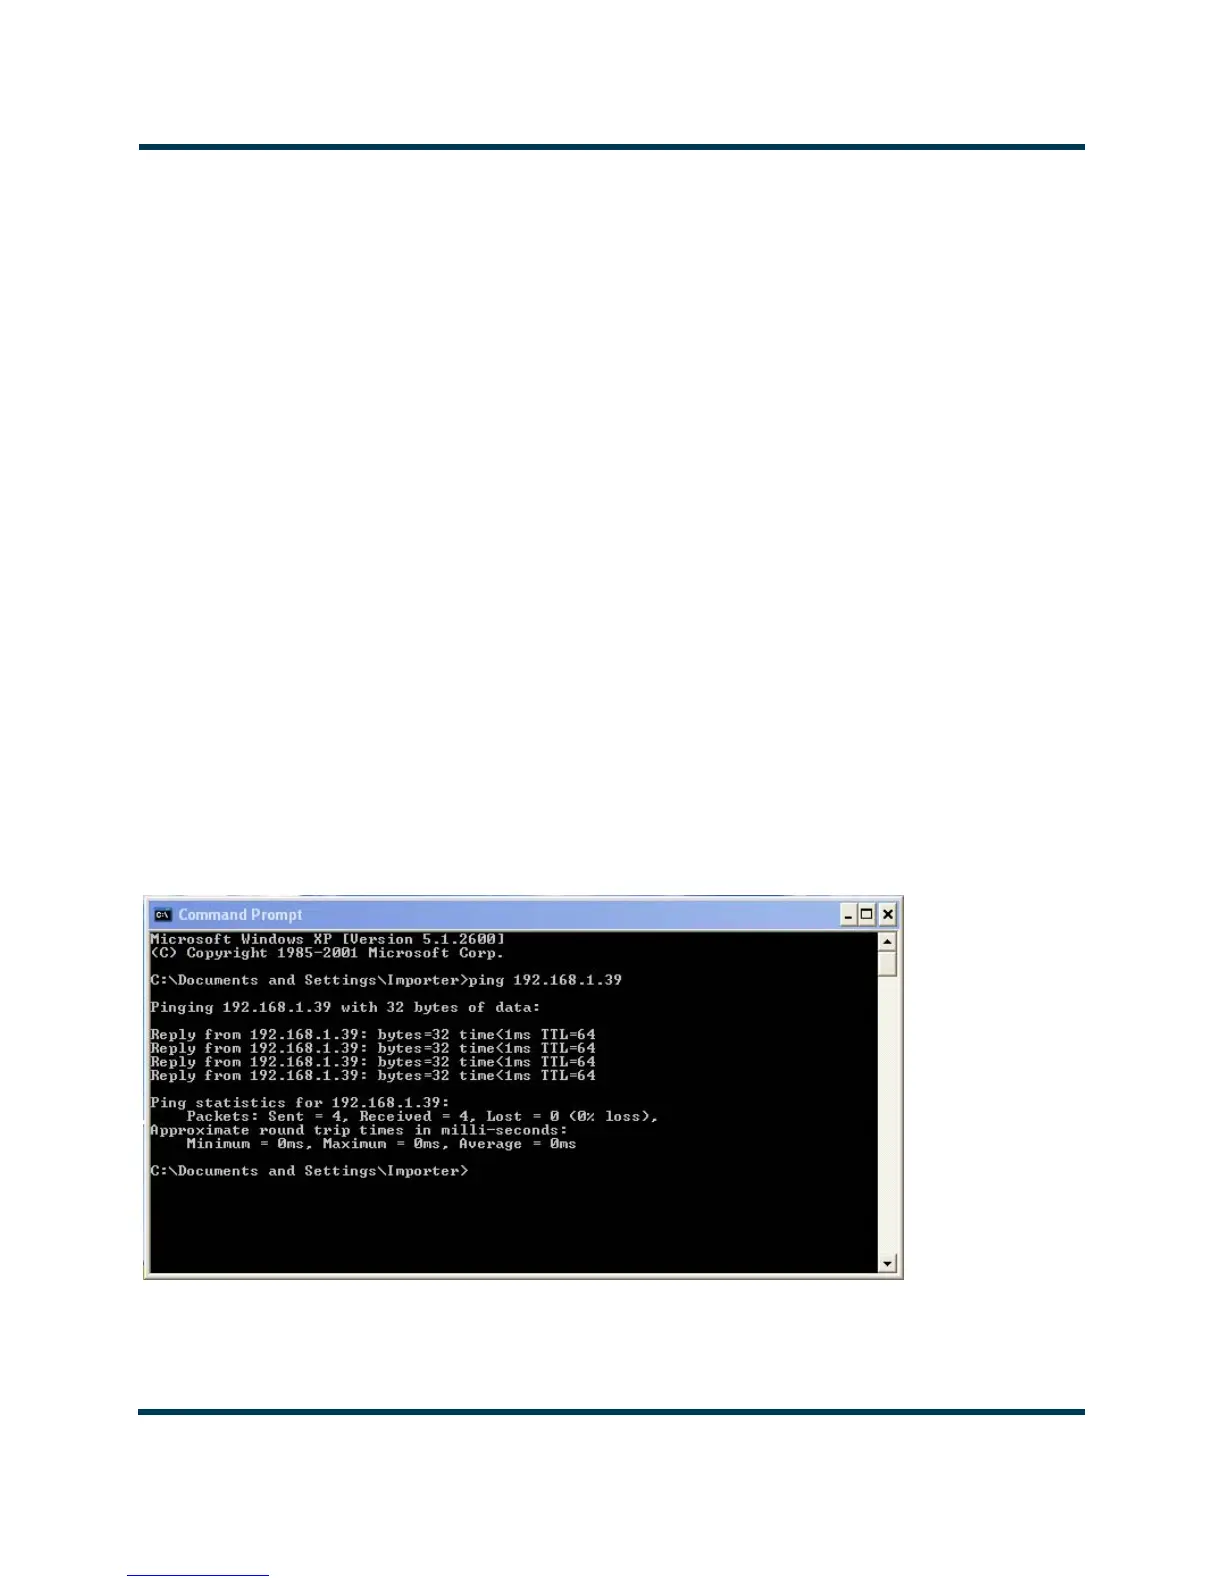
•The ping command should show the status of four packets sent to the Importer Plus. If
the connection is OK, a response similar to Figure 7.2 should appear.
•Type exit to close the Command Prompt window.
Figure 7.2: Successful importer ping response