162 NPE Service Manual
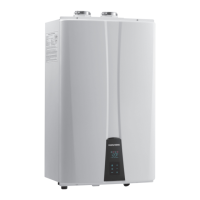
2-Stage Thermostat / 2-Stage Control System
Set DIP switch (SW) #3 to ‘On’ to configure the system to use a
2-stage thermostat / 2-stage control.
10.3.2 Cable Connections
Follow the instructions below to connect the cables to the H2Air+
+
.
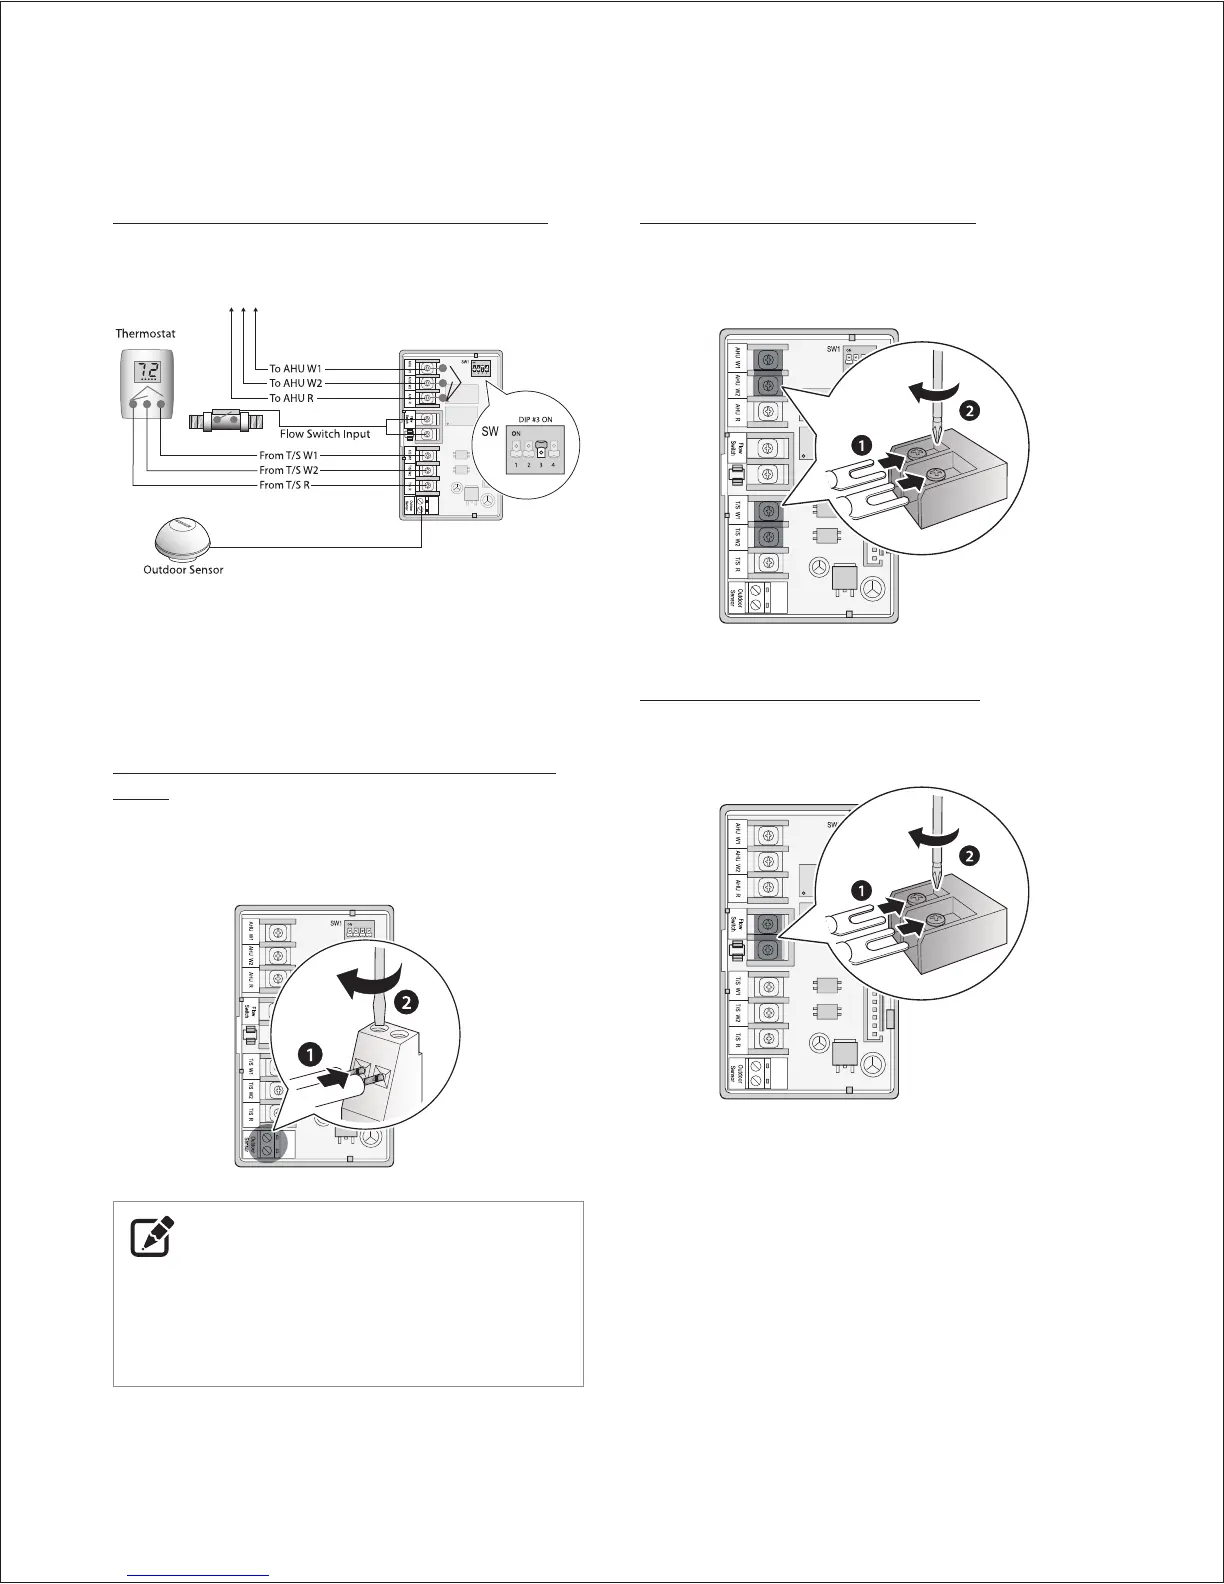
Connecting the Outdoor Temperature Sensor
Cable
An outdoor temperature sensor is supplied with the Navien
H2Air+
+
installation kit. Insert the exposed wire into the terminal.
Then tighten the terminal screw with a screwdriver.
NOTE
●
Use thermostat wire (18 gauge wire) for the outdoor
temperature sensor connection.
●
When installing the outdoor temperature sensor, avoid
installing it in direct sunlight.
Connecting the Thermostat Cables
The H2Air+
+
receives input signals from thermostats to control the
AHU. Insert the fork connector into the contact. Then tighten the
terminal screw with a screwdriver.
Connecting the Flow Switch Cables
Insert the fork connector into the contact. Then tighten the
terminal screw with a screwdriver.
 Loading...