Figure
4-11
4-12
4-13
4-14
4-15
4-16
4-17
4-18
4-19
4-20
5-1
5-2
5-3
5-4
5-5
5-6
5-7
5-8
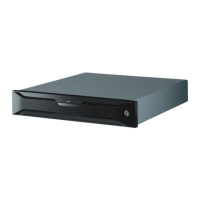
6-1
6-2
Table
1-1
2-1
2-2
2-3
2-4
4-1
4-2
5-1
5-2
5-3
5-4
5-5
6-1
ILLUSTRATIONS (cont'd)
Title
Removing
the
Sensor
Cable
Assembly
••••••••••
Installing
the
Index
Sensor
•••••••••••••••••
Removing
a
Carbon
Brush
•••••••••••.•••••••••
Removing
the
Armature
•••••••••••••••••••••••
Removing
the
Spindle
Assembly
•••••••••••••••
Removing
the
Front
Panel
••••••••••••••••••••
Adjusting
the
Picker
Rod
••••••••••••••••••••
Removing
the
Pop-Up
Assembly
and
Guide
Rail.
Removing
the
Door
Lock
Solenoid
•••••••••••••
Adjusting
the
Door
Lock
Solenoid
••••••••••••
Location
of
Diagnostic
Test
Pins
and
Test
Po
in
ts
.
Head
Radial
Alignment
Waveform
••••••••••••••
Adjusting
Head
Radial
Alignment
•.••••••••••.
Azimuth
Waveform
••
~
•••••••••••••••••••••••••
Index
Alignment
Waveform
••••••••••••••••••••
Waveforms
at
TP7
and
TP10
•••••••••••••••••••
Track
00
Signal
•••••••••••••••••••••••••••••
Head
Load
Waveform
••••••••••••••••••••••••••
FDl165
Flexible
Disk
Drive
••••••••••••••••••
G9NYF
PCB
Assembly
••••••••••••••••••••••••••
TABLES
Title
FDl165
Specifications
•••••••••••••••••••••••
Power
Supply
Specifications
••••••••••.••••••
Power
Connector
Part
Number
••••••••••••.••••
Data
and
Control
Interface
Contact
As s
ignmen
ts
•••••••••••••••••••••••••••••••••
Door
Lock
Jumper
Combinations
•••••••••••••••
Maintenance
Tools
••••••••••••••••••••••.••••
Maintenance
Parts
••••••.••••••••••••••••••••
Test
Points
and
Signals
•••••••••••••••••••••
Adj
ust.ments
•••••••••••••••••••••••••••••••••
Head
Radial
Alignment
Oscilloscope
Settings.
Head
Azimuth
Oscilloscope
Settings
••••••••••
Index
Alignment
Oscilloscope
Settings
•••..••
List
of
Illustrations
•••••••••••••••••••••••
xi
Page
4-12
4-13
4-14
4-15
4-16
4-17
4-18
4-19
4-20
4-21
5-1
5-5
5-6
5-7
5-8
5-9
5-9
5-11
6-5
6-7
1-5
2-6
2-6
2-9
2-14
4-1
4-2
5-3
5-3
5-4
5-6
5-7
6-3